
 Pin it
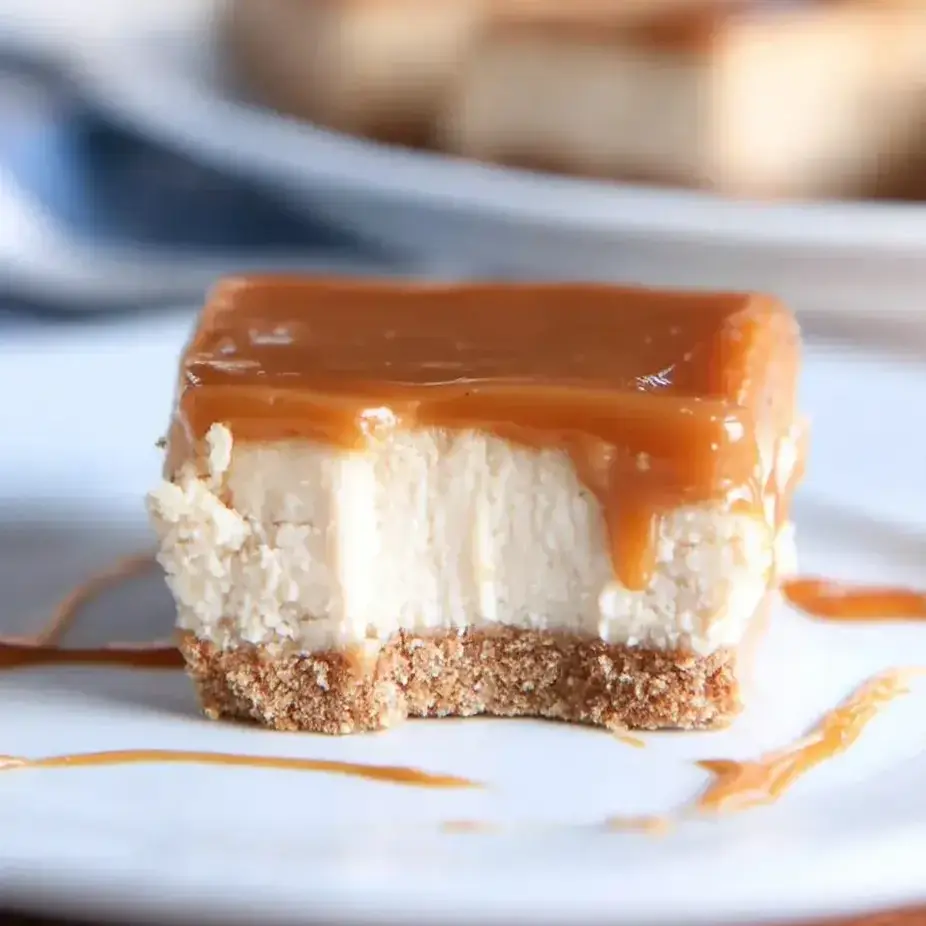
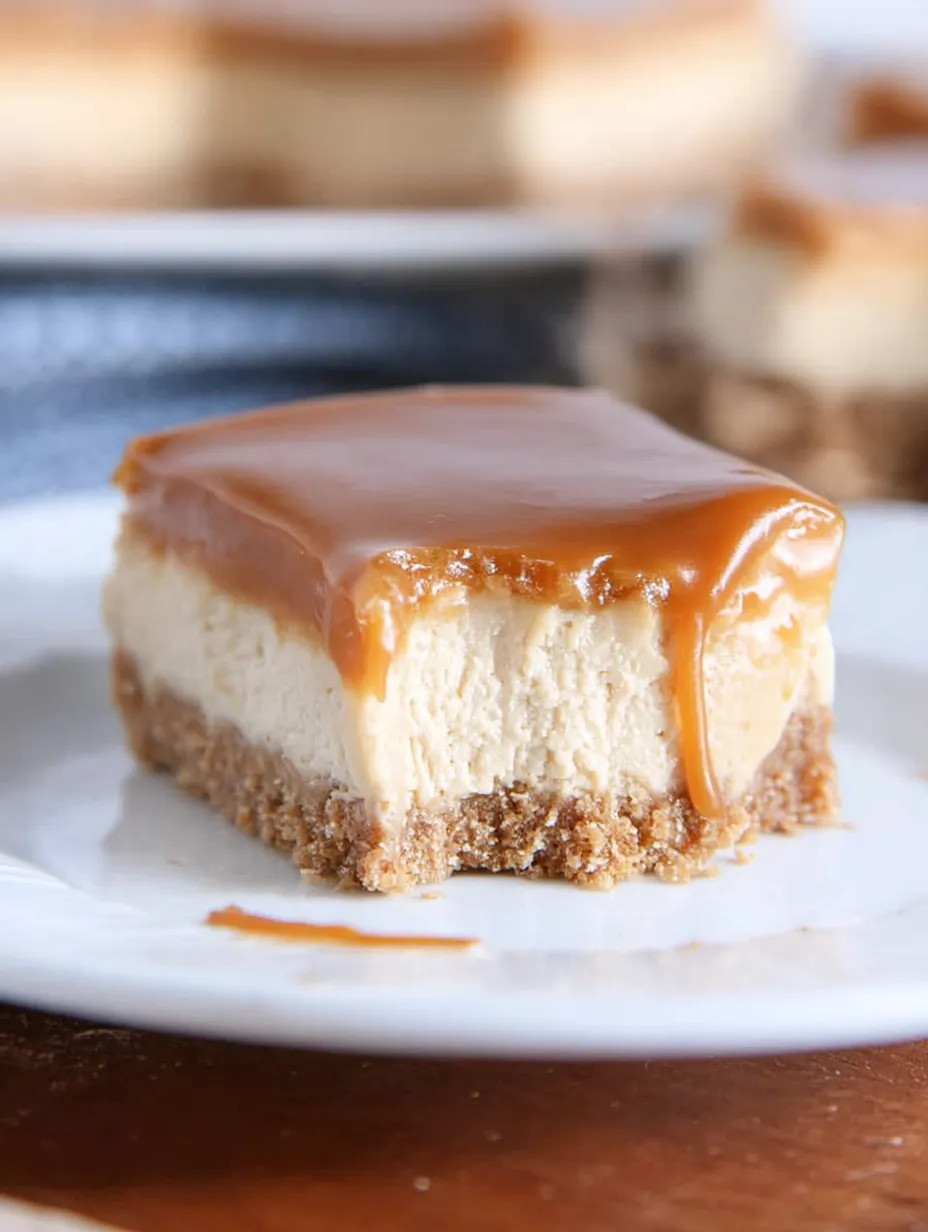
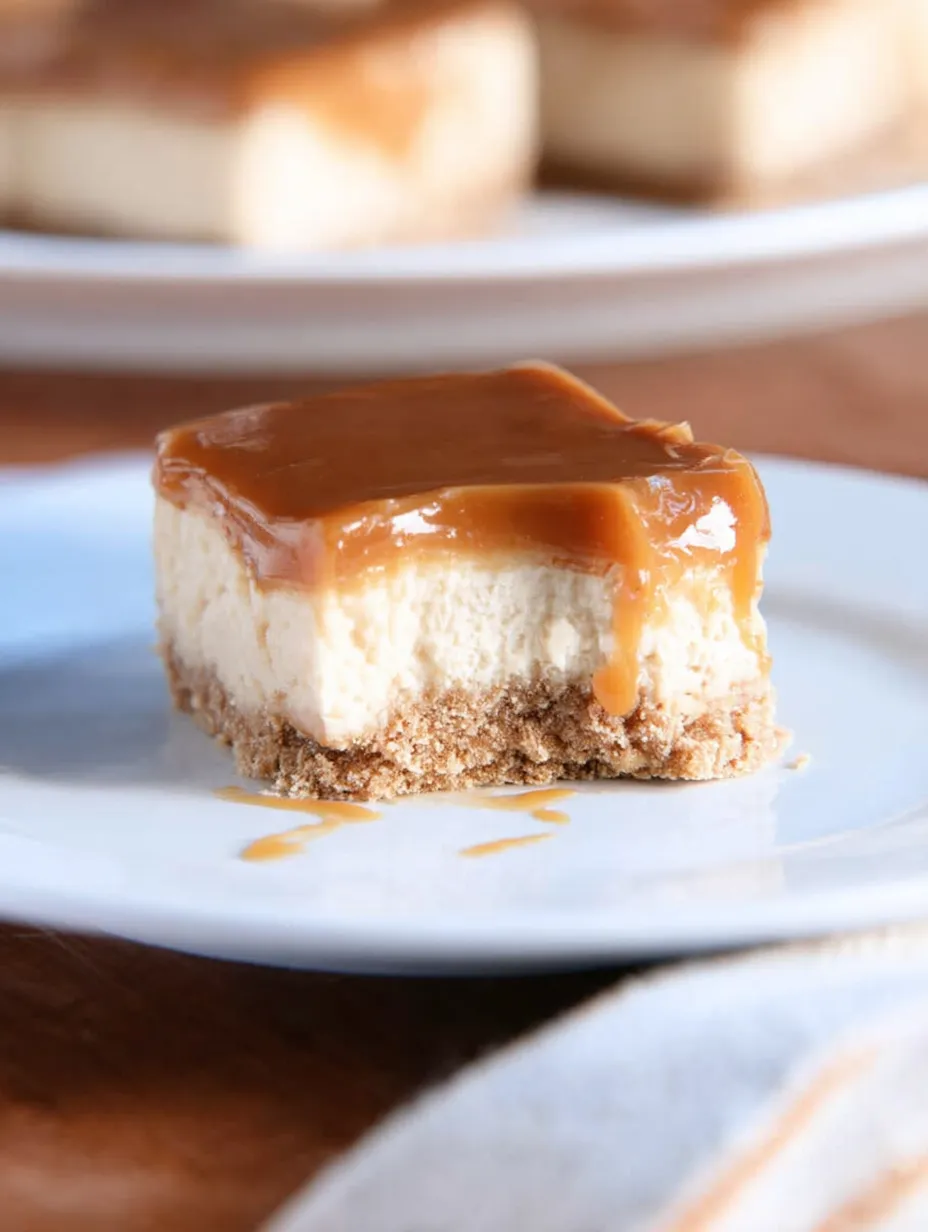
This indulgent dulce de leche cheesecake bar recipe transforms the classic cheesecake into handheld treats perfect for sharing. The caramel-infused filling sits atop a buttery graham cracker crust, all crowned with a silky dulce de leche glaze that delivers pure bliss in every bite.
I first made these bars for my sister's birthday when she requested something with caramel flavors. The delighted expressions when everyone took their first bite made these an instant family classic that I'm asked to bring to every holiday gathering.
Ingredients
- Graham cracker crumbs: Create the perfect buttery foundation with that classic cheesecake base flavor. Use store-bought crumbs or pulse whole crackers in your food processor for freshest results.
- Sugar: Balances the tanginess of the cream cheese and enhances the caramel notes throughout the dessert.
- Cinnamon: Adds subtle warmth to the crust that complements the dulce de leche beautifully. Just a quarter teaspoon transforms the entire flavor profile.
- Butter: Binds the crust together and adds richness. Always use melted butter for proper incorporation with the dry ingredients.
- Cream cheese: Provides that signature tangy cheesecake flavor. Philadelphia brand consistently delivers superior results with the right fat content for proper setting.
- Sour cream: Adds moisture and creates that velvety smooth texture that melts in your mouth. Full-fat varieties yield the best consistency.
- Dulce de leche: Infuses a rich caramel flavor throughout the cheesecake and glaze. San Ignatio brand offers the ideal consistency for baking but any quality brand works well.
- Vanilla extract: Enhances all the flavors without overpowering the star ingredient. Pure extract rather than imitation makes a noticeable difference.
- Heavy cream: Thins the glaze to the perfect pourable consistency while maintaining its luxurious texture.
Step-by-Step Instructions
- Prepare the baking pan:
- Line a 9x13 metal pan with foil or parchment with some overhang on the sides to create handles for easy removal later. A light coating of cooking spray ensures nothing sticks to your liner. Preheat your oven to 350°F to ensure it reaches the proper temperature before baking begins.
- Make the graham cracker crust:
- Combine graham cracker crumbs with sugar and cinnamon in a medium bowl until evenly distributed. Pour in the melted butter and stir thoroughly until every crumb is moistened. The mixture should hold together when pressed between your fingers. Transfer to the prepared pan and press firmly into an even layer using the bottom of a measuring cup for best compaction. Bake for exactly 10 minutes until the edges begin to turn golden brown. Remove and allow to cool while preparing the filling.
- Create the cheesecake batter:
- Beat the room temperature cream cheese with sugar and sour cream until completely smooth and fluffy. This typically takes 1 to 2 minutes of mixing with no visible lumps remaining. Room temperature ingredients are crucial for a perfectly smooth result. Add the dulce de leche and mix thoroughly until fully incorporated. Finally add vanilla and eggs mixing just until combined. Overmixing after adding eggs incorporates too much air which can cause cracks during baking.
- Bake to perfection:
- Pour the silky batter over the cooled crust spreading it into an even layer. Bake for 30 to 35 minutes watching carefully for the right signs of doneness. The edges will puff slightly and appear set while the center should still have a slight jiggle when the pan is gently shaken. Avoid overbaking which can lead to a dry cracked cheesecake. Allow to cool completely at room temperature before adding the glaze.
- Create the luscious glaze:
- Combine dulce de leche and heavy cream in a microwave safe bowl. Heat in short 20-second bursts stirring between each until the mixture becomes smooth and pourable. The consistency should coat the back of a spoon but still flow easily. Pour over the cooled cheesecake spreading into an even layer. Refrigerate for at least 2 hours until thoroughly chilled and set.
 Pin it
My absolute favorite part of this recipe is the moment when the dulce de leche is swirled into the cream cheese mixture. The beautiful caramel ribbons gradually disappear as you mix creating a batter that smells absolutely heavenly. My husband always finds his way to the kitchen at precisely this moment hoping to claim the mixing beaters.
Perfecting Your Dulce de Leche Source
While store bought dulce de leche works beautifully in this recipe you can also make your own from a can of sweetened condensed milk. Simply pour the contents into a glass baking dish cover tightly with foil and place in a water bath. Bake at 425°F for about 1.5 hours until transformed into a gorgeous caramel color and consistency. This homemade version has a particularly intense flavor that elevates these bars to new heights.
Storage and Freezing Guidelines
These cheesecake bars keep beautifully in the refrigerator for up to 5 days when stored in an airtight container. For longer storage individual bars can be frozen for up to 3 months. Simply wrap each bar in plastic wrap then place in a freezer bag. Thaw overnight in the refrigerator before serving. The texture remains remarkably creamy even after freezing making these an excellent dessert to prepare well in advance of special occasions.
 Pin it
Serving Suggestions
For an extra special presentation dust the top with a light sprinkle of flaky sea salt just before serving to create a salted caramel effect. These bars pair wonderfully with fresh berries particularly raspberries whose tartness balances the sweetness perfectly. For coffee lovers serve alongside a shot of espresso which complements the caramel notes beautifully. A small scoop of vanilla ice cream alongside creates a dessert worthy of any restaurant menu.
Frequently Asked Questions
- → What does dulce de leche taste like?
Dulce de leche has a rich, sweet, and caramel-like flavor with creamy undertones, making it perfect for desserts like cheesecake bars.
- → Can I use a homemade dulce de leche?
Yes, you can use homemade dulce de leche, as long as it has a smooth, spreadable consistency similar to store-bought options.
- → Can I make this dessert ahead of time?
Absolutely! These bars can be prepared a day in advance and stored in the refrigerator until ready to serve.
- → How should I store leftover bars?
Store leftover bars in an airtight container in the refrigerator for up to 5 days. They can also be frozen for longer storage.
- → What can I use instead of graham crackers for the crust?
You can substitute crushed digestive biscuits, shortbread cookies, or even wafer biscuits for the crust.