
 Pin it
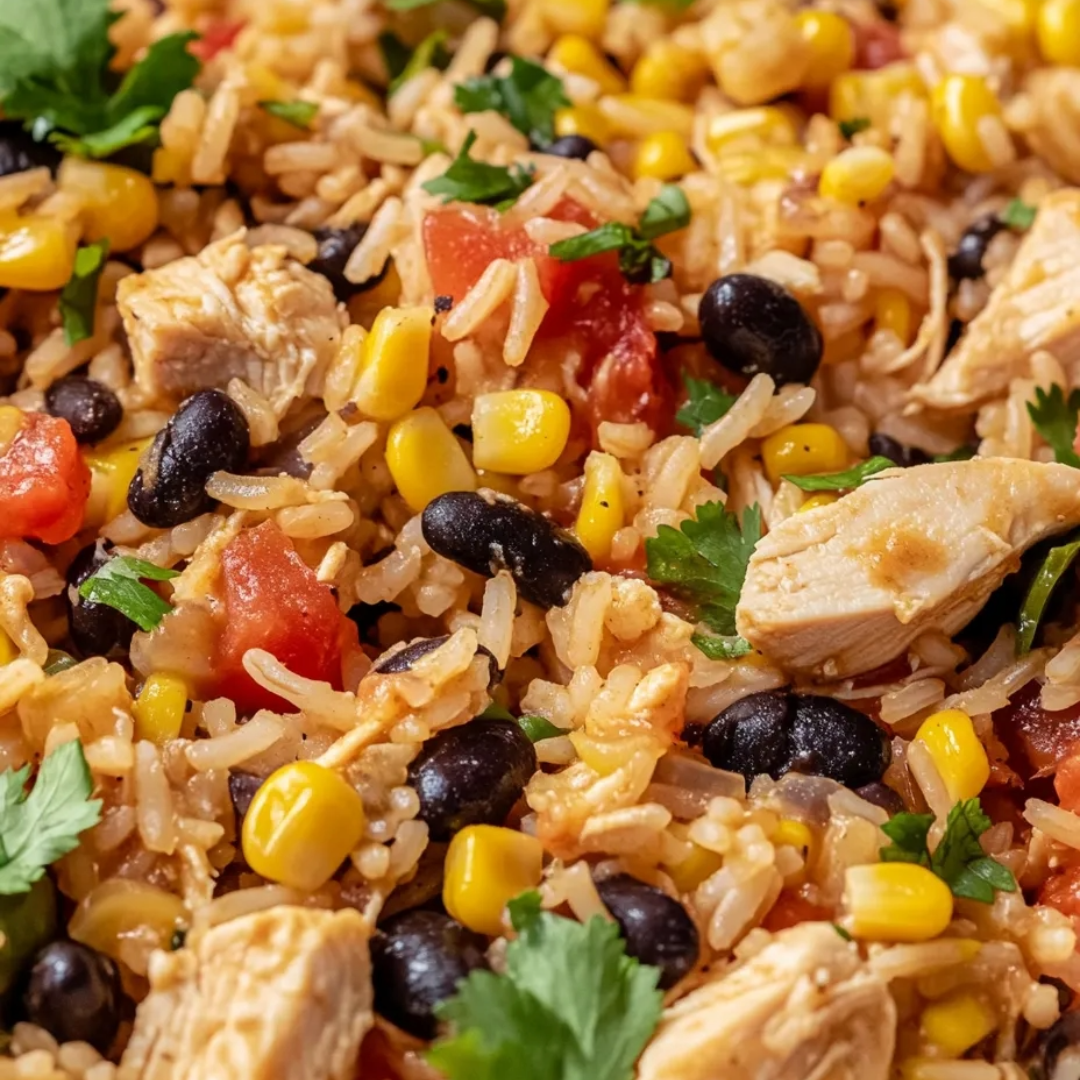
Flavorful chicken burrito bowls brimming with tender chicken, fluffy rice, black beans, and sweet corn create a restaurant-worthy meal without the restaurant price tag. This one-pan wonder delivers all your favorite Mexican flavors with minimal cleanup, making it perfect for busy weeknights when you want something satisfying without spending hours in the kitchen. The combination of spices, salsa, and fresh toppings creates a bowl that's customizable for everyone at your table.
I created this recipe shortly after moving from Philadelphia to the DC area, where I experienced serious sticker shock over Mexican restaurant prices. We had been spoiled by our old neighborhood's authentic and affordable Mexican spots, and I wasn't about to start paying $15 for a basic burrito bowl! After a few test runs in the kitchen, this one-pan version became our weeknight hero. My husband actually requested it three weeks in a row, which never happens with our usual dinner rotation.
Perfect Ingredients for Chicken Burrito Bowls
- Boneless chicken thighs: They stay juicy and tender while cooking with the rice; much more forgiving than breast meat which can dry out
- Jasmine rice: The floral aroma and fluffy texture are perfect for soaking up all the flavors; long-grain white rice works too but jasmine adds something special
- Black beans: Provide hearty protein and fiber; rinsing them well removes excess sodium and starch
- Sweet corn: Adds pops of sweetness and color; frozen corn works perfectly and doesn't need thawing
- Fire-roasted tomatoes: Bring smoky depth that regular diced tomatoes just don't have; worth seeking out for the extra flavor
- Green chilies: Add mild heat and authentic flavor without overwhelming spiciness
- Salsa: Choose your preferred heat level; the salsa does double duty as flavor and moisture for cooking the rice
- Chicken broth: Creates a richer flavor base than water; use low-sodium to control the salt level
- Cumin, chili powder, oregano: This trio creates that classic Mexican flavor profile without needing a dozen different spices
I've learned that keeping canned beans, corn, and tomatoes in my pantry means I can make this dish anytime with just a quick stop for fresh chicken. Having a well-stocked spice cabinet is another game-changer for creating flavorful meals without extra shopping trips.
Step-by-Step Cooking Instructions
- Step 1:
- Dice one medium onion into small, even pieces. Mince 3 cloves of garlic finely. Cut 1½ pounds of boneless chicken thighs into ¾-inch cubes. Having everything ready before you start cooking makes the process smooth and prevents anything from overcooking while you're chopping.
- Step 2:
- Heat 1 tablespoon of olive oil in a large, deep skillet over medium-high heat until shimmering. Add the chicken pieces in a single layer, being careful not to overcrowd the pan. Let them cook undisturbed for 2-3 minutes to develop a golden crust before stirring. This initial searing creates flavor compounds that will enhance the entire dish.
- Step 3:
- Add the diced onion to the chicken and cook for another 3-4 minutes until the onion turns translucent and begins to soften. Add the minced garlic and cook for just 30 seconds until fragrant, stirring constantly to prevent burning. This aromatic foundation flavors the entire dish.
- Step 4:
- Sprinkle 1 tablespoon chili powder, 1 teaspoon cumin, and ½ teaspoon dried oregano over the chicken mixture. Stir to coat everything evenly, allowing the spices to toast slightly for about 30 seconds. This blooms the spices, intensifying their flavors before adding the liquid ingredients.
- Step 5:
- Add 1 cup of uncooked jasmine rice, 1 can of drained and rinsed black beans, 1 cup of corn kernels, 1 can of fire-roasted diced tomatoes (undrained), 1 small can of diced green chilies, and ½ cup of your favorite salsa. Stir everything together until well combined, making sure to scrape up any browned bits from the bottom of the pan – these contain concentrated flavor.
- Step 6:
- Pour in 1½ cups of chicken broth and stir once to combine. Bring the mixture to a boil, then reduce heat to low, cover tightly with a lid, and simmer for 15-20 minutes until the rice is tender and has absorbed the liquid. Resist the urge to lift the lid or stir during cooking, as this releases steam and can result in unevenly cooked rice.
- Step 7:
- Remove the pan from heat and let it stand, covered, for 5 minutes. This resting period allows the rice to finish steaming and the flavors to meld together perfectly. After resting, fluff the mixture gently with a fork to separate the rice grains.
- Step 8:
- Serve in bowls with your choice of toppings: diced avocado, a dollop of sour cream, fresh cilantro, lime wedges, shredded cheese, or additional salsa. The contrast between the warm, spiced rice mixture and cool, fresh toppings creates the perfect balance of flavors and textures.
Budget-Friendly Meal Magic
One of the things I love most about this recipe is how economical it is. When I priced it out, each serving costs less than $3, compared to the $10-15 you'd pay at a restaurant. Plus, it makes enough for our family of four with enough leftovers for lunch the next day.
The first time I made this for friends, they couldn't believe it all came together in one pan. The flavors taste like they've been simmering all day, but the actual hands-on cooking time is minimal. It's become my go-to when entertaining friends who drop by unexpectedly since I usually have all the ingredients on hand.
Perfect for Meal Prep and Leftovers
This dish reheats beautifully, making it perfect for meal prep. I often make a double batch on Sunday and portion it into containers for quick lunches throughout the week. The flavors actually develop and improve overnight in the refrigerator.
For a fun twist on leftovers, I sometimes use the mixture as a filling for stuffed bell peppers or wrapped in large flour tortillas to make burritos. Adding a few extra toppings makes it feel like a completely different meal the second time around.
My husband used to stop at Chipotle on his way home from work at least twice a week. After I perfected this recipe, those stops became less and less frequent. Last month, he actually texted me asking if we could have "that amazing one-pan burrito thing" for dinner instead of picking up takeout. That's when I knew this recipe had officially earned its spot in our regular rotation!
I still remember the first time I made this dish. We had just moved to our new apartment, most of our kitchen was still in boxes, and I was exhausted from unpacking all day. This one-pan meal saved dinner that night, requiring just one skillet and minimal prep. As we sat on moving boxes eating these burrito bowls, we agreed that maybe our new place already felt a little bit like home. Sometimes the simplest meals create the strongest memories, especially when they bring comfort during hectic times.
Frequently Asked Questions
- → Can I use brown rice instead of white rice?
- Yes, but you'll need to adjust the cooking time and liquid amount. Brown rice typically needs about 45 minutes to cook and requires more liquid. Use 2 1/4 cups of broth instead of 2 cups, and plan for about 25-30 minutes additional cooking time.
- → What can I substitute for the chicken?
- For a vegetarian version, you can omit the chicken and add an extra can of black beans or pinto beans. Ground beef or turkey also work well as substitutes - brown them first just as you would the chicken pieces.
- → Can I make this recipe ahead of time?
- Yes! This dish reheats beautifully. Store in an airtight container in the refrigerator for up to 3 days. When reheating, add a splash of water or broth to prevent it from drying out. Save fresh toppings like avocado and sour cream to add just before serving.
- → How spicy is this recipe?
- As written, this recipe is mild to medium in spiciness depending on your salsa and taco seasoning. For a spicier version, add more chili powder, a diced jalapeño, or use a hot salsa. For a milder version, make sure to use mild salsa and taco seasoning.
- → Can I freeze this burrito bowl?
- Yes! Once cooled, portion into freezer-safe containers and freeze for up to 3 months. Thaw overnight in the refrigerator and reheat in the microwave or on the stovetop. Add fresh toppings after reheating for the best flavor and texture.