
 Pin it
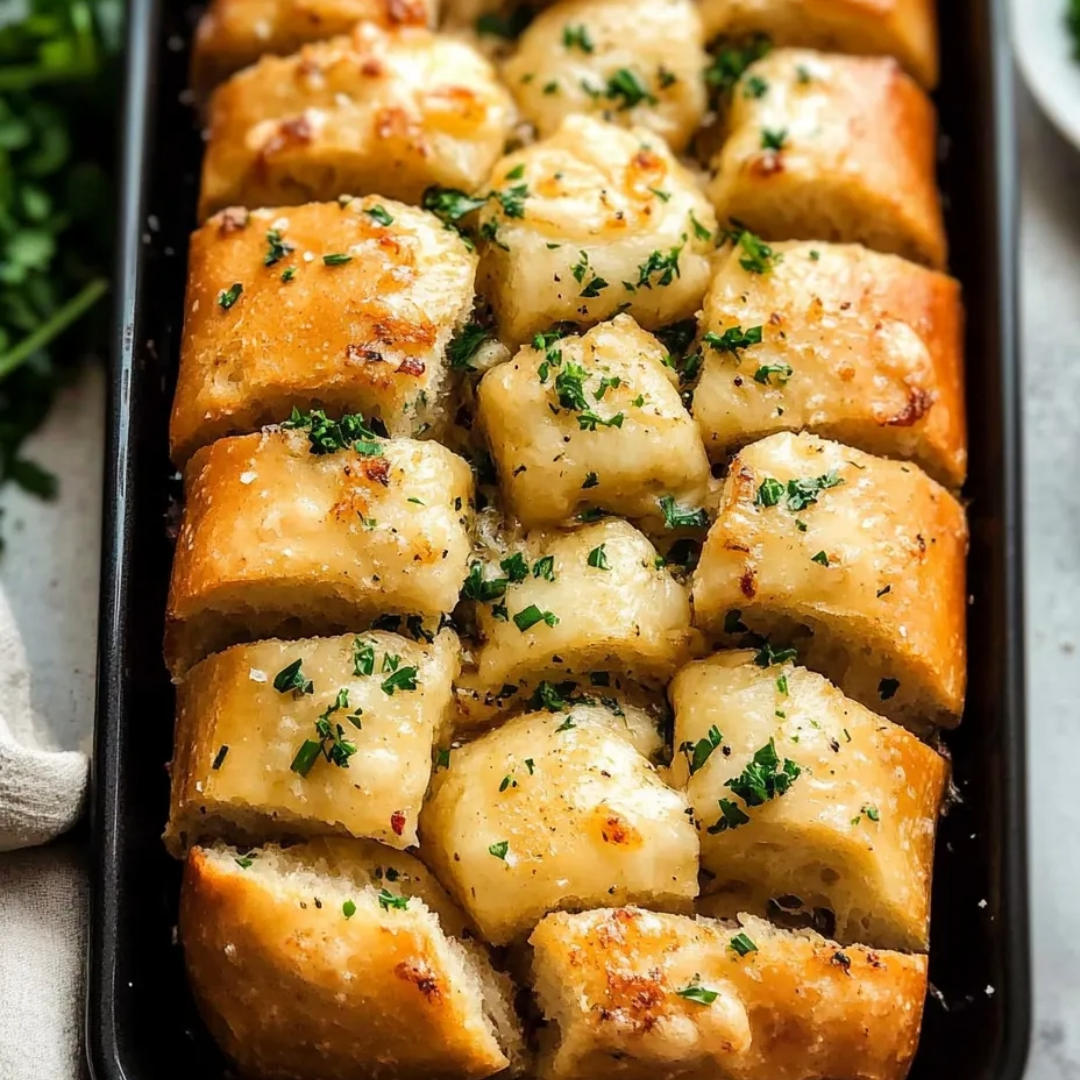
The first time I pulled a loaf of this garlic bread from the oven, my kitchen filled with an aroma so intoxicating that my teenage son appeared as if summoned by magic. There's something deeply satisfying about watching hands reach for those golden, buttery nuggets of bread, each one perfectly infused with garlic and herbs. This pull-apart version elevates traditional garlic bread from simple side dish to the star of the table—creating little pillows of dough that bake into a cohesive loaf while maintaining their individual identity, allowing each piece to be richly coated in garlicky goodness.
I stumbled upon this method during a particularly hectic holiday season when I needed something special but manageable for a family gathering. The standard garlic bread seemed too ordinary, but this approach—cutting the dough into small pieces and coating each in infused butter before baking—transformed the humble side into something people still talk about years later. What surprised me most was how the bread maintained a tender interior while developing a beautifully crisp exterior on the pieces exposed during baking.
Ingredients (with Selection Tips)
- Warm Water (1 cup, divided): The temperature should feel like warm bath water, around 105-115°F. Too hot will kill the yeast; too cool will slow activation. This ideal temperature creates the perfect environment for the yeast to bloom and work its magic.
- Active Dry Yeast (2¼ teaspoons or 1 packet): Look for yeast well within its expiration date. Store unused yeast in the refrigerator or freezer to extend its life. If you only have instant yeast, you can substitute it 1:1 and skip the activation step.
- Honey (1 tablespoon): Local honey adds subtle floral notes, but any variety works well. This natural sweetener feeds the yeast and contributes a gentle sweetness that balances the savory garlic. Brown sugar or maple syrup can substitute in a pinch.
- All-Purpose Flour (3 cups): Unbleached flour provides the best flavor. For a more tender result, you can substitute bread flour, which has a higher protein content. If measuring by volume, fluff the flour first, then spoon into your measuring cup and level off with a knife.
- Butter (2 tablespoons, softened + ½ cup for garlic butter): European-style butter with higher fat content creates the richest flavor. The softened butter in the dough adds tenderness, while the melted butter coating creates that irresistible garlic flavor in every bite.
- Salt (1 teaspoon): Kosher salt has a cleaner flavor than table salt. Don't skip or reduce this ingredient—salt not only enhances flavor but also regulates yeast activity and strengthens the gluten structure.
- Garlic (4-6 cloves, minced): Select firm bulbs with tight skin. Fresh garlic provides incomparable flavor; pre-minced varieties lack the aromatic punch. The size of your cloves matters—if they're small, use more to achieve the right garlic intensity.
- Fresh Parsley (2 tablespoons, chopped, plus more for garnish): Italian flat-leaf parsley has a stronger flavor than curly varieties. The bright, herbaceous quality cuts through the richness of the butter. Reserve some for sprinkling after baking for a pop of color.
- Italian Seasoning (1 teaspoon): A quality blend should include oregano, basil, thyme, and rosemary. For the freshest flavor, crush it between your fingers before adding to release the essential oils. You can customize this by adding more of your favorite herbs.
Step-by-Step Cooking Instructions
- Step 1:
- Activate the Yeast — In a large mixing bowl, combine ½ cup warm water (105-115°F), yeast, and honey. Stir gently until the honey dissolves. Let this mixture rest for 5-10 minutes until it becomes foamy and fragrant. This visual cue confirms your yeast is alive and active. If the mixture doesn't foam, your yeast may be old or the water temperature incorrect—better to start over than proceed with inactive yeast.
- Step 2:
- Form the Dough — To the foamy yeast mixture, add the flour, 2 tablespoons softened butter, and salt. Mix until roughly combined. Gradually pour in the remaining ½ cup warm water while continuing to stir. The gradual addition prevents the dough from becoming too sticky. The dough should come together into a cohesive ball that feels soft but only slightly tacky. If it's sticking excessively to your hands, add flour one tablespoon at a time until it reaches the right consistency.
- Step 3:
- Develop the Gluten — Knead the dough on a lightly floured surface for 7-10 minutes by hand, or 5-7 minutes in a stand mixer with a dough hook. This step is crucial for developing the gluten structure that will give your bread its perfect texture. The dough is ready when it feels smooth and elastic, and bounces back when you press it with your thumb. Under-kneaded dough will result in dense bread, while properly kneaded dough creates that airy, tender interior we're after.
- Step 4:
- First Rise — Place the dough in a lightly oiled bowl, turning once to coat the surface. Cover with a clean kitchen towel and let it rise in a warm, draft-free area until doubled in size, about 45-60 minutes. The ideal temperature for rising dough is around 75-78°F. This slow, steady rise develops flavor and texture. If your kitchen is cool, place the bowl in an oven with just the light turned on, which creates a perfect rising environment.
- Step 5:
- Prepare the Garlic Butter — While the dough rises, create the infused butter that will give this bread its signature flavor. In a small saucepan, melt ½ cup butter over low heat. Once melted, add the minced garlic, chopped parsley, and Italian seasoning. The low heat is crucial—it allows the flavors to infuse without burning the garlic, which would create bitterness. Simmer gently for 2 minutes, stirring occasionally, then remove from heat. The butter should be fragrant and golden, with the herbs and garlic softened and aromatic.
- Step 6:
- Shape the Dough — Once the dough has doubled in size, gently deflate it by pressing down with your fingertips. On a lightly floured surface, shape the dough into a long tube approximately 1 inch in diameter. Using a sharp knife, cut the tube into 1-inch pieces. You should get approximately 20-24 pieces. Each piece will become an individual, pull-apart morsel of garlic bread, so aim for uniformity in size for even baking.
- Step 7:
- Coat with Garlic Butter — Transfer the dough pieces to the saucepan with the prepared garlic butter. Gently toss to ensure each piece is thoroughly coated on all sides. Use a flexible spatula to help coat every surface without damaging the dough pieces. This step is what creates the magic of this recipe—each bite will have that perfect garlic butter flavor because we're coating the individual pieces rather than just brushing the top.
- Step 8:
- Arrange and Second Rise — Lightly grease an 8×4-inch loaf pan. Arrange the butter-coated dough pieces in the pan, distributing them evenly. Don't press them down—allow some space between pieces as they will expand during baking. Cover loosely with a kitchen towel and let rise for an additional 20-30 minutes until slightly puffy. This shorter second rise ensures the pieces maintain their individual character while still becoming a cohesive loaf.
- Step 9:
- Bake to Golden Perfection — Preheat your oven to 375°F during the second rise. Bake the bread for 20-25 minutes, or until the top is deeply golden brown and the internal temperature reaches 190°F. The high heat creates that beautiful contrast between crisp exterior and tender interior. If the top starts browning too quickly, loosely cover with aluminum foil for the remaining bake time.
- Step 10:
- Rest and Serve — Allow the bread to cool in the pan for 5 minutes, which helps it set up and makes it easier to remove. Then transfer to a wire rack or serving plate. Sprinkle with additional fresh parsley for a bright finish. Serve warm, allowing everyone to pull apart their own pieces.
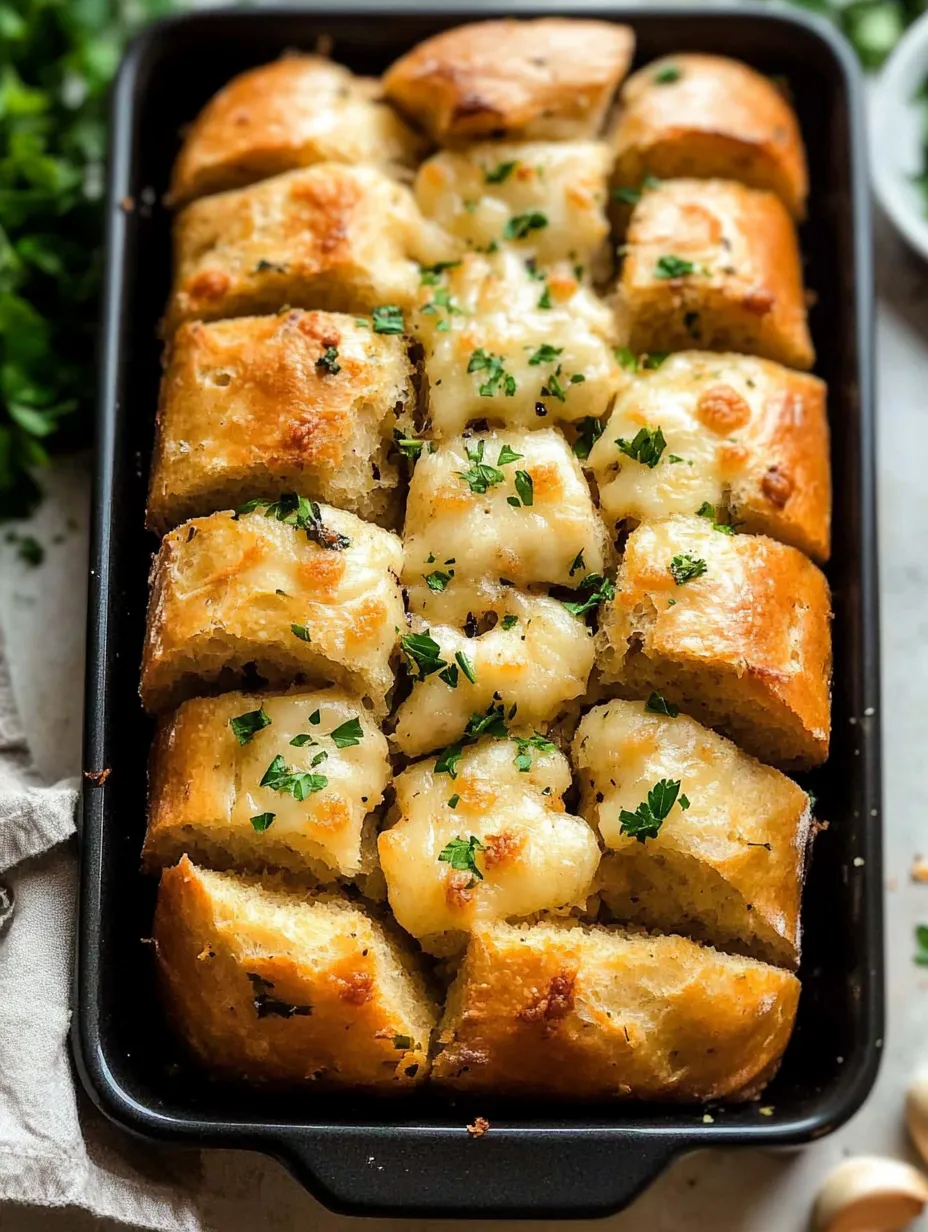
I've always been partial to the corner pieces of this garlic bread. The way they develop extra crispiness while still maintaining that soft, pillowy interior creates the most satisfying textural contrast. My husband strategically positions himself at the table to grab these pieces first! What I love most about sharing this bread is watching people's faces as they pull apart their first piece—there's always a moment of surprise at how each individual morsel is completely enrobed in garlic butter flavor, unlike traditional garlic bread where the topping sits primarily on top.
Serving Suggestions
This pull-apart garlic bread makes an ideal accompaniment to pasta dishes like lasagna or spaghetti and meatballs, where you can use the pieces to mop up any remaining sauce. It's also perfect alongside soups, particularly tomato or minestrone, where the contrast of the crisp bread with the warm liquid creates a comforting combination. For a casual appetizer, serve with a side of marinara or pizza dip in the center of the table and watch it disappear.
When entertaining, I often prepare the dough through the first rise earlier in the day, then shape, coat with garlic butter, and perform the second rise just before guests arrive. This allows me to pop it in the oven while we enjoy drinks, timing it perfectly to emerge warm and fragrant as we're sitting down to eat.
Storage and Reheating
While this bread is truly at its peak freshness straight from the oven, leftovers can be stored in an airtight container at room temperature for 2-3 days. To reheat, wrap loosely in aluminum foil and warm in a 325°F oven for 10 minutes. This gentle reheating preserves the texture far better than microwaving, which tends to make the bread tough.
This Pull-Apart Garlic Bread has transformed many ordinary meals into memorable gatherings at my table. There's something uniquely satisfying about breaking bread together in such a literal way—reaching into the center of the table, pulling off a piece, and sharing in that collective moment of anticipation before the first bite. In our increasingly fast-paced world, dishes that encourage us to slow down, to engage with our food and each other, become more than just sustenance; they become the threads that weave together the fabric of our shared experiences.
Frequently Asked Questions
- → Can I make the dough ahead of time?
- Yes! You can prepare the dough a day ahead and let it rise slowly in the refrigerator overnight. Allow it to come to room temperature for about 30 minutes before shaping and baking.
- → Can I use instant yeast instead of active dry yeast?
- Absolutely. Use the same amount of instant yeast, but you can skip the initial proofing step and mix it directly with the dry ingredients. The rise time might be slightly shorter.
- → What can I serve with pull apart garlic bread?
- This bread pairs perfectly with pasta dishes, soups, stews, or salads. It's especially delicious with spaghetti and meatballs, lasagna, or a hearty minestrone soup.
- → Can I add cheese to this garlic bread?
- Definitely! Sprinkle shredded mozzarella, parmesan, or cheddar between layers before baking. For an extra cheesy version, sprinkle some on top during the last 5 minutes of baking.
- → Why is my dough not rising properly?
- This could be due to inactive yeast, water that's too hot (which kills yeast), or a cool kitchen temperature. Make sure your yeast foams during proofing and consider placing the dough in a warm spot like a turned-off oven with the light on.