
 Pin it
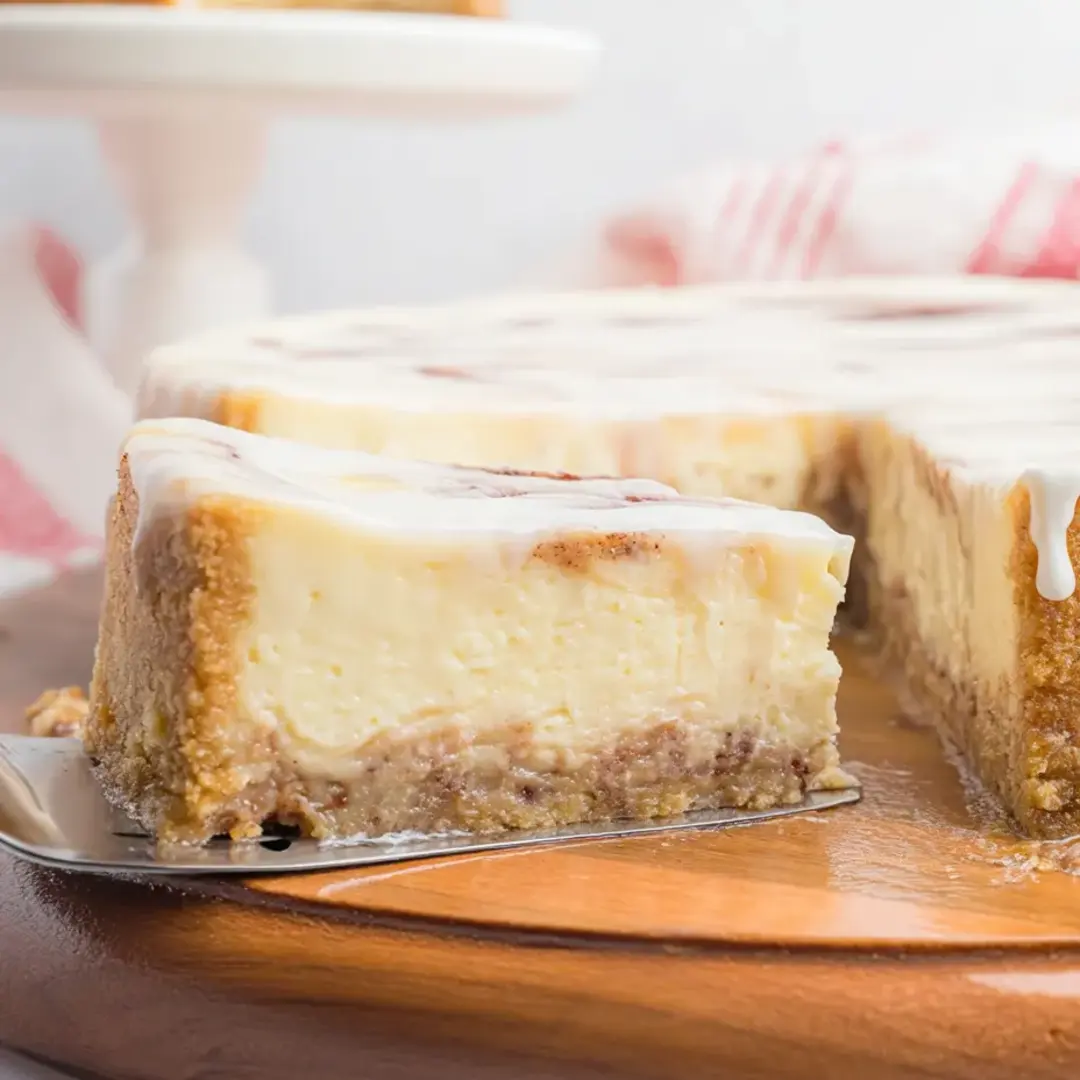
This honey bun cheesecake transforms two beloved desserts into one spectacular treat. The vanilla wafer crust provides the perfect foundation for the rich, honey-infused cheesecake, while the cinnamon swirl and sweet glaze recreate that classic honey bun flavor in every bite.
I first made this for my sister's birthday dinner, and it's become our family's most requested celebration dessert. Something about the nostalgic honey bun flavor combined with cheesecake makes everyone feel like a kid again.
Ingredients
- Nilla Wafers: Provide a sweet, vanilla-forward crust that complements the filling perfectly
- Cream Cheese: Creates that signature tangy cheesecake base best when full-fat and room temperature
- Honey: Adds natural sweetness and authentic honey bun flavor use good quality for best results
- Ground Cinnamon: Appears in both crust and swirl bringing warmth and that classic honey bun spice
- Sour Cream: Gives the cheesecake a smoother, creamier texture than using cream cheese alone
Step-by-Step Instructions
- Prepare the Crust:
- Process Nilla wafers into fine crumbs using a food processor or blender until they become a sand-like texture. Mix thoroughly with melted butter and cinnamon, ensuring every crumb is moistened. Press firmly into your springform pan, creating an even layer on the bottom and halfway up the sides. The back of a measuring cup works perfectly for compressing the mixture. Refrigerate while preparing the filling to help it set.
- Create the Filling:
- Beat cream cheese and sugar on low speed until completely smooth and fluffy, taking care not to incorporate excess air. Add eggs one at a time, fully incorporating each before adding the next. Mix in sour cream, honey, vanilla, and flour just until combined. The mixture should be silky smooth without lumps, which is why room temperature ingredients are critical.
- Layer and Swirl:
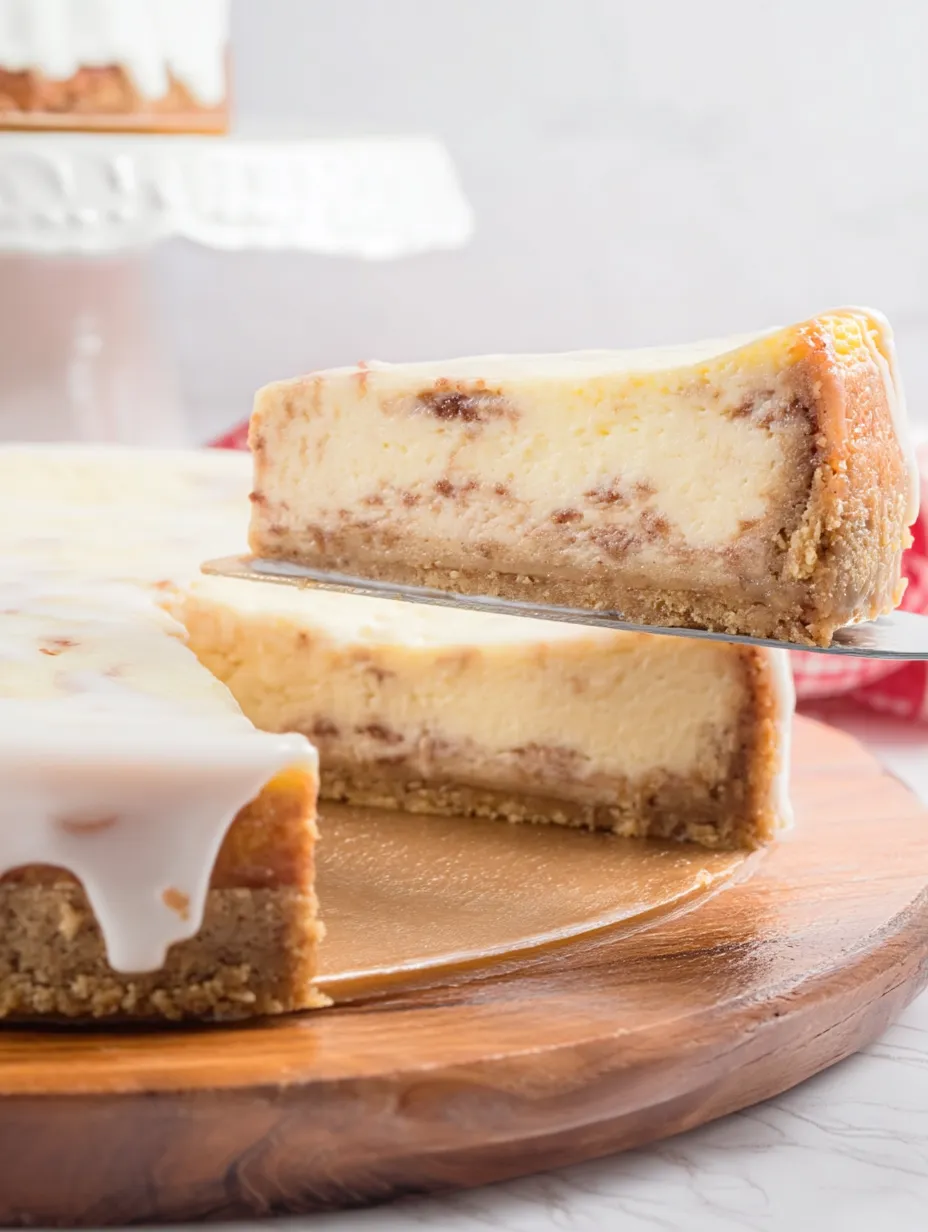
- Pour half the cheesecake batter over the chilled crust, spreading evenly. Sprinkle half the cinnamon-brown sugar mixture across the surface. Add remaining batter carefully to maintain layers. Top with remaining cinnamon-sugar mixture. Use a knife to create gentle swirls, dragging through both mixtures without overmixing. Just 4-5 passes with the knife creates beautiful marbling.
- Water Bath Baking:
- Place the springform pan inside a larger pan and add boiling water halfway up the sides. This creates a humid environment that prevents cracking and ensures even baking. Bake until the edges are set but center remains slightly jiggly. Turn off oven, crack door open, and allow cheesecake to cool gradually for 45 minutes. This slow cooling further prevents cracking.
- Glaze and Serve:
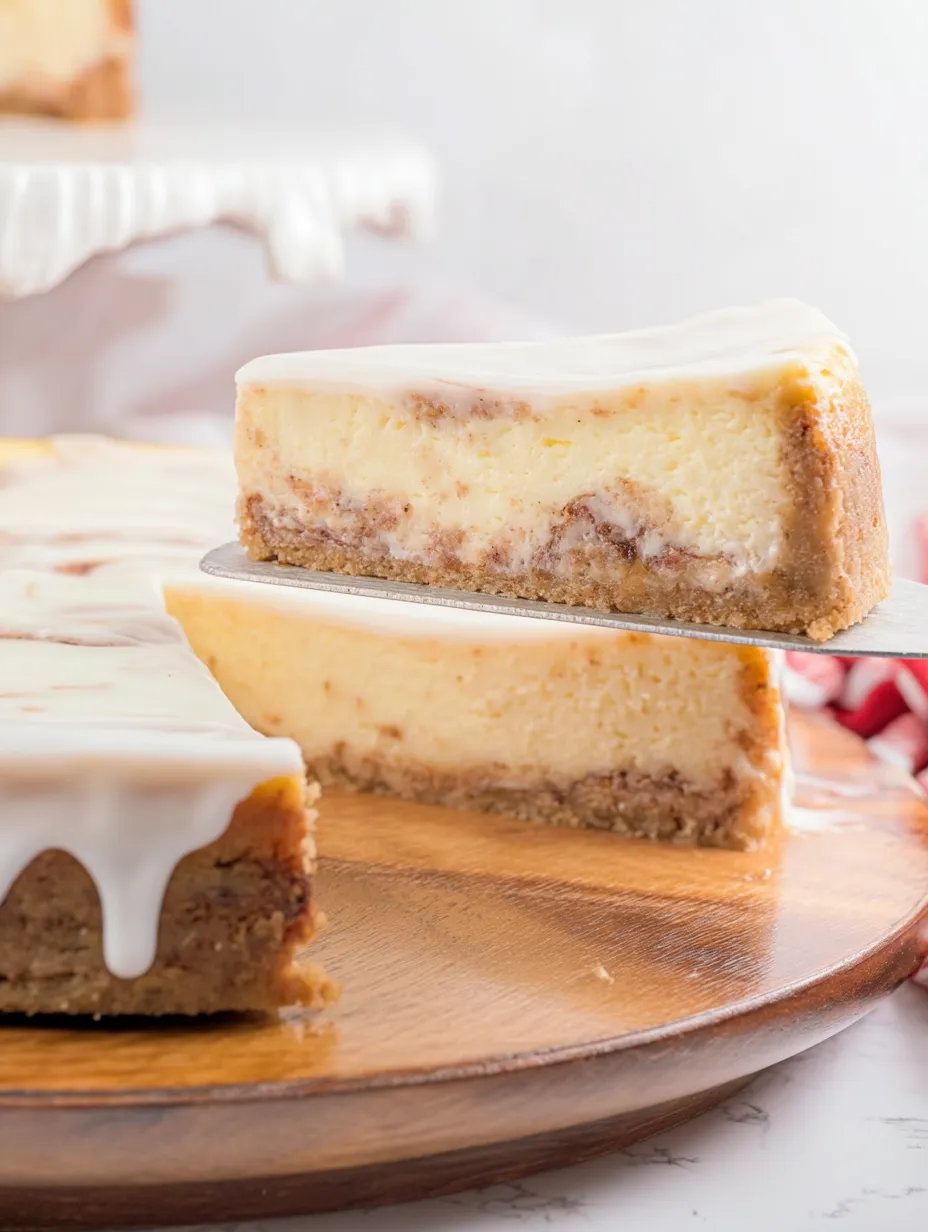
- After chilling for at least 4 hours, prepare the glaze by whisking powdered sugar, milk, and vanilla until smooth. Release the cheesecake from the springform pan by running a warm knife around the edges. Pour glaze over the top, allowing it to cascade down the sides. The glaze will set slightly in the refrigerator before serving.
 Pin it
The honey in this recipe is truly the star. I discovered that using a good quality local honey rather than the plastic bear variety makes a noticeable difference in the flavor depth. My family can always tell when I splurge on the good honey from our local farmers market.
Mastering the Water Bath
The water bath might seem intimidating, but it's the secret to cheesecake perfection. Wrap your springform pan in foil before placing it in the water bath to prevent water seepage. The steam created during baking keeps the cheesecake moist and prevents the dreaded center crack that often plagues homemade cheesecakes. If you're nervous about handling hot water, you can place the springform in the larger pan first, place both in the oven, and then carefully pour the hot water into the outer pan.
Make Ahead Magic
This cheesecake actually improves with time, making it perfect for busy hosts. Prepare it up to two days before serving and store covered in the refrigerator. The flavors meld together beautifully, creating an even more harmonious dessert. Add the glaze just before serving for the freshest appearance. This make-ahead capability makes the honey bun cheesecake perfect for holiday gatherings or special occasions when you want to minimize day-of preparation.
 Pin it
Serving Suggestions
Transform this already incredible dessert into a showstopper by adding thoughtful accompaniments. A drizzle of warm honey, a sprinkle of toasted pecans, or a side of lightly whipped cream complement the flavors beautifully. For a restaurant-worthy presentation, warm your knife under hot water and wipe dry between each slice for perfectly clean cuts. This dessert pairs wonderfully with coffee or a sweet dessert wine like Moscato.
Frequently Asked Questions
- → How do I prevent cracks in the cheesecake?
Use room temperature ingredients and avoid overmixing to prevent cracks. Also, bake the cheesecake in a water bath for even heat distribution.
- → Can I make the crust ahead of time?
Yes, you can prepare and refrigerate the crust up to a day in advance to save time.
- → What type of honey works best for this cheesecake?
Use a mild, light-colored honey to ensure the flavor doesn't overpower the cheesecake's creaminess.
- → How do I create the perfect swirl pattern?
Gently use a knife to swirl the cinnamon-sugar mixture into the cheesecake filling without overmixing for a beautiful marbled effect.
- → How should I store leftover cheesecake?
Keep the leftovers covered tightly in the refrigerator for up to five days for the best freshness.
- → Can I freeze this cheesecake?
Yes, wrap the cheesecake in plastic wrap and aluminum foil. Freeze for up to three months. Thaw in the refrigerator before serving.