
 Pin it
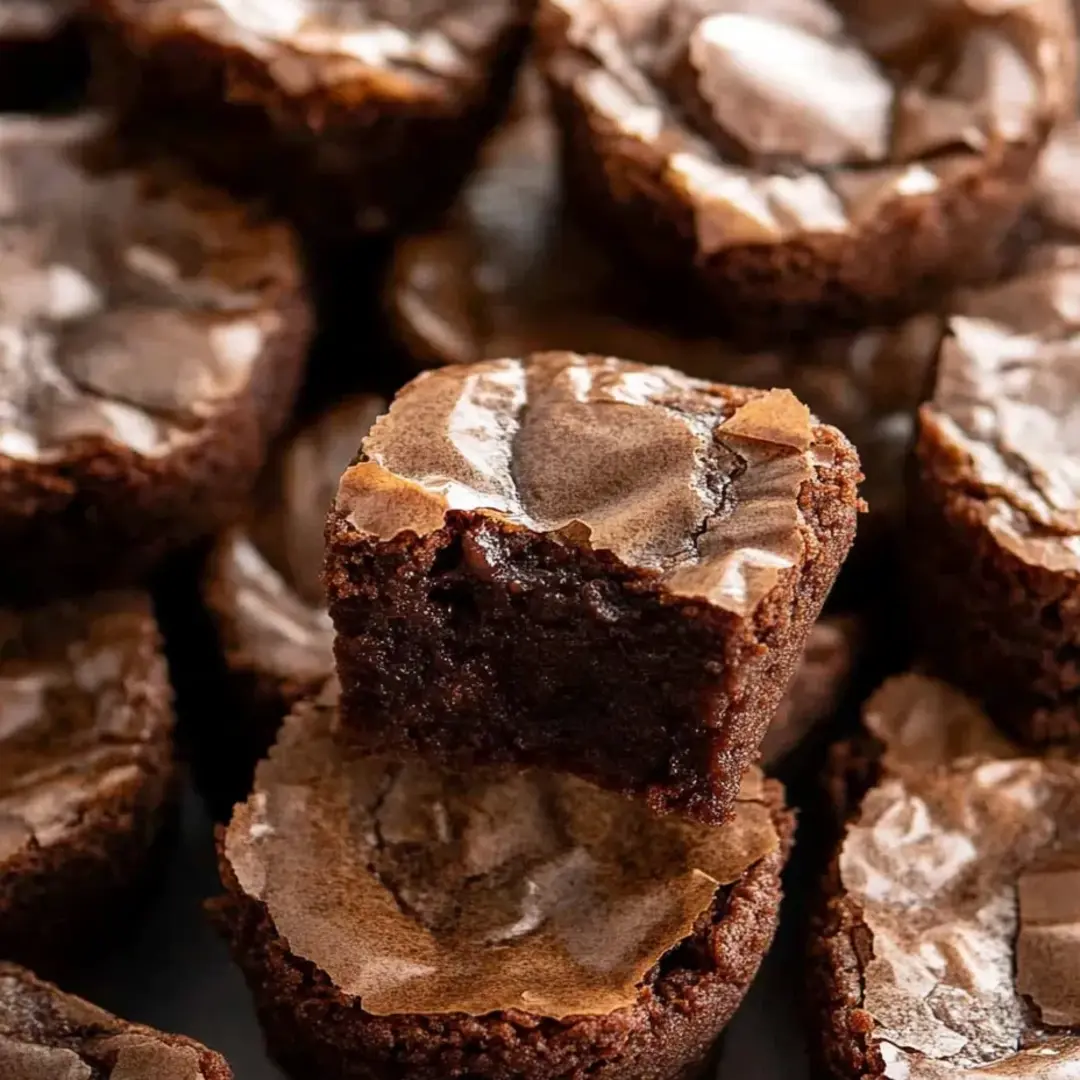
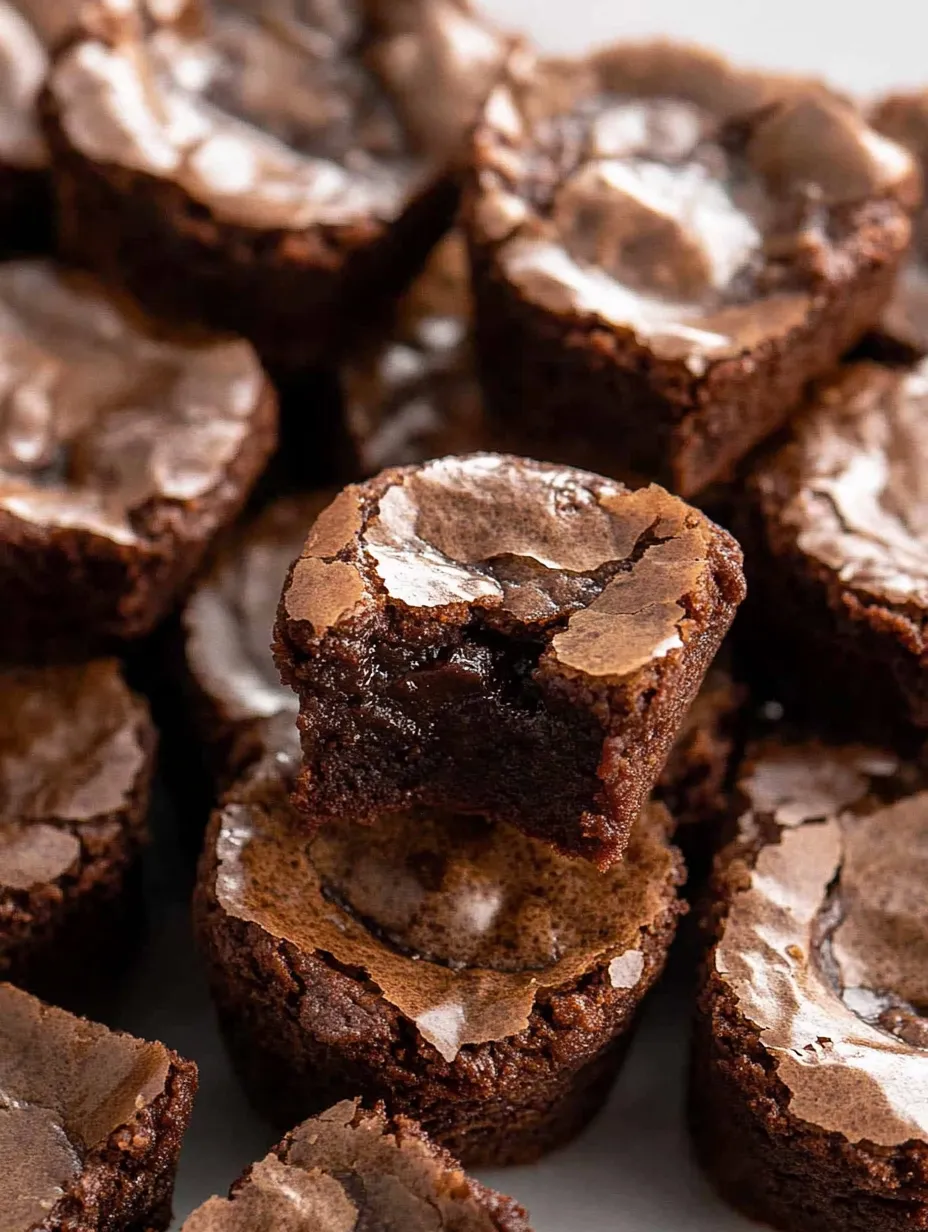
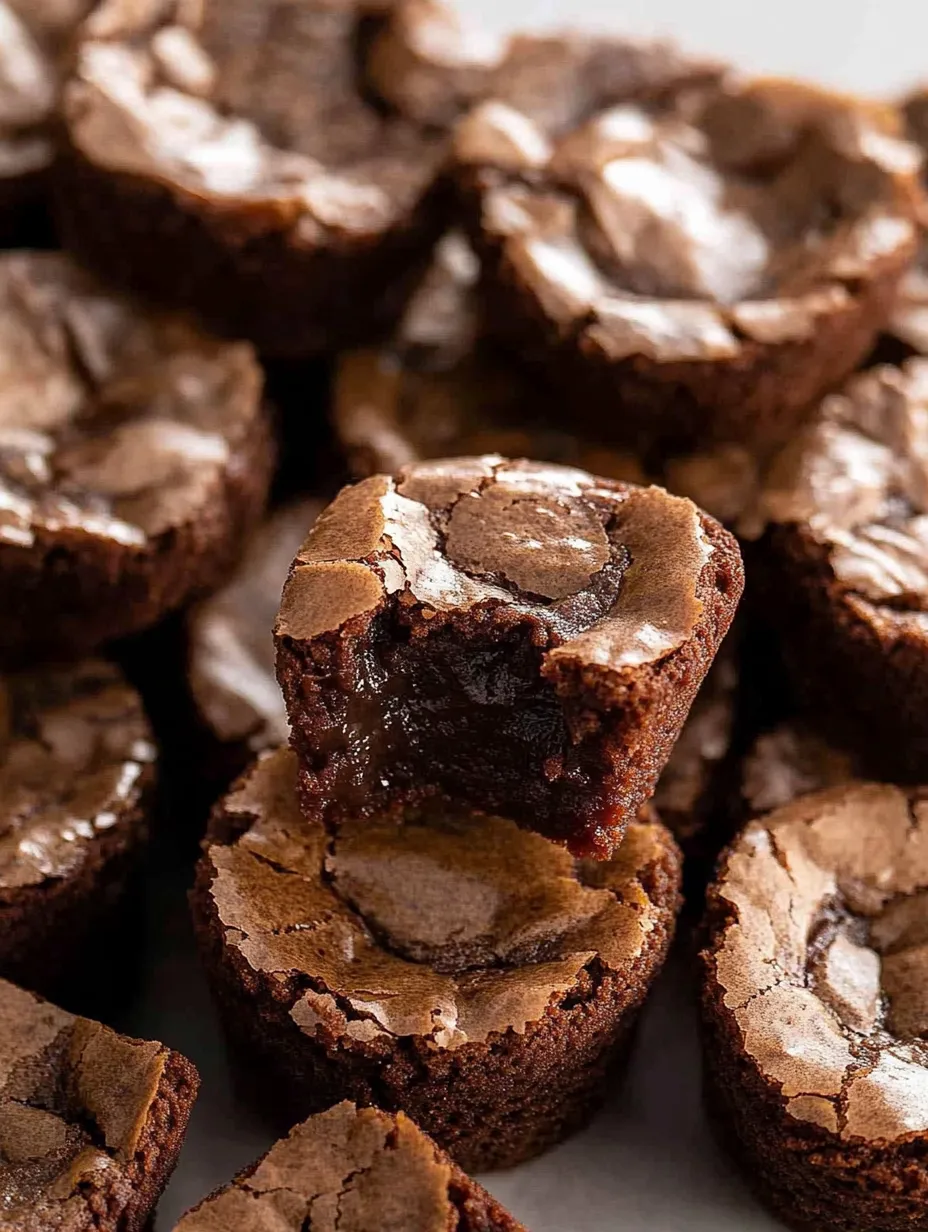
These irresistible Brownie Bites deliver pure chocolate bliss in just two bites, featuring the ultimate contrast that brownie lovers crave – a delicate crispy edge giving way to a decadently fudgy center. Each miniature treat packs all the rich complexity of a full-sized brownie into a perfectly portioned morsel, ideal for satisfying chocolate cravings without overindulging. The beauty of these bite-sized delights lies in their versatility: elegant enough for entertaining yet simple enough for everyday indulgence. Their petite size creates the perfect ratio of crackly top, chewy edge, and gooey center, delivering the complete brownie experience in each tiny package.
I discovered the magic of these brownie bites during a dinner party when I wanted to serve something chocolate but less formal than a plated dessert. The first batch disappeared within minutes, with guests discreetly returning to the serving platter for "just one more." My neighbor's teenage son, usually too cool to comment on food, asked if he could take some home! Since then, I've made these for countless occasions, from office potlucks to elegant dinner parties, and they never fail to elicit that eyes-closed moment of chocolate appreciation from first-time tasters. What began as a simple recipe experiment has become my signature contribution to any gathering.
Ingredients
- 1/2 cup unsalted butter: Creates the rich foundation of flavor and fudgy texture. Using unsalted allows precise control over the final saltiness.
- 1 cup granulated sugar: Provides sweetness and contributes to the characteristic crackly top. The sugar crystals create that delicate sheen and crunch that defines a perfect brownie.
- 1/3 cup unsweetened cocoa powder: Delivers deep chocolate flavor without adding sweetness. Dutch-processed or natural both work beautifully in this recipe.
- 1 teaspoon vanilla extract: Enhances the chocolate notes with warm, aromatic depth. Pure vanilla extract offers the cleanest flavor.
- 1/4 teaspoon salt: Balances the sweetness and intensifies the chocolate flavor. Even this small amount makes a significant difference in the final taste.
- 2 large eggs: Provide structure and richness while contributing to the fudgy texture. Room temperature eggs incorporate more easily into the batter.
- 1/2 cup all-purpose flour: Just enough to provide structure without making the brownies cakey. The low flour-to-fat ratio is the secret to their fudgy consistency.
- 1/2 cup chocolate chips: Adds pockets of melted chocolate throughout and intensifies the chocolate experience. Semi-sweet offers the perfect balance of sweetness and chocolate intensity.
I'm particularly passionate about the cocoa powder in this recipe. After testing various types and brands, I've found that a high-quality unsweetened cocoa powder makes a noticeable difference in the depth of flavor. Look for cocoa that's rich in color and fragrant with complex chocolate notes – it creates the foundation that makes these brownie bites truly special despite their simple ingredient list.
Step-by-Step Instructions
- Step 1: Preheat Oven
- Begin by preheating your oven to 350°F (175°C). Position the rack in the middle of the oven for even heat distribution. This moderate temperature allows the centers to remain fudgy while the edges develop a perfect chew.
- Step 2: Prepare Pan
- Prepare a 24-cup mini muffin pan by thoroughly greasing each cup with butter or a high-quality non-stick baking spray. Be sure to coat the sides as well as the bottoms to ensure easy removal after baking. If you're concerned about sticking, mini cupcake liners work beautifully as well.
- Step 3: Melt Butter
- In a medium saucepan, melt the butter over medium heat, watching carefully to prevent browning. The butter should become completely liquid but remain a light golden color. This gentle melting creates the foundation for your brownie batter.
- Step 4: Add Sugar
- Add the sugar to the melted butter while the pan is still warm, stirring until combined. The warm butter will partially dissolve the sugar, creating the foundation for that crackly top. The mixture will look grainy at this stage, which is perfectly normal.
- Step 5: Add Cocoa Mixture
- Add the cocoa powder, vanilla extract, and salt to the butter-sugar mixture, stirring until fully incorporated and smooth. The cocoa will absorb the butter, creating a thick, glossy chocolate paste with an intense aroma. This blooming of the cocoa in warm butter enhances its flavor significantly.
- Step 6: Cool Mixture
- Remove the saucepan from the heat and allow the mixture to cool for about 5 minutes. This cooling period is crucial – if the mixture is too hot when you add the eggs, they could scramble instead of incorporating smoothly. The mixture should be warm but not hot to the touch.
- Step 7: Add Eggs
- Once sufficiently cooled, quickly whisk in the eggs one at a time, beating vigorously after each addition until fully incorporated. The batter will transform from a thick paste to a smoother, glossier mixture as the eggs are incorporated. This vigorous beating contributes to the crackly top layer.
- Step 8: Add Flour
- Add the flour to the mixture and gently fold it in with a rubber spatula until mostly combined but with some flour still visible. Undermixing at this stage is better than overmixing, which can develop gluten and lead to tougher brownies.
- Step 9: Add Chocolate Chips
- Add the chocolate chips to the batter and continue folding gently just until no dry flour remains visible and the chips are evenly distributed. This minimal mixing preserves the fudgy texture and ensures tender brownie bites.
- Step 10: Fill Pan
- Using a small cookie scoop or tablespoon, fill each cup of the mini muffin pan about 2/3 full with batter. Don't overfill, as the brownies will rise slightly during baking. A scoop helps ensure uniform size for even baking.
- Step 11: Bake
- Bake in the preheated oven for 12-15 minutes. The perfect brownie bite should have set edges with a slight resistance when touched, but the centers should still seem slightly underdone. A toothpick inserted in the center should come out with a few moist crumbs attached, not completely clean or wet with batter.
- Step 12: Cool in Pan
- Once baked, remove from the oven and allow the brownie bites to cool in the pan for exactly 10 minutes. This cooling period allows them to set up enough to hold their shape without becoming too firm. The residual heat from the pan continues to cook them slightly.
- Step 13: Remove from Pan
- After 10 minutes, run a small offset spatula or butter knife around the edges of each brownie bite to loosen them. Then carefully lift them out and transfer to a wire rack to cool completely. The brownies will firm up a bit more as they cool but should remain fudgy in the center.
- Step 14: Store
- Once completely cooled, store in an airtight container at room temperature for up to 3 days, or freeze for longer storage. For the best eating experience, let them come to room temperature before serving to fully appreciate their fudgy texture and rich flavor.
The Science Behind Fudgy Brownies
What makes these brownie bites so irresistibly fudgy? It's all about the ratio of ingredients. The relatively high proportion of fat (butter) and sugar to flour creates that distinctive texture that's dense and moist rather than cakey.
The limited amount of flour means less gluten development, which translates to a more tender, fudgy texture. The brief mixing after adding the flour further prevents gluten formation, while the added chocolate chips melt during baking to create pockets of intense chocolate throughout.
Temperature control is equally important. Baking at a moderate 350°F allows the edges to set while the centers remain soft. Removing the brownies when they're still slightly underdone ensures they maintain their fudgy centers even after cooling. This technique creates the perfect textural contrast between the edges and centers that makes these bites so special.
Perfect Serving Suggestions
These versatile brownie bites shine in numerous settings, from casual snacking to elegant entertaining:
- Dessert Platters: Arrange on a tiered stand interspersed with fresh berries and mint sprigs for a sophisticated presentation that belies their simple preparation.
- Ice Cream Topping: Warm slightly and crumble over vanilla ice cream for an elevated sundae experience. The contrast of warm, fudgy brownie with cold, creamy ice cream is universally appealing.
- Coffee Pairing: Serve alongside espresso or cappuccino for an afternoon treat. The bitterness of the coffee beautifully complements the chocolate's richness.
- Gift Packaging: Stack in clear cellophane bags tied with ribbon for a homemade gift that's always appreciated. Include the recipe on a decorative card for an extra thoughtful touch.
For special occasions, consider creating a brownie bite bar with various toppings – sea salt flakes, crushed candy canes, or toasted nuts – allowing guests to customize their own mini desserts.
Creative Variations to Try
While perfect in their classic form, these brownie bites welcome creative adaptations:
- Salted Caramel: Press a small indent into each brownie bite before baking and fill with a caramel square. After baking, sprinkle with flaky sea salt for a sweet-savory experience.
- Peppermint Surprise: Add 1/4 teaspoon peppermint extract to the batter and substitute mint chocolate chips for a refreshing twist. Ideal for holiday gatherings.
- Raspberry Truffle: Drop a fresh raspberry into the center of each brownie bite before baking for a fruity surprise that pairs beautifully with the rich chocolate.
- Nutty Delight: Stir 1/4 cup of toasted, chopped pecans, walnuts, or hazelnuts into the batter before baking for added texture and flavor complexity.
These variations maintain the fudgy nature of the original while offering new flavor experiences for different occasions or preferences.
I learned the importance of proper baking time through a disappointing first attempt at these brownie bites. Uncertain about doneness, I left them in the oven "just a few more minutes" until a toothpick came out clean. The result was perfectly respectable chocolate mini muffins – but not the fudgy, rich brownie bites I'd envisioned. Now I deliberately underbake them slightly, knowing that residual heat will continue the cooking process as they cool in the pan. This simple adjustment transformed them from merely good to absolutely irresistible.
There's something magical about the way these tiny treats transform basic pantry ingredients into something so satisfyingly indulgent. Whether served as an elegant finish to a dinner party or tucked into a lunchbox as a midday surprise, these brownie bites remind us that sometimes the best desserts come in small packages. Their versatility, simplicity, and pure chocolate intensity make them a recipe I return to again and again – proving that sometimes the humblest recipes become our most treasured culinary traditions.
Frequently Asked Questions
- → Can I add nuts to this recipe?
- Absolutely! Stir in ½ cup of chopped walnuts or pecans along with the chocolate chips for a delicious nutty variation.
- → Why did my brownie bites stick to the pan?
- Even with greasing, mini muffin pans can sometimes cause sticking. For foolproof removal, use mini parchment liners or let them cool longer in the pan before attempting to remove them.
- → How do I know when they're perfectly baked?
- Look for crackly, shiny tops and set edges, but a toothpick inserted in the center should still have a few moist crumbs (not wet batter). Remember they'll continue cooking slightly as they cool.
- → Can I make these with a brownie mix?
- Yes, you can use a boxed brownie mix as a shortcut. Prepare according to package directions and bake in mini muffin tins for about 12-15 minutes.
- → How should I serve these for a party?
- These are perfect for dessert platters! For an extra special touch, dust with powdered sugar, drizzle with caramel sauce, or add a tiny dollop of whipped cream before serving.