
 Pin it
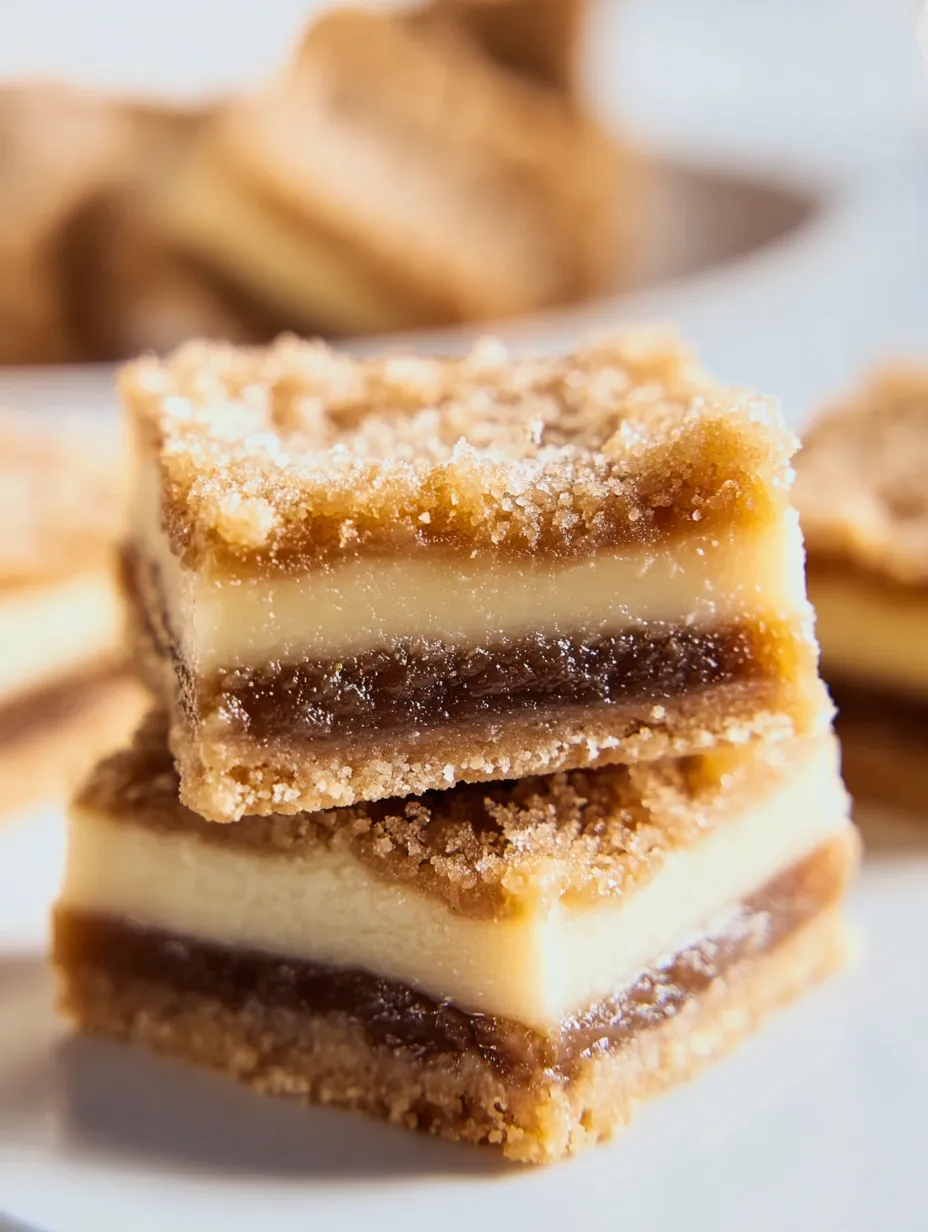
Butter Tart Squares capture everything I love about old-fashioned butter tarts but in the easiest treat to share. There is a crumbly base topped with sweet gooey filling all in one pan making it perfect for bake sales or desserts at gatherings. Whenever I need a crowd-pleasing Canadian classic with less mess these always deliver
I brought these butter tart squares to a family reunion one summer and not a crumb was left I now get requests for the recipe every holiday
Ingredients
- All purpose flour: gives the crust structure and keeps it tender Choose unbleached flour for the best flavor
- Icing sugar: also called powdered sugar makes the crust sweet and smooth Be sure it is lump free
- Unsalted butter: cold and cubed ensures a flaky crumbly base Look for butter with a high fat content for richer flavor
- Brown sugar: in the filling adds the deep toffee sweetness that defines butter tarts Use fresh soft brown sugar for best results
- Large eggs: bind the filling and make it silky Choose fresh eggs for a brighter color and richer taste
- White vinegar: balances the sweetness and keeps the filling from getting overly sugary Opt for clear vinegar without strong flavor
- Vanilla extract: adds warmth and depth Try pure vanilla for the truest flavor
- Optional raisins: for classic texture and chew Look for plump moist raisins for best results
Step-by-Step Instructions
- Get Your Pan Ready:
- Line a nine by thirteen inch pan with parchment paper pressing it into the corners so removal is easy Spray lightly with cooking spray so the crust does not stick
- Preheat the Oven:
- Set your oven to three hundred fifty degrees Fahrenheit or about one hundred seventy five Celsius to get it warming while you mix
- Make the Crust Mixture:
- Whisk together the flour and icing sugar in a large mixing bowl Add the cold cubed butter
- Cut in the Butter:
- Use a pastry cutter or rub with cold fingers until the mixture looks like coarse crumbs with pieces of butter about the size of peas If the mixture is too dry sprinkle in a tablespoon or two of cold water until it just comes together
- Press Into Pan:
- Pour the crumb mixture into the prepared pan Spread evenly then press firmly to create a compact base so it holds together when cut
- Bake the Crust:
- Bake for ten minutes until just set and lightly golden This step ensures the crust stays crisp under the filling
- Prepare the Filling:
- Melt the butter in a medium microwave safe bowl then let it cool slightly so you do not cook the eggs by accident
- Mix Filling Ingredients:
- Add the brown sugar to the melted butter and whisk until smooth Beat in eggs one at a time mixing after each until just combined Stir in vanilla and vinegar to balance sweetness If you want raisins add them now and stir gently
- Assemble and Bake:
- Take the crust from the oven and immediately pour the filling over so the heat begins to set it Return the pan to the oven and bake for twenty five to thirty minutes The edges should be set but the middle may look a bit jiggly which is perfect
- Cool and Chill:
- Cool the pan on a rack until room temperature for easy cutting Chill several hours in the refrigerator so the bars set and stay tidy when sliced
- Cut Into Squares and Serve:
- Once chilled lift the bars from the pan using the parchment Cut neatly into even squares and serve to happy friends
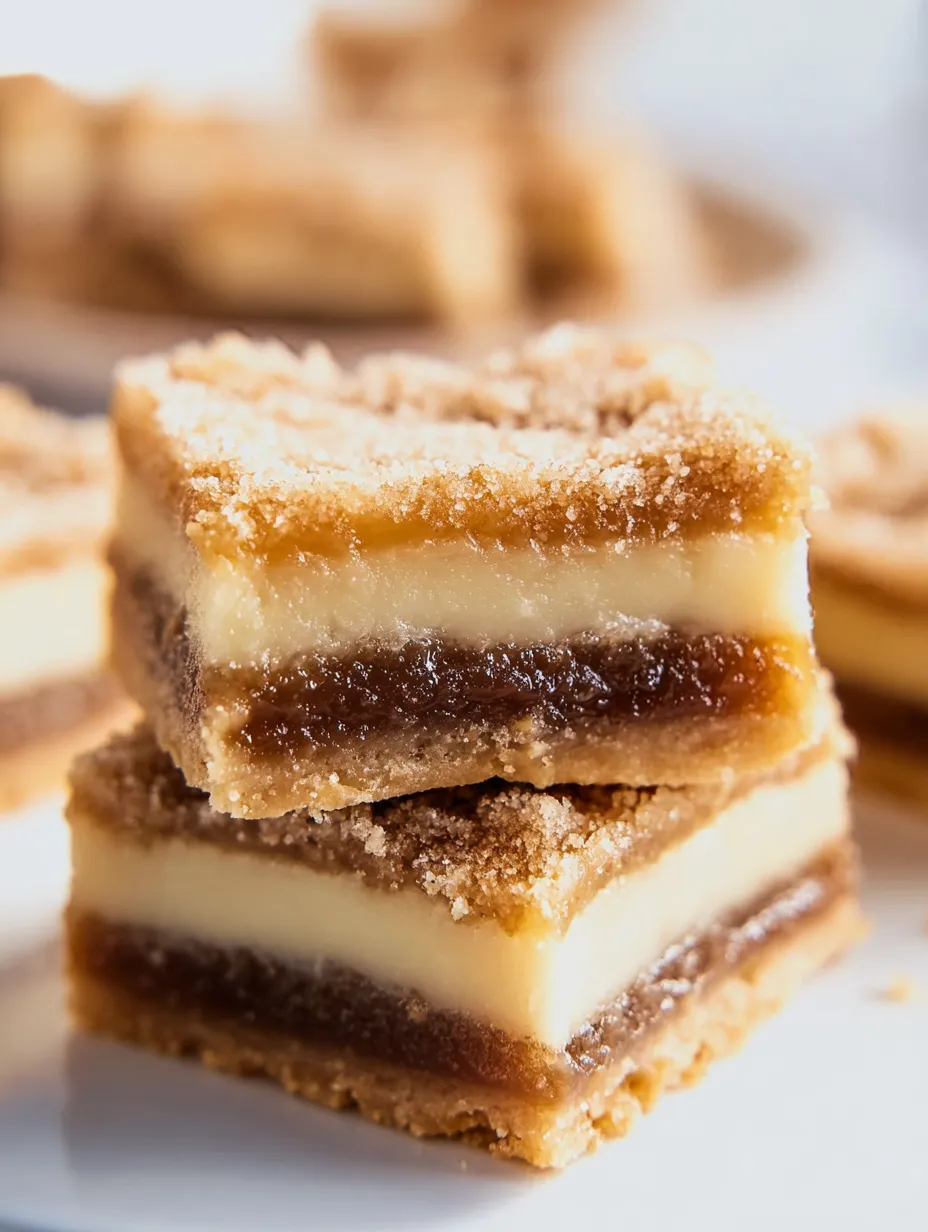
I absolutely love the creaminess of the buttery filling That hint of vanilla reminds me of the holidays when my grandmother would always sneak me an extra square right out of the fridge
Storage Tips
Store the butter tart squares in an airtight container at room temperature for up to three days For longer freshness keep them refrigerated They also freeze beautifully wrap well in plastic or foil and store for up to two months just thaw at room temperature before serving
Ingredient Substitutions
You can swap walnuts or pecans for the raisins if you want added crunch For a gluten free version use a one to one gluten free flour blend in place of all purpose Flour alternatives like almond flour will yield a more tender crust but change the texture
Serving Suggestions
Dust with extra icing sugar for a festive look or serve with a scoop of vanilla ice cream For a party platter cut the squares smaller and place in paper baking cups to keep things neat
Cultural Context
Butter tarts are loved across Canada each region adding their own twist These squares are a shortcut way of getting that classic caramelized filling without fiddling with tart shells Families have passed down this dessert for generations often tweaking the recipe to suit their memories
Frequently Asked Questions
- → How do I achieve the perfect crust texture?
Use cold, cubed butter and blend it with the flour and icing sugar until pea-sized bits remain. Press the mixture firmly into the pan for an even, crumbly base.
- → Can I make Butter Tart Squares ahead of time?
Yes, you can prepare them in advance. Chill in the refrigerator for several hours or overnight, then cut into squares before serving.
- → What's the best way to store leftovers?
Keep leftovers in an airtight container at room temperature for up to 3 days, or refrigerate to extend freshness.
- → Should I use raisins or nuts in the filling?
While optional, adding raisins or chopped nuts gives extra flavor and texture, suiting personal preferences.
- → How do I know when the filling is baked through?
The filling should be mostly set with a gentle jiggle in the center. If it's still very loose, bake a few minutes longer.