
 Pin it
Sink your teeth into these irresistible mochi bread balls that offer the perfect textural experience—delightfully chewy centers with a slightly crisp exterior that gives way to a heavenly cheese-filled interior. These little globes of goodness combine the stretchy, glutinous texture that makes mochi so beloved with savory cheese for a snack that straddles the line between bread and dumpling.
I brought these to a potluck last month where several guests had gluten sensitivities. Everyone was delighted to have a bread option they could enjoy, but what surprised me most was how quickly the non-gluten-free guests devoured them too! My neighbor's son asked if I could teach his mom to make them because he couldn't stop eating 'the cheesy bouncy balls.'
Essential Ingredients
- Glutinous rice flour: Creates the distinctive chewy texture; regular rice flour won't work as a substitute
- Cheddar cheese: Provides sharp, rich flavor; freshly grated melts more smoothly than pre-shredded
- Parmesan cheese: Adds savory depth and slight saltiness
- Egg: Acts as a binder and helps create structure in the dough
- Milk: Adds moisture and richness; whole milk creates the best texture
- Neutral oil: Contributes to the tender mouthfeel; avocado or vegetable oil works well
- Salt: Enhances all flavors and balances the mild sweetness of the rice flour
Step-by-Step Instructions
- Step 1:
- Prepare your workspace - Preheat your oven to 375°F (190°C) and line a baking sheet with parchment paper. Measure all ingredients before you begin.
- Step 2:
- Mix the dry base - Combine the glutinous rice flour and salt in a medium mixing bowl. Make a well in the center.
- Step 3:
- Add wet ingredients - Pour the milk and oil into the well and mix until the mixture resembles coarse pebbles.
- Step 4:
- Incorporate the egg - Beat the egg, add it to the flour mixture, and mix until a cohesive dough forms.
- Step 5:
- Add the cheese - Fold in the grated cheddar and Parmesan until evenly distributed.
- Step 6:
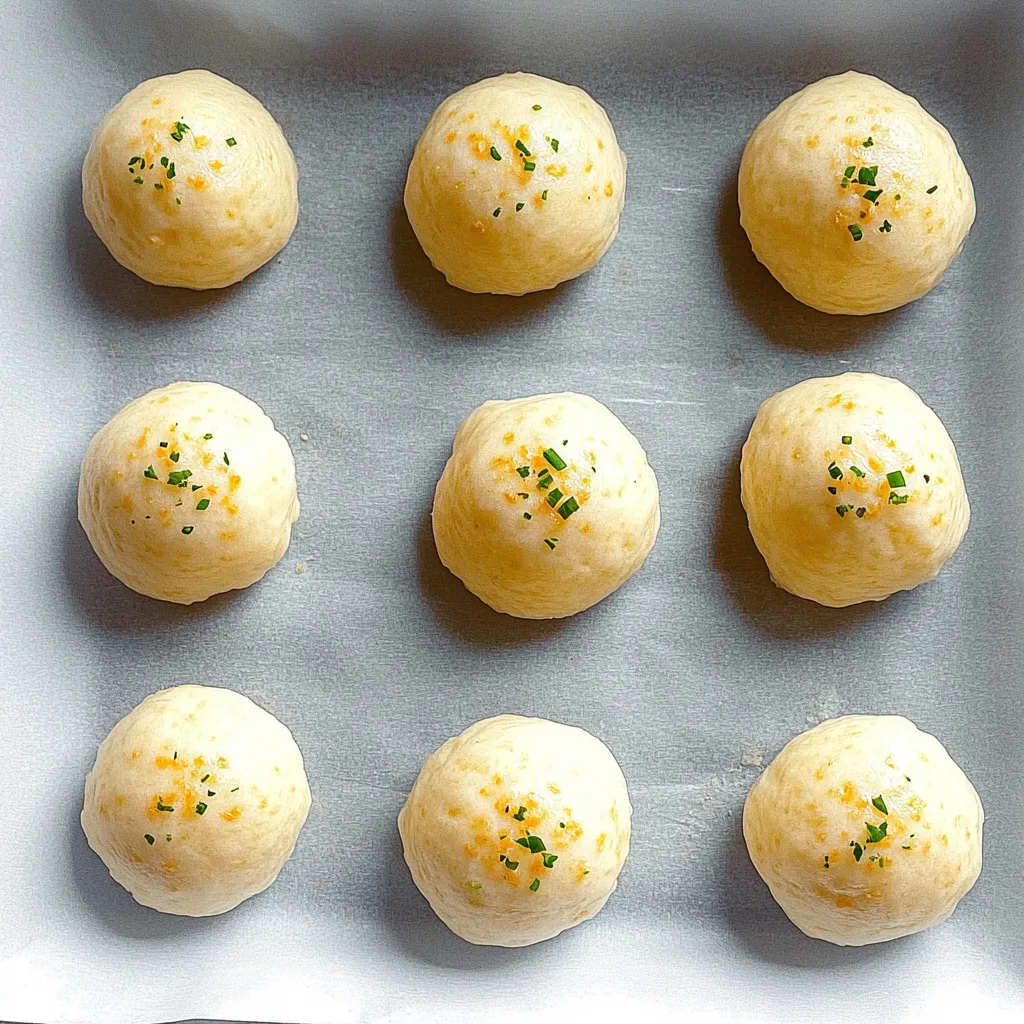
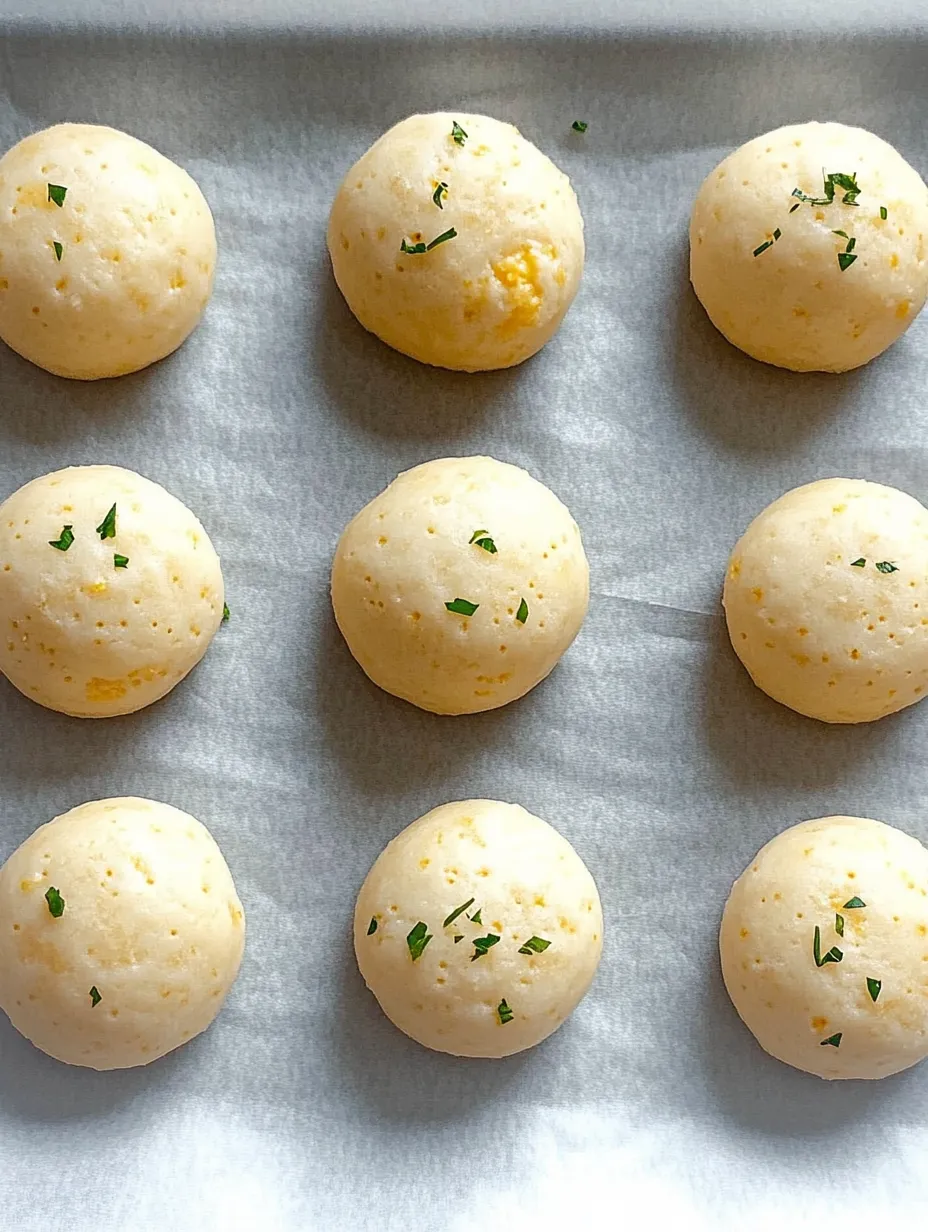
- Shape the dough - Divide the dough into 8 equal portions, roll into balls, and place on the prepared baking sheet.
- Step 7:
- Bake to golden perfection - Bake for 18-20 minutes until golden brown.
- Step 8:
- Cool slightly before serving - Allow the mochi bread to cool for 5 minutes before serving.
Cultural Connections
These cheesy mochi balls share ancestry with several global treats. While they resemble Brazilian pão de queijo in concept, they have roots in Korean cuisine where glutinous rice is a staple ingredient. The use of glutinous rice flour creates that distinctive stretchy, chewy texture that's beloved in many Asian desserts but takes a savory turn here.
Perfect Pairing Ideas
The versatility of these cheesy mochi breads makes them ideal companions to various dishes. They shine alongside a steaming bowl of kimchi jjigae or doenjang soup, where their chewiness complements the spicy broth. For a simple afternoon snack, enjoy them with a cup of barley tea or coffee. During dinner, they can replace traditional dinner rolls, offering an interesting textural contrast to grilled meats or roasted vegetables.

Storing Leftovers
These mochi breads are at their absolute best fresh from the oven, when the exterior is slightly crisp and the interior is warm and stretchy. However, if you have leftovers, store them in an airtight container at room temperature for up to 2 days. To refresh them, sprinkle with a few drops of water and heat in a 350°F oven for 5-7 minutes until warmed through.
My first attempt at these resulted in bread that was too dense because I was afraid to add enough liquid. Don't worry if the dough seems slightly wet—the glutinous rice flour absorbs moisture differently than wheat flour. Trust the process and you'll be rewarded with perfectly textured mochi bread.
The beauty of these cheesy Korean mochi breads lies in their simplicity. With just a few ingredients and minimal equipment, you can create something truly special that bridges culinary traditions. I've made these countless times for friends with dietary restrictions, and they're always met with delight and requests for the recipe. There's something magical about watching someone experience that first bite—the initial resistance followed by the yielding chew, and then the smile that inevitably follows as they reach for another.
Frequently Asked Questions
- → Is mochi bread the same as Brazilian cheese bread?
- They're similar! Both use different starches (rice flour vs tapioca) that create that uniquely chewy texture. Mochi bread tends to be slightly chewier while Brazilian cheese bread (pão de queijo) is often more airy.
- → Can I freeze these mochi bread balls?
- Yes! Freeze them after baking and cooling completely. Store in an airtight container for up to 1 month. Reheat in a 350°F oven for about 5-7 minutes or microwave for 15-20 seconds.
- → What can I substitute for glutinous rice flour?
- Unfortunately, glutinous rice flour is essential for the signature chewy texture. Tapioca starch might work but would create a different product (more like Brazilian cheese bread). Regular rice flour won't provide the same chewiness.
- → Can I use different cheeses?
- Absolutely! Try mozzarella for more stretch, Gruyère for nuttiness, or a pepper jack for some heat. Just make sure to use cheeses that melt well.
- → Why did my mochi bread crack on top?
- That's actually perfect! The cracks are a sign that they've baked properly. The expansion during baking naturally creates those cracks on the surface.