
 Pin it
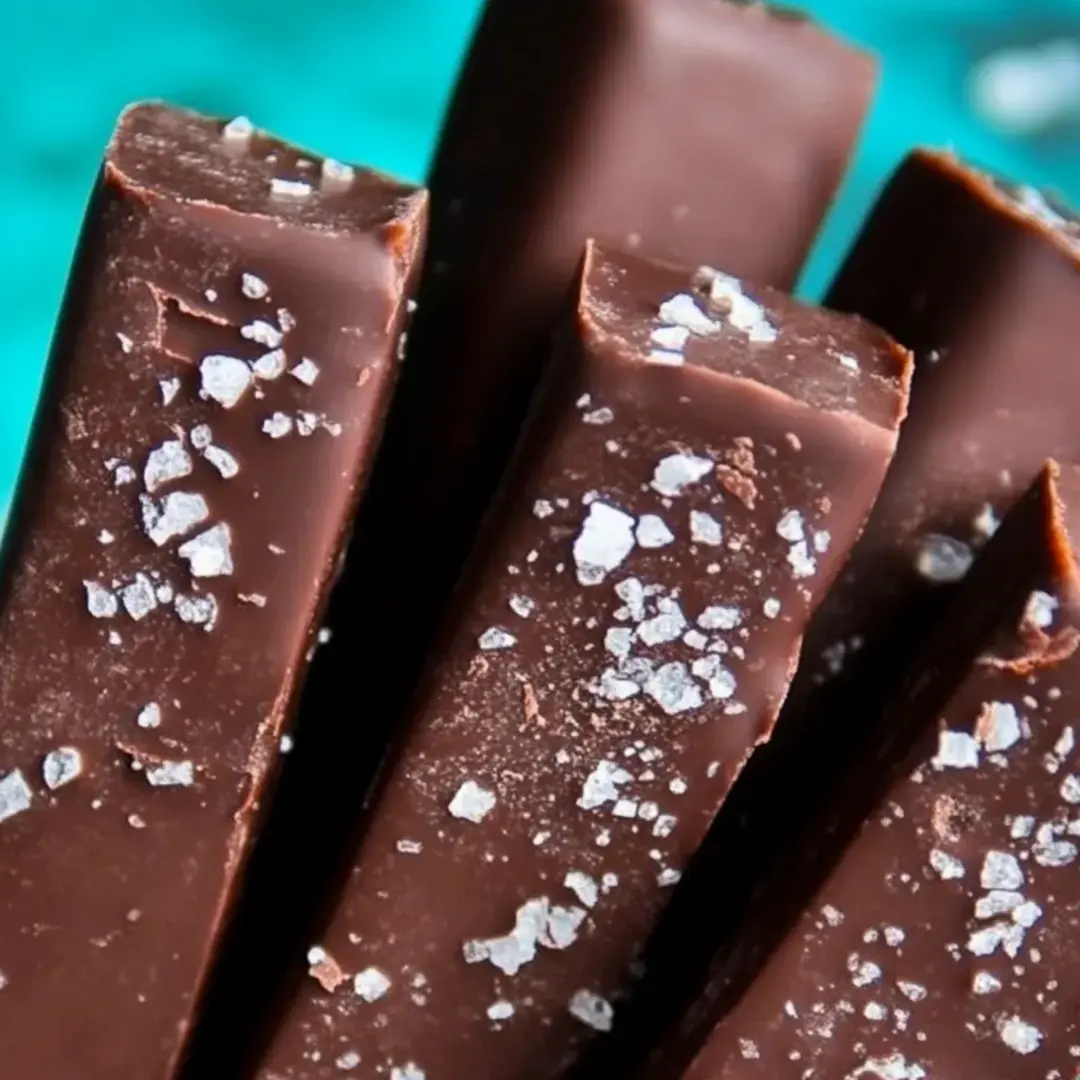
These Brownie Truffle Fries transform classic fudgy brownies into an elegant, playful dessert that delivers pure chocolate indulgence in every bite. Each brownie "fry" features a perfectly moist interior encased in a glossy chocolate shell, then adorned with a delicate sprinkle of sea salt and sugar crystals that create both visual appeal and flavor complexity. The interplay of textures – from the tender brownie to the snappy chocolate coating – creates a multisensory experience that elevates this treat beyond ordinary brownies. Whether served at a dinner party with gourmet dipping sauces or enjoyed as a special afternoon indulgence, these chocolate fruffles offer a sophisticated twist on comfort food that satisfies both nostalgia and culinary curiosity.
I first encountered these delightful treats at Red Robin, where my family and I couldn't resist ordering their Chocolate Fruffles despite being completely full from dinner. The first bite sparked an obsession that led to this homemade version. When I served them at my daughter's birthday gathering, her friend's father (a self-proclaimed "chocolate hater") reluctantly tried one—and ended up asking for the recipe before the night was over! They've since become my most-requested contribution to potlucks and family gatherings, proving that sometimes the simplest concepts make the most memorable impressions.
Ingredients
- 1 box brownie mix (18.3 oz): Creates the perfect fudgy interior. Look for a premium mix with chocolate chunks for extra richness, or use your favorite homemade recipe.
- Ingredients called for on the brownie mix box (typically eggs, oil, and water): These create the proper structure and moisture for your brownies. Using butter instead of oil can enhance richness if desired.
- 16 oz quality dark or semi-sweet chocolate, chopped: Forms the luxurious coating that seals in moisture and adds textural contrast. Using chocolate with 60-70% cacao content provides the perfect balance of sweetness and complexity.
- 2 tablespoons vegetable shortening: Helps the chocolate coating set with the perfect snap while remaining glossy. This small amount ensures the coating doesn't become too thick or brittle.
- 1 tablespoon flaky sea salt: Creates bursts of flavor that cut through the richness of the chocolate. Maldon or fleur de sel varieties provide the best texture and clean taste.
- 2 tablespoons decorative sugar crystals: Adds visual appeal and subtle crunch. Coarse sugar or sanding sugar works beautifully for this garnish.
Optional dipping sauces
- Salted caramel sauce: Provides a buttery contrast to the chocolate intensity. The caramel notes complement the brownie's depth perfectly.
- Hot fudge sauce: Creates double chocolate decadence. A slightly different chocolate (milk or white) offers pleasant variation.
- Raspberry jam: Adds a bright, fruity counterpoint to the rich chocolate. The slight acidity cuts through the sweetness beautifully.
- Freshly whipped cream: Offers a light, cooling element that balances the intensity of the chocolate. Unsweetened or very lightly sweetened works best.
I'm particularly passionate about the quality of chocolate used for the coating. After experimenting with various brands and cacao percentages, I've found that a premium chocolate in the 60-70% range creates the perfect balance—dark enough to provide sophisticated flavor but not so bitter that it overwhelms the brownies. Splurging on a high-quality chocolate for the coating makes a noticeable difference in both flavor and texture.
Step-by-Step Instructions
- Step 1: Prep Oven and Pan
- Begin by preheating your oven according to the brownie mix package directions, typically around 350°F (175°C). Position the rack in the center of the oven for even baking. Line a 9x13-inch baking pan with parchment paper, leaving overhang on the sides to create handles for easy removal later.
- Step 2: Make Brownie Batter
- Prepare the brownie mix according to package directions, combining it with the called-for eggs, oil, and water. For a more decadent version, substitute melted butter for the oil and add an extra egg yolk for fudgier texture. Mix until just combined – overmixing can create a tougher brownie.
- Step 3: Bake Brownies
- Pour the brownie batter into the prepared pan, using a spatula to spread it evenly into the corners. The even distribution ensures uniform baking and consistent-sized fries later. Gently tap the pan on the counter a few times to release any large air bubbles.
- Step 4: Check Doneness
- Bake according to package directions, but check for doneness 5 minutes before the recommended time. The perfect brownies for this recipe should be set around the edges but still slightly fudgy in the center – a toothpick inserted should come out with a few moist crumbs attached. Overbaking will result in dry, crumbly fries.
- Step 5: Cool Completely
- Once baked, remove the brownies from the oven and allow them to cool completely in the pan on a wire rack. This cooling period is crucial – attempting to cut warm brownies will result in messy edges. For the cleanest cuts, refrigerate the brownies for 1-2 hours once they've reached room temperature.
- Step 6: Cut Brownies
- When the brownies are thoroughly chilled, use the parchment paper handles to lift the entire brownie slab out of the pan and onto a cutting board. With a large, sharp knife, trim the edges to create even sides. These trimmings make perfect chef's treats!
- Step 7: Shape Fries
- Cut the brownie slab lengthwise into 6 equal strips, then cut each strip into 4 pieces, creating 24 rectangular "fries." For the cleanest cuts, wipe the knife clean between slices and use a gentle sawing motion rather than pressing straight down.
- Step 8: Freeze Before Dipping
- Place the cut brownie fries on a baking sheet lined with parchment paper, leaving space between each piece. Transfer to the freezer for 30 minutes to firm up. This brief freezing makes the brownies easier to handle during dipping and helps the chocolate coating set more quickly.
- Step 9: Melt Chocolate
- When the brownies are nearly done chilling, prepare the chocolate coating. In a microwave-safe bowl, combine the chopped chocolate and vegetable shortening. Microwave in 30-second intervals at 50% power, stirring between each interval until completely smooth. The low power prevents scorching, while the shortening creates a smoother, more dippable consistency.
- Step 10: Dip Brownies
- Remove the brownies from the freezer in small batches, keeping the rest chilled while you work. Using two forks or dipping tools, carefully dip each brownie fry completely in the melted chocolate, allowing excess to drip off. If you prefer a lighter version, you can simply dip the top of each fry rather than coating it completely.
- Step 11: Garnish
- Return each chocolate-coated brownie to the lined baking sheet, spacing them to prevent sticking together. Work efficiently but carefully – the goal is to get a smooth coating without allowing the brownies to warm up too much in your hands.
- Step 12: Add Finishing Touches
- While the chocolate coating is still wet, sprinkle each brownie fry with a small amount of flaky sea salt and sugar crystals. The contrast of salty and sweet creates a sophisticated flavor profile, while the crystals add visual appeal and textural interest.
- Step 13: Chill to Set
- Once all brownies are dipped and garnished, refrigerate them for at least 30 minutes to allow the chocolate coating to set completely. The perfect coating will have a satisfying snap when bitten into, revealing the fudgy brownie beneath.
- Step 14: Serve
- For serving, arrange the brownie fries in small paper cups or standing upright in a french fry container for a playful presentation. Offer various dipping sauces in small ramekins alongside. The contrast between the elegant truffle-like taste and the fun presentation creates a memorable dessert experience.
- Step 15: Store
- Store any leftovers in an airtight container in the refrigerator for up to 5 days. The chocolate coating actually helps preserve the brownies' moisture, making this an excellent make-ahead dessert option.
The Art of the Perfect Coating
The chocolate coating is what transforms these from simple brownie bites into sophisticated truffle fries. For the most professional-looking results, here are some expert techniques:
Temperature Control: The brownies should be very cold but not frozen solid when dipping. If too warm, they'll crumble in the chocolate; if too frozen, condensation can form as they warm up, preventing the chocolate from adhering properly.
Double-Dipping Technique: For an extra-thick coating, allow the first layer of chocolate to set for about 5 minutes, then dip again. This creates a more substantial shell that provides a satisfying crack when bitten.
Tempering Option: For a coating that stays glossy and snappy at room temperature, consider tempering your chocolate instead of using shortening. This involves carefully controlling the temperature as the chocolate melts and cools to form stable crystals in the cocoa butter.
The finishing touch of sea salt is not merely decorative – it serves an important culinary purpose. Salt enhances our perception of sweetness while simultaneously cutting through richness, creating a more balanced and complex flavor profile. The slight crunch of the flaky crystals also provides textural contrast to the smooth chocolate and fudgy brownie.
Creative Variations to Try
While the classic version is spectacular, these brownie truffle fries welcome creative adaptations:
- Peppermint Bark Version: Add a drop of peppermint extract to the chocolate coating and substitute crushed candy canes for the sugar crystals. Perfect for holiday gatherings.
- Tuxedo Fries: Dip half of each fry in dark chocolate and half in white chocolate for an elegant black-and-white look. The flavor contrast is as beautiful as the visual effect.
- Birthday Cake Edition: Use blondie batter instead of brownies, coat in white chocolate, and decorate with colorful sprinkles and a tiny pinch of edible glitter for a festive celebration version.
- Spicy Mexican Chocolate: Add a pinch of cinnamon and cayenne to the chocolate coating for a subtle heat that develops as you eat. Pair with cinnamon-infused whipped cream for dipping.
These variations maintain the playful concept while offering new flavor experiences for different occasions or to match seasonal ingredients.
I learned the importance of proper brownie chilling through a messy first attempt. Eager to complete the recipe, I cut the brownies while they were still slightly warm, resulting in ragged edges and crumbs that contaminated my chocolate coating. Now I always make these a day ahead, allowing for proper cooling and chilling time before cutting. The result is professional-looking brownie fries with clean edges that dip beautifully in the chocolate coating.
These Brownie Truffle Fries represent what I love most about home baking—taking inspiration from a restaurant treat and recreating it with personal touches that make it even better than the original. There's something magical about serving a dessert that looks sophisticated yet playful, and tastes even better than it looks. The contrast between the rich, fudgy interior and the snappy chocolate shell creates a textural experience that's far more interesting than a standard brownie, while the finishing salt elevates the flavor profile into something truly memorable. Whether served at a dinner party or enjoyed as a special family treat, these chocolate fruffles never fail to bring smiles of anticipation followed by appreciative silence as everyone savors that first perfect bite.
Frequently Asked Questions
- → Can I make these with boxed brownie mix?
- Yes! While homemade brownies yield the best flavor, you can use a fudgy boxed brownie mix as a shortcut. Just be sure to underbake them slightly so they remain soft when chilled.
- → Why do the brownies need to be chilled before dipping?
- Chilling makes the brownies firmer and easier to handle when dipping in warm chocolate. It also prevents them from falling apart or melting during the coating process.
- → What's the best way to melt the chocolate for dipping?
- The most reliable method is using a double boiler (a bowl set over simmering water). You can also use a microwave in 30-second intervals at 50% power, stirring between each interval until smooth.
- → How long do these keep?
- Stored in an airtight container in the refrigerator, these brownie fries will keep for up to a week. The chocolate coating helps seal in moisture and prevents them from drying out.
- → Can I add other toppings besides sea salt?
- Absolutely! Try crushed nuts, sprinkles, cocoa nibs, or even a drizzle of caramel or white chocolate for variety. Add these immediately after the chocolate coating while it's still wet.