
 Pin it
This chocolate mousse delivers pure indulgence with every spoonful - impossibly airy, deeply chocolaty, and velvety smooth without requiring any complicated techniques. It manages to be both light as air and intensely rich at the same time, creating that perfect dessert paradox that keeps you coming back for "just one more bite." The beauty of this particular recipe lies in its simplicity – no separating eggs, no tempering, no water baths – just pure chocolate bliss that comes together with minimal effort.
When summer temperatures soared last year and my kitchen felt like a sauna, I discovered this mousse recipe out of necessity. I had promised a special dessert for a dinner party but couldn't bear the thought of turning on the oven. The first time I served it, my friend Katie (who considers herself a chocolate mousse connoisseur after studying in France) asked for the recipe immediately. Her husband actually closed his eyes while eating it to "fully appreciate the texture." Now it's my most requested dinner party dessert, even when the temperature is perfectly comfortable for baking!
Chocolate Mousse Ingredients
- 8 ounces semi-sweet chocolate, chopped: The foundation of your mousse deserves quality chocolate. I prefer bars over chips since they melt more smoothly and have better flavor complexity.
- 2 cups heavy whipping cream, divided: Look for cream with at least 36% fat content for the best stability and texture. The higher fat percentage creates more volume when whipped.
- 2 tablespoons unsweetened cocoa powder: This intensifies the chocolate flavor without adding sweetness. Dutch-processed cocoa gives a smoother flavor, but regular works beautifully too.
- 1 teaspoon vanilla extract: Use pure vanilla extract rather than imitation for clean, authentic flavor that complements chocolate perfectly.
- 1/4 teaspoon salt: Just a pinch balances the sweetness and actually enhances the chocolate flavor. Don't skip this crucial ingredient!
- 1/3 cup confectioners' sugar: Also called powdered sugar, this dissolves instantly in cream and helps stabilize the whipped texture.
I'm particularly fussy about the chocolate used in this recipe. After trying numerous brands, I've found that Ghirardelli or Guittard chocolate bars produce the smoothest, most intensely flavored mousse. The investment in slightly better chocolate makes a noticeable difference in the final dessert—after all, when a recipe has so few ingredients, each one really matters.
How to Make Chocolate Mousse
- Step 1:
- Begin by preparing your chocolate base. Place the chopped chocolate in a medium heatproof bowl. Take care to chop the chocolate into relatively uniform pieces to ensure it melts evenly. The smaller the pieces, the more quickly and smoothly they'll melt.
- Step 2:
- Heat 1/2 cup of the heavy cream in a small saucepan over medium heat until it just begins to simmer around the edges. Watch it carefully—cream can boil over quickly! You want it hot but not boiling vigorously. Small bubbles forming around the edges of the pan is your signal that it's ready.
- Step 3:
- Pour the hot cream over the chopped chocolate and let it stand untouched for 2 minutes. This allows the heat from the cream to gently melt the chocolate without risking scorching or seizing. The patience at this step pays off with a silky-smooth mixture.
- Step 4:
- After waiting, whisk the chocolate and cream together until completely smooth and glossy. The mixture should be uniform with no visible chocolate pieces remaining. Add the cocoa powder, vanilla extract, and salt, whisking until fully incorporated. The cocoa powder intensifies the chocolate flavor while the vanilla and salt balance and enhance it.
- Step 5:
- Set this chocolate mixture aside to cool to room temperature, about 15-20 minutes. Stir occasionally to promote even cooling. The mixture needs to be cool enough not to deflate your whipped cream when combined, but still fluid enough to fold in smoothly. If you're in a hurry, you can place it in the refrigerator for about 10 minutes, stirring halfway through.
- Step 6:
- While the chocolate mixture cools, prepare your whipped cream. In a large, chilled mixing bowl, combine the remaining 1 1/2 cups of cold heavy cream and the confectioners' sugar. Using an electric mixer with chilled beaters, begin beating on medium-low speed until the sugar is incorporated.
- Step 7:
- Increase the speed to medium-high and continue beating until stiff peaks form. You'll know you've reached stiff peaks when you lift the beaters and the cream holds its shape firmly without drooping. Be careful not to over-beat, as this can give your mousse a grainy texture. The cream should look glossy and smooth, not rough or curdled.
- Step 8:
- Check that your chocolate mixture has cooled properly. It should feel cool to the touch but still be fluid enough to fold. If it has thickened too much during cooling, gently warm it by placing the bowl over a pan of warm (not hot) water and stirring until it reaches the right consistency.
- Step 9:
- Begin the folding process by adding about one-quarter of the whipped cream to the chocolate mixture. Using a rubber spatula, gently fold the cream into the chocolate using a cutting motion down the center and then sweeping up along the sides. This first addition lightens the chocolate mixture, making subsequent folding easier.
- Step 10:
- Add half of the remaining whipped cream and fold using the same gentle technique. The goal is to incorporate the ingredients without deflating the air bubbles that give mousse its characteristic lightness. Your mixture should be starting to lighten in both color and texture.
- Step 11:
- Finally, fold in the last of the whipped cream until no white streaks remain. The finished mousse should be uniform in color – a beautiful medium brown – and have a cloud-like, airy texture. Take care not to overmix; stop as soon as the mixture appears homogeneous.
- Step 12:
- Carefully spoon or pipe the mousse into serving glasses or ramekins. For the most elegant presentation, use a piping bag fitted with a large star tip. Fill each container about three-quarters full to leave room for optional garnishes. Smooth the tops with the back of a spoon if desired.
- Step 13:
- Cover each serving with plastic wrap, ensuring the wrap directly touches the surface of the mousse to prevent a skin from forming. Refrigerate for at least 2 hours or up to 24 hours before serving. This chilling time allows the mousse to set properly and the flavors to develop fully.
- Step 14:
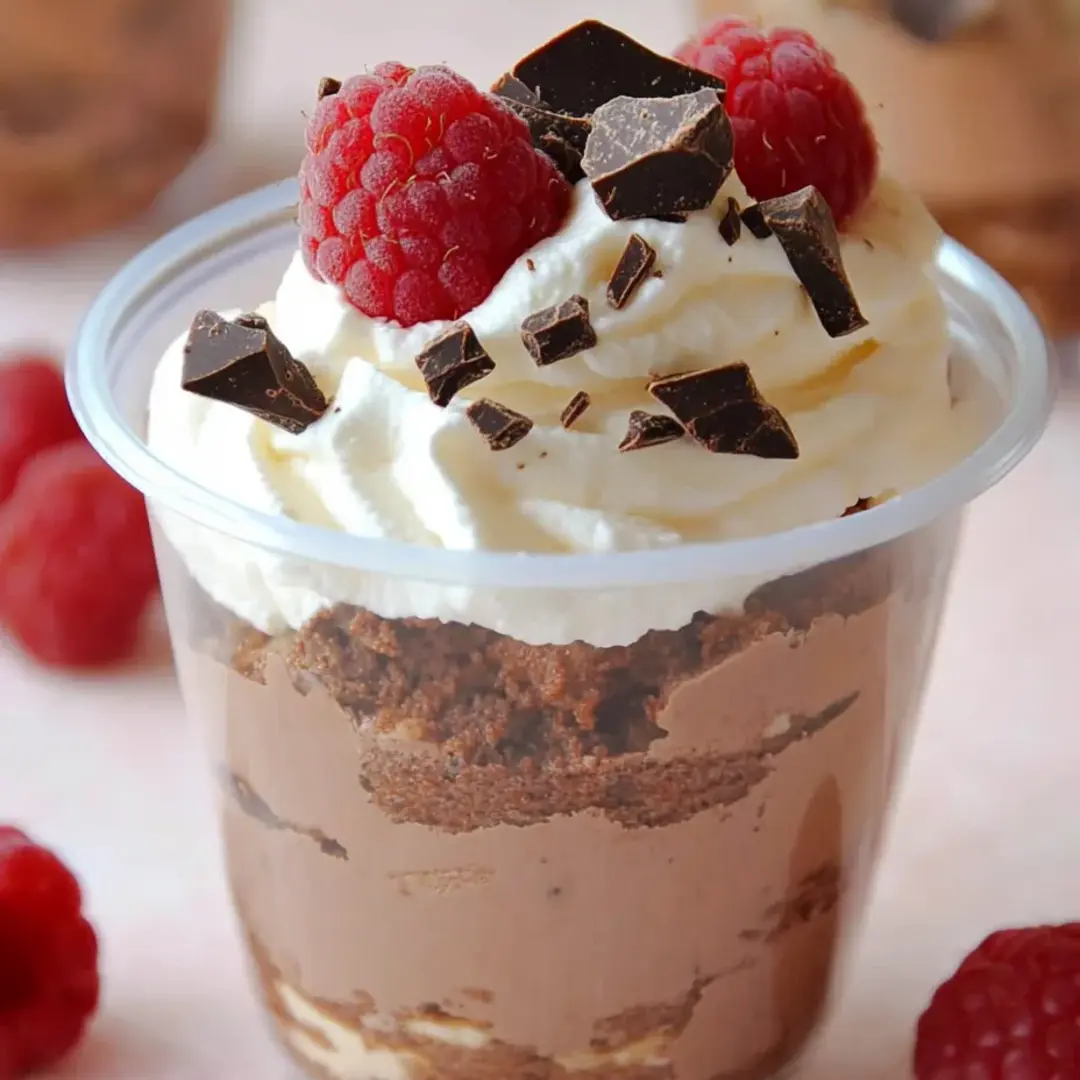
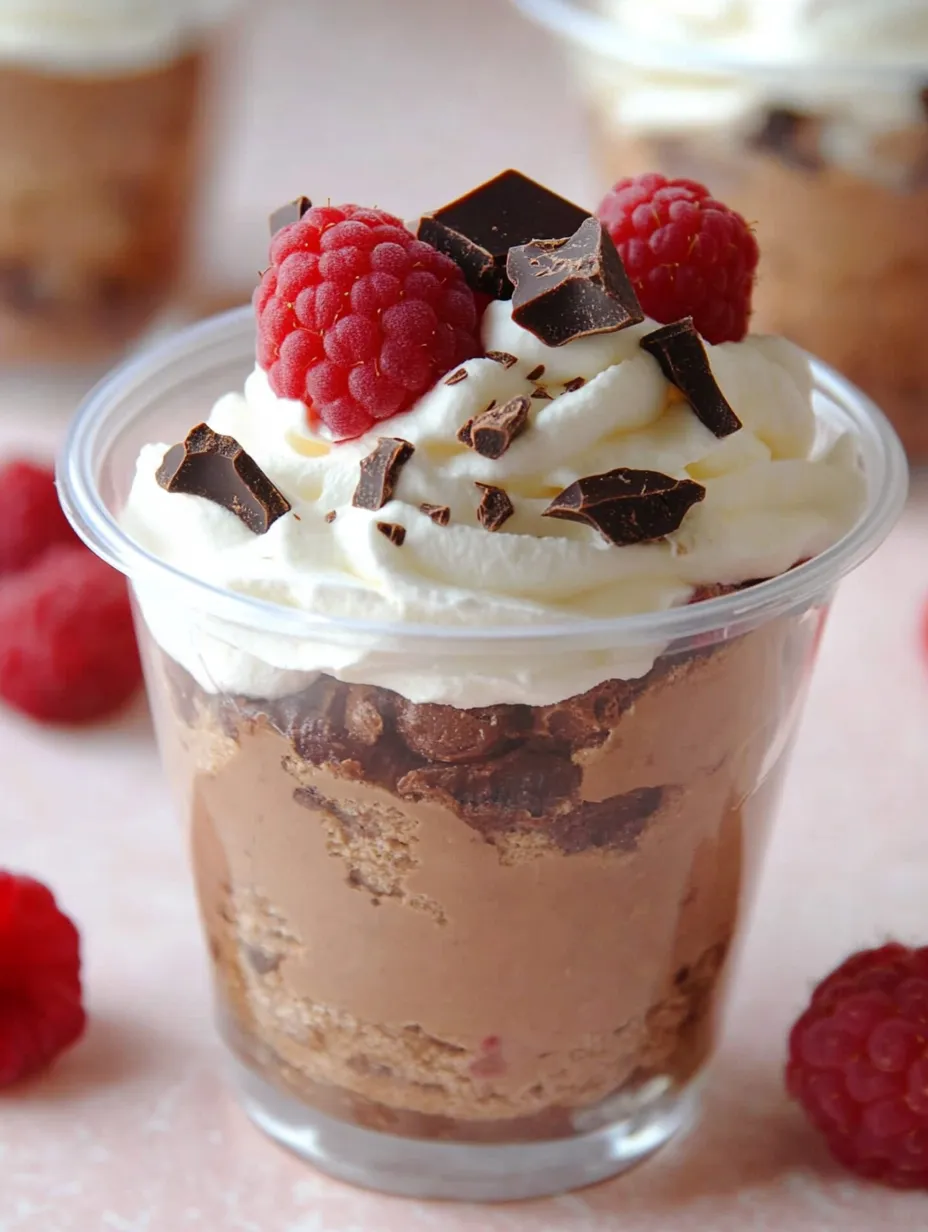
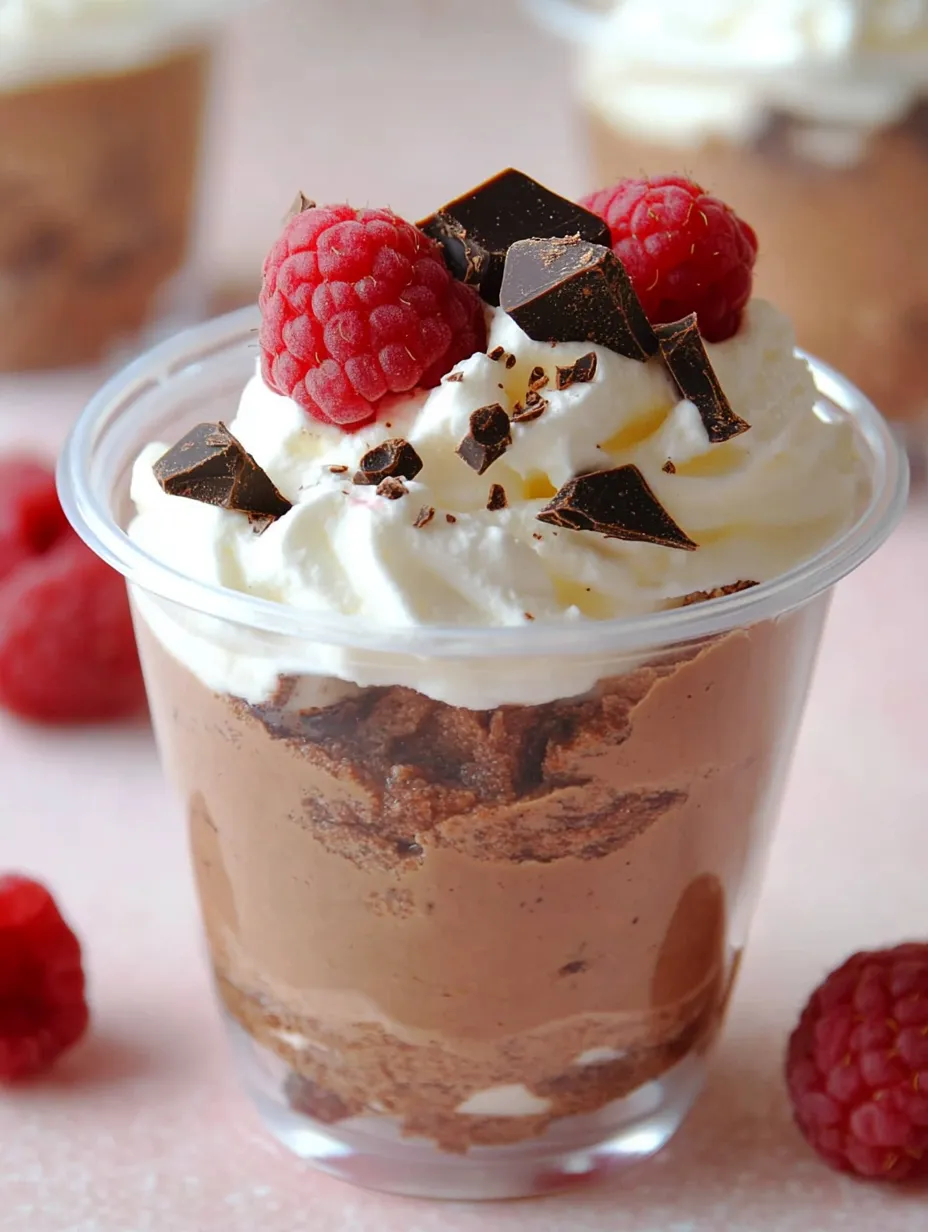
- Before serving, remove from the refrigerator and let stand for 5-10 minutes to take the chill off slightly. This brief rest enhances the flavor and texture. Garnish as desired with whipped cream, chocolate shavings, berries, or a light dusting of cocoa powder.
The Secret to Perfect Texture
The key to this mousse's magnificent texture lies in the incorporation of air into the heavy cream and the gentle folding technique used to combine it with the chocolate. When whipping the cream, make sure both the cream and the equipment are cold—I even chill my mixing bowl and beaters in the freezer for 15 minutes before starting. Cold cream whips faster and holds air bubbles more effectively.
When folding the whipped cream into the chocolate mixture, imagine you're handling something extremely delicate. Use a cutting motion down the center of the bowl, then sweep the spatula around and up the sides, rotating the bowl slightly with each fold. This preserves as much air as possible while ensuring even incorporation.
If your mousse ever seems too loose after folding, don't panic! Simply refrigerate it for 30 minutes before portioning into serving dishes. The chilled environment will help the chocolate firm up and stabilize the texture.
Elegant Serving Suggestions
While this mousse is divine on its own, presentation can elevate it to special occasion status:
- Layered Parfaits: Create stunning layers in tall glasses by alternating mousse with fresh raspberry coulis, crushed cookies, or salted caramel sauce.
- Chocolate Cups: Serve the mousse in edible chocolate cups made by coating the inside of small balloons with melted chocolate, then popping the balloons once the chocolate sets.
- Nostalgic Milkshake Style: Top with lightly sweetened whipped cream, chocolate shavings, and a cherry for a nod to old-fashioned soda fountain treats.
- Deconstructed S'mores: Serve in small jars layered with crushed graham crackers and topped with a toasted marshmallow for an elegant take on the campfire classic.
For dinner parties, I often prepare this mousse in individual vintage teacups or small coupe glasses, garnished with a single raspberry and a delicate chocolate curl. The contrast between the rustic simplicity of the dessert and the elegant presentation never fails to impress.
The first time I made this mousse, I rushed the cooling process and added the chocolate while it was still too warm. While it tasted delicious, the texture was more like a dense pudding than a proper mousse. Now I make sure to test the chocolate mixture on the inside of my wrist—it should feel neutral, neither warm nor cool, before folding it with the whipped cream.
There's something magical about transforming just a handful of ingredients into a dessert that feels this sophisticated. When I serve this mousse, I'm reminded that sometimes the simplest recipes become the most treasured—not because they're complicated showstoppers, but because they reliably deliver pure pleasure with minimal fuss. The way this mousse melts on your tongue, leaving nothing but intense chocolate flavor in its wake, makes it the perfect ending to any meal, any season of the year.
Frequently Asked Questions
- → Why is this mousse egg-free?
- Traditional mousse often contains raw eggs, which some prefer to avoid. This recipe achieves the same light texture using only whipped cream for a safer alternative.
- → Can I make this in advance?
- Absolutely! This mousse needs at least 6 hours to set properly and can be made up to 2 days ahead. Just add any garnishes right before serving.
- → What's the best chocolate to use?
- High-quality chocolate bars like Ghirardelli or Guittard work best. Avoid chocolate chips as they contain stabilizers that affect melting quality.
- → Can I make this dairy-free?
- While not recommended with this specific recipe, there are versions using coconut cream instead of dairy cream that work well.
- → Why did my mousse become grainy?
- This usually happens if the chocolate gets too hot or if water gets into the chocolate. Melt over low heat and ensure all utensils are completely dry.