
 Pin it
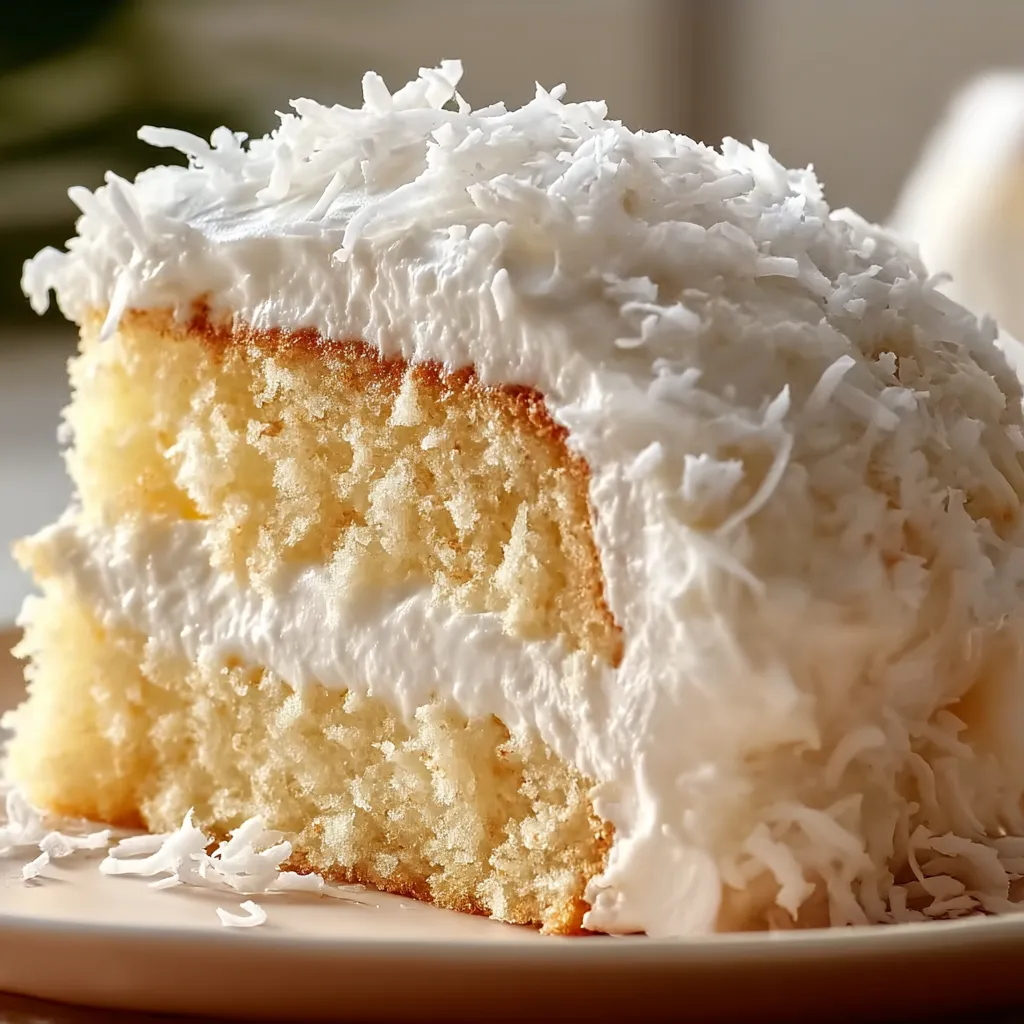
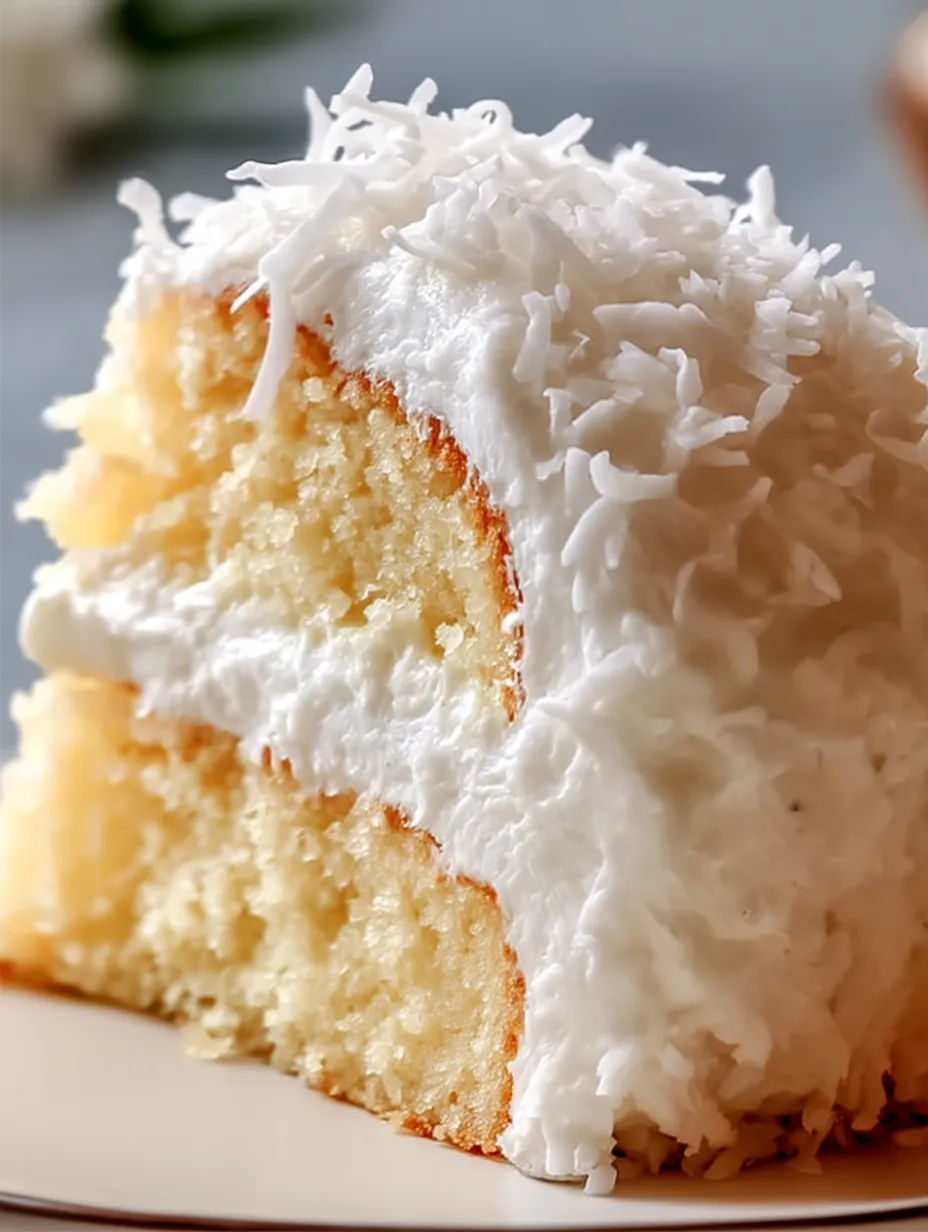
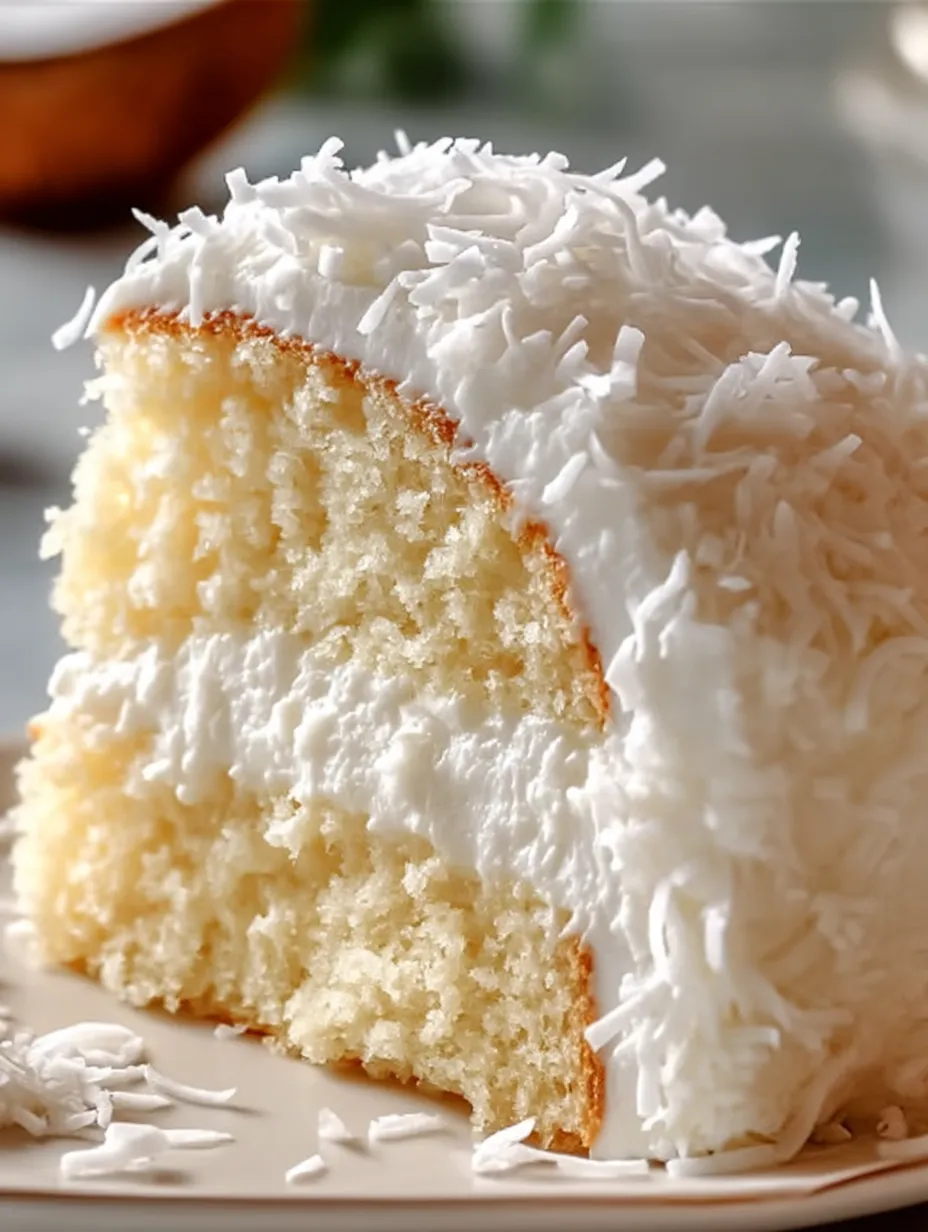
This coconut cloud cake transports you to a tropical paradise with every bite. Fluffy, light, and infused with rich coconut flavor, this showstopper dessert has become my signature celebration cake that never fails to impress guests.
I first made this for my sister's birthday after she returned from a Hawaiian vacation. The coconut reminded her of the islands, and now it has become our family's most requested celebration cake whenever someone needs a little taste of paradise.
Ingredients
- All purpose flour: Provides the perfect structure for this delicate cake without becoming heavy
- Baking powder: Gives the cake its impressive rise and cloud like texture
- Unsalted butter: Adds richness while allowing you to control the salt content
- Granulated sugar: Sweetens while helping create air pockets during creaming
- Room temperature eggs: Incorporate more easily for a smoother batter
- Vanilla extract: Provides the classic foundation that enhances the coconut flavor
- Coconut extract: Intensifies the tropical flavor without overwhelming
- Coconut milk: Brings authentic flavor while adding moisture and tenderness
- Shredded coconut: Creates a beautiful exterior and adds wonderful texture contrast
Step-by-Step Instructions
- Prepare Your Workspace:
- Preheat your oven to 350°F and prepare your cake pans. I prefer lining with parchment circles plus a light spray of cooking oil for guaranteed easy release. Nothing ruins a beautiful cake like it sticking to the pan.
- Combine Dry Ingredients:
- Whisk the flour, baking powder and salt together thoroughly. This step ensures even distribution of leavening agents for a perfectly uniform rise across your cake layers.
- Create The Base:
- Beat butter and sugar for a full 3 4 minutes until truly fluffy. Most bakers rush this crucial step, but patience here creates millions of tiny air bubbles that give your cake that cloud like texture. The mixture should lighten in color and look almost whipped.
- Build The Batter:
- Add eggs one at a time, fully incorporating each before adding the next. This prevents the batter from curdling and maintains the air structure. Add both extracts at this stage to distribute the flavors evenly.
- Combine Wet and Dry Elements:
- Alternate adding dry ingredients and coconut milk in stages, starting and ending with flour. This technique prevents overmixing while ensuring everything blends smoothly. The batter should look silky but still hold some structure.
- Bake To Perfection:
- Pour into prepared pans and bake until a toothpick comes out clean, about 25 30 minutes. The cake tops should spring back when lightly touched and appear golden around the edges.
- Cool Strategically:
- Allow the cakes to cool in pans for exactly 10 minutes. This timing allows the structure to set while still releasing easily. Then transfer to cooling racks to prevent condensation from making the bottoms soggy.
- Assemble and Decorate:
- Once completely cool, frost with coconut frosting and press shredded coconut around the sides. Work over a baking sheet to catch excess coconut for easy cleanup.
The coconut milk is truly the secret weapon in this recipe. I once tried substituting regular milk in a pinch, and while the cake was still good, it lacked that distinctive tropical richness that makes this cake so special. My grandmother always said a proper coconut cake should transport you to an island getaway with just one bite.
Achieving Perfect Texture
The cloud like texture comes from proper mixing technique and precise measurements. Overmixing after adding flour will develop gluten and create a tougher cake. Stop mixing as soon as ingredients are combined for the lightest result. Using cake flour instead of all purpose will create an even more delicate crumb, though I find the all purpose version holds up better when layered.
Make Ahead Options
This cake actually benefits from being made a day ahead. The coconut flavor deepens overnight, and the texture becomes even more tender. You can bake the layers up to two days in advance, wrap tightly in plastic wrap once cooled, and store at room temperature until ready to frost. The completed cake stays fresh for up to four days refrigerated, though bring it to room temperature before serving for the best flavor and texture.
Flavor Variations
While classic coconut is divine, this versatile cake can be customized with complementary flavors. Add a layer of lime curd between cake layers for a key lime coconut version. Fold a cup of finely chopped pineapple into the batter for a piña colada inspired treat. For chocolate lovers, a drizzle of dark chocolate ganache over the frosted cake creates a delicious contrast to the sweet coconut.
Frequently Asked Questions
- → What makes this cake light and fluffy?
The key to the cake's light texture lies in creaming the butter and sugar thoroughly, which incorporates air into the batter, and using coconut milk for moistness.
- → Can I substitute coconut extract?
Yes, you can use vanilla extract or almond extract as a substitute, but coconut extract provides the signature tropical flavor.
- → How do I toast shredded coconut?
Spread the shredded coconut evenly on a baking sheet and toast in a preheated oven at 350°F for 5-7 minutes, stirring occasionally for even browning.
- → Can I freeze the cake layers?
Yes, you can freeze the unfrosted cake layers for up to three months. Wrap them tightly in plastic wrap and store in an airtight container.
- → What’s the best way to decorate this cake?
Frost with coconut frosting or whipped cream, then press shredded coconut onto the sides and top for a stunning tropical presentation.