
 Pin it
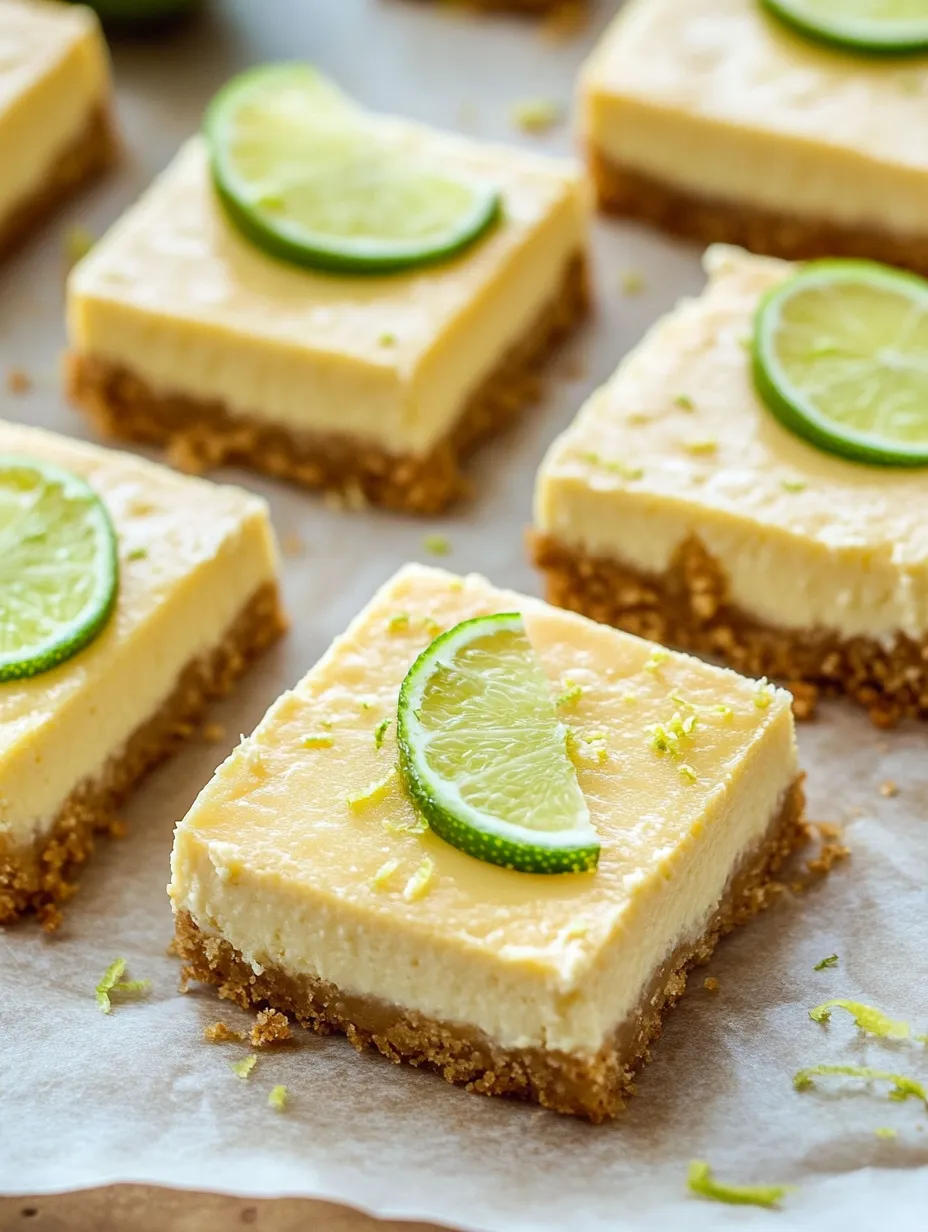
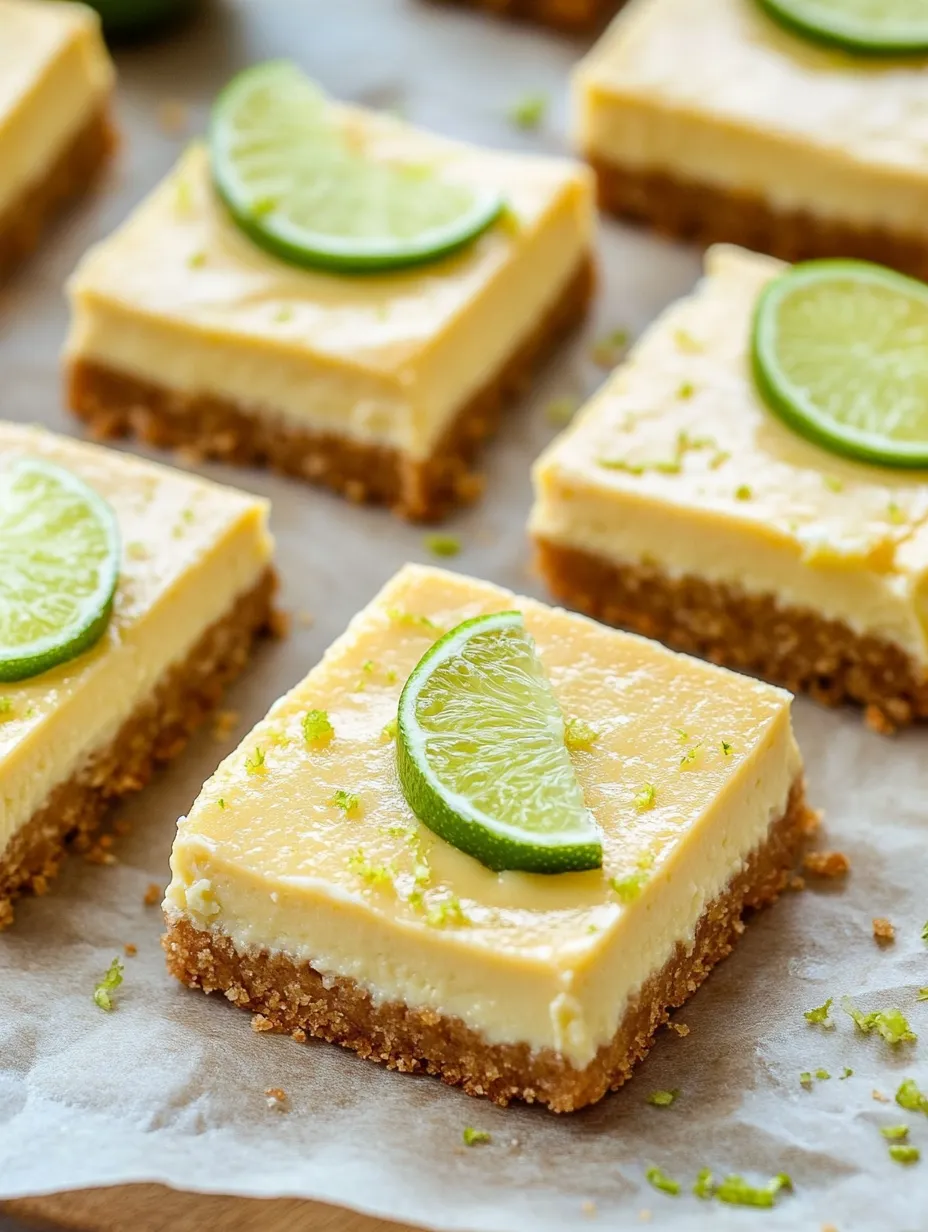
These Key Lime Pie Bars brilliantly capture the perfect balance between tangy citrus brightness and creamy sweetness that makes traditional key lime pie so beloved. Each bar delivers a buttery graham cracker foundation topped with a silky-smooth filling that offers both the richness of cheesecake and the distinctive zesty punch of fresh key limes. The contrast between the crunchy, slightly sweet crust and the velvety, tangy filling creates an irresistible textural experience in every bite. Perfect for summer gatherings or whenever you crave a refreshing dessert, these bars deliver all the tropical flavor of a classic key lime pie in a convenient, hand-held format that's both easier to make and serve.
I first discovered my love for these bars at a neighborhood summer barbecue where they disappeared faster than anything else on the dessert table. When I finally tracked down the recipe from my friend Sarah, I was shocked by how simple they were to make. The first time I served them at my own gathering, my brother-in-law (who typically shies away from "non-chocolate desserts") devoured three bars and asked if he could take some home. That's when I knew this recipe was truly special! Now they're my go-to summer potluck contribution, and I'm constantly fielding requests for the recipe.
Ingredients
For the crust:
- 15 graham crackers (full sheets), crushed (about 1¾ cups crumbs): These form the foundation of our bars with their honey-sweet flavor and distinctive texture. The subtle warmth of graham crackers complements the tangy filling perfectly.
- ⅓ cup granulated sugar: Adds just enough sweetness to the crust without overpowering the filling. The fine crystals incorporate evenly throughout the graham cracker crumbs.
- ¼ teaspoon salt: Balances the sweetness and enhances the overall flavor profile. Even this small amount makes a noticeable difference in the final taste.
- 6 tablespoons unsalted butter, melted: Binds the crust ingredients together while adding rich flavor. The butter also helps create that perfect tender-crisp texture when baked.
For the filling:
- 8 oz cream cheese, softened: Provides the creamy, luxurious texture that makes these bars so satisfying. Full-fat cream cheese yields the best results and richest flavor.
- 1 (14 oz) can sweetened condensed milk: Creates the perfect velvety consistency while adding the signature sweetness that balances the tart lime. This ingredient is non-negotiable for authentic flavor.
- 4 large egg yolks: Adds richness and helps the filling set to the perfect consistency. The yolks also contribute to the filling's beautiful pale yellow color.
- ½ cup fresh key lime juice (from about 1 pound of key limes): The star ingredient that provides the distinctive tangy, floral flavor. Fresh juice makes a noticeable difference in the final taste.
- 1 tablespoon lime zest: Intensifies the lime flavor and adds tiny bursts of citrus throughout the filling. The oils in the zest contain concentrated lime flavor compounds.
- 1 teaspoon vanilla extract: Adds depth and complexity to the filling, enhancing the lime flavor without competing with it. Pure vanilla extract offers the cleanest flavor.
I'm particularly passionate about using authentic key limes in this recipe whenever possible. After experimenting with regular Persian limes, bottled juice, and fresh key limes, I've found that the unique floral quality and intense tartness of true key limes creates an unmistakable flavor that simply can't be replicated. If you can find them, the extra effort of juicing these small fruits is absolutely worth it for the authentic tropical flavor they provide.
Step-by-Step Instructions
- Step 1: Prep Oven and Pan
- Begin by preheating your oven to 350°F (175°C). This moderate temperature allows the crust to develop a golden color and slight crispness without burning. While the oven heats, line a 9×9-inch baking pan with aluminum foil or parchment paper, leaving some overhang on the sides to create handles for easy removal later. This simple step makes serving and cleanup significantly easier.
- Step 2: Make Crust
- Prepare the graham cracker crust by crushing the graham crackers into fine, even crumbs. You can use a food processor for the quickest results, or place the crackers in a large zip-top bag and crush them with a rolling pin for a more therapeutic approach. The texture should be uniform—like coarse sand—with no large pieces remaining to ensure a cohesive crust.
- Step 3: Combine Crust Ingredients
- In a medium mixing bowl, combine the graham cracker crumbs, granulated sugar, and salt, stirring to distribute the ingredients evenly. Pour the melted butter over the mixture and stir until thoroughly combined. The mixture should resemble wet sand and hold together when pressed between your fingers. If it seems too dry, add an additional tablespoon of melted butter.
- Step 4: Form Crust
- Transfer the crust mixture to your prepared pan and use the bottom of a measuring cup or glass to press it firmly and evenly across the bottom of the pan. Apply firm, consistent pressure to create a compact layer that will hold together when sliced. Pay special attention to the corners and edges, which tend to be thicker if not properly pressed.
- Step 5: Pre-Bake Crust
- Place the crust in the preheated oven and bake for exactly 10 minutes. This par-baking step is crucial—it allows the crust to set up and become slightly crisp before adding the filling. The crust should be fragrant and just beginning to turn golden at the edges when done.
- Step 6: Make Filling
- While the crust bakes, prepare your filling. In a large mixing bowl, beat the softened cream cheese with an electric mixer until completely smooth and free of lumps, about 2 minutes. Don't rush this step—properly creamed cheese is essential for a silky-smooth filling. Scrape down the sides of the bowl as needed to ensure even mixing.
- Step 7: Add Condensed Milk
- Add the sweetened condensed milk to the cream cheese and mix on medium speed until fully incorporated and the mixture is smooth and uniform. The condensed milk should be completely integrated with no streaks remaining. This usually takes about 1-2 minutes of mixing.
- Step 8: Incorporate Egg Yolks
- Add the egg yolks one at a time, mixing well after each addition. This gradual incorporation allows each yolk to be fully integrated before adding the next, resulting in a smoother, more stable filling. Scrape down the sides of the bowl between additions to ensure everything is evenly mixed.
- Step 9: Add Lime and Vanilla
- Add the lime juice, lime zest, and vanilla extract to the mixture. Mix on low speed until just combined, being careful not to overmix. The acid in the lime juice will begin to thicken the filling almost immediately, so work efficiently from this point forward. The mixture should be smooth and pourable, with tiny flecks of green zest visible throughout.
- Step 10: Assemble Bars
- Remove the hot crust from the oven and immediately pour the filling over it. The heat from the crust helps the filling begin to set from the bottom up, creating the perfect texture. Pour from the center and allow the filling to spread naturally to the edges for the most even layer.
- Step 11: Bake
- Return the pan to the oven and bake for 15-18 minutes, or until the filling is set but still slightly jiggly in the center, like barely set gelatin. The top should remain pale without any browning. If you see the edges starting to brown, it's time to remove the bars regardless of the total baking time.
- Step 12: Cool and Chill
- Remove the pan from the oven and allow it to cool completely at room temperature, about 1 hour. Once cooled, transfer to the refrigerator and chill for at least 2 hours, preferably 4 hours or overnight. This chilling time is non-negotiable—it allows the bars to fully set and the flavors to develop and meld together.
- Step 13: Cut and Serve
- When fully chilled and set, use the foil or parchment overhang to lift the entire dessert from the pan and transfer it to a cutting board. With a sharp knife, cut into 16 squares (or 9 larger bars if you prefer). For the cleanest cuts, wipe the knife clean between slices and run it under hot water occasionally.
- Step 14: Garnish
- Just before serving, garnish as desired with additional lime zest, thin lime slices, or whipped cream. Serve cold for the best flavor and texture experience. The contrast between the chilled, creamy filling and the crisp crust is most pronounced when properly refrigerated.
The Secret to Perfect Key Lime Flavor
The distinctive taste of these bars comes from authentic key limes, which are smaller, more aromatic, and more intensely tart than standard Persian limes. Their unique flavor profile includes subtle floral notes that regular limes simply don't possess. If you can find fresh key limes, they're worth the extra effort of juicing despite their small size.
When key limes aren't available, you can create a reasonable substitute by combining fresh Persian lime juice with a touch of lemon juice—the ratio should be approximately 3 parts lime juice to 1 part lemon juice. This combination more closely approximates the complexity of key lime flavor than using Persian limes alone.
For the zest, standard limes work perfectly fine and are much easier to zest due to their larger size. Always zest your limes before juicing them, and be careful to take only the colored part of the peel, avoiding the bitter white pith beneath.
Make-Ahead and Storage Tips
These key lime pie bars are the perfect make-ahead dessert, and in fact, they benefit from being prepared in advance. The flavors continue to develop and the texture improves with proper chilling time.
For the best results, make these bars a day ahead and allow them to chill overnight. This extended refrigeration creates the ideal texture—firm enough to hold their shape when cut but still luxuriously creamy when eaten.
To store leftovers (if you're lucky enough to have any!), keep them in an airtight container in the refrigerator for up to 5 days. The bars will continue to taste fresh, though the crust may soften slightly over time.
These bars also freeze beautifully for up to three months. To freeze, chill the bars completely, then cut into individual servings. Place the bars on a baking sheet and freeze until solid, about 2 hours. Once frozen, wrap each bar individually in plastic wrap and store in a freezer-safe container. Thaw in the refrigerator for 2-3 hours before serving.
Creative Serving Suggestions
While these key lime pie bars are perfect on their own, you can elevate them for special occasions with these serving ideas:
- Tropical Paradise: Top each bar with a dollop of coconut whipped cream and a sprinkle of toasted coconut flakes for a vacation-worthy treat.
- Berry Bliss: Serve with a side of fresh raspberries or blackberries, whose sweet-tart flavor complements the lime beautifully.
- Elegant Entertaining: Place each bar on a small pool of raspberry coulis, add a quenelle of lightly sweetened whipped cream, and garnish with a mint leaf and a tiny lime wedge for restaurant-quality presentation.
- Dessert Platter: Create a citrus-themed dessert board with these bars as the centerpiece, surrounded by lemon cookies, chocolate-dipped orange segments, and grapefruit sorbet for a memorable finish to a summer meal.
I learned the importance of proper chilling time through a disappointing experience. Once, eager to serve these bars at a gathering, I cut the chilling time to just an hour. While they looked set, the filling hadn't properly firmed up, resulting in messy slices that didn't hold their shape. Now I always make these bars a day ahead, allowing them plenty of time to set up in the refrigerator. The difference in texture and sliceability is remarkable, and the flavor is noticeably better too, as the lime has time to permeate throughout the filling.
There's something magical about the way these key lime pie bars bring a taste of tropical sunshine to any occasion. The vibrant citrus flavor cuts through the richness of summer barbecues and picnics, providing the perfect refreshing finale to a meal. Every time I make them, I'm transported back to carefree summer evenings, sharing dessert with friends as the sun sets. They've become not just a recipe in my collection, but a tradition that marks the beginning of summer—a bright, tangy reminder that the best gatherings are often accompanied by the simplest pleasures.
Frequently Asked Questions
- → Can I use regular limes instead of key limes?
- Yes! Regular lime juice works perfectly in this recipe. Key limes are smaller and slightly more aromatic, but standard limes make an excellent substitute.
- → How do I know when the bars are done baking?
- The filling should be set but still slightly jiggly in the center. The top shouldn't brown. If it starts to brown, your oven might be too hot.
- → Can I make these bars gluten-free?
- Yes, simply substitute the graham crackers with gluten-free graham crackers or cookies to make a gluten-free crust.
- → How far in advance can I make these?
- These bars can be made up to 2 days in advance and stored in the refrigerator. The flavors actually improve after a day of chilling.
- → What can I top these bars with?
- While delicious on their own, you can top them with whipped cream, additional lime zest, thin lime slices, or a light dusting of powdered sugar before serving.