
 Pin it
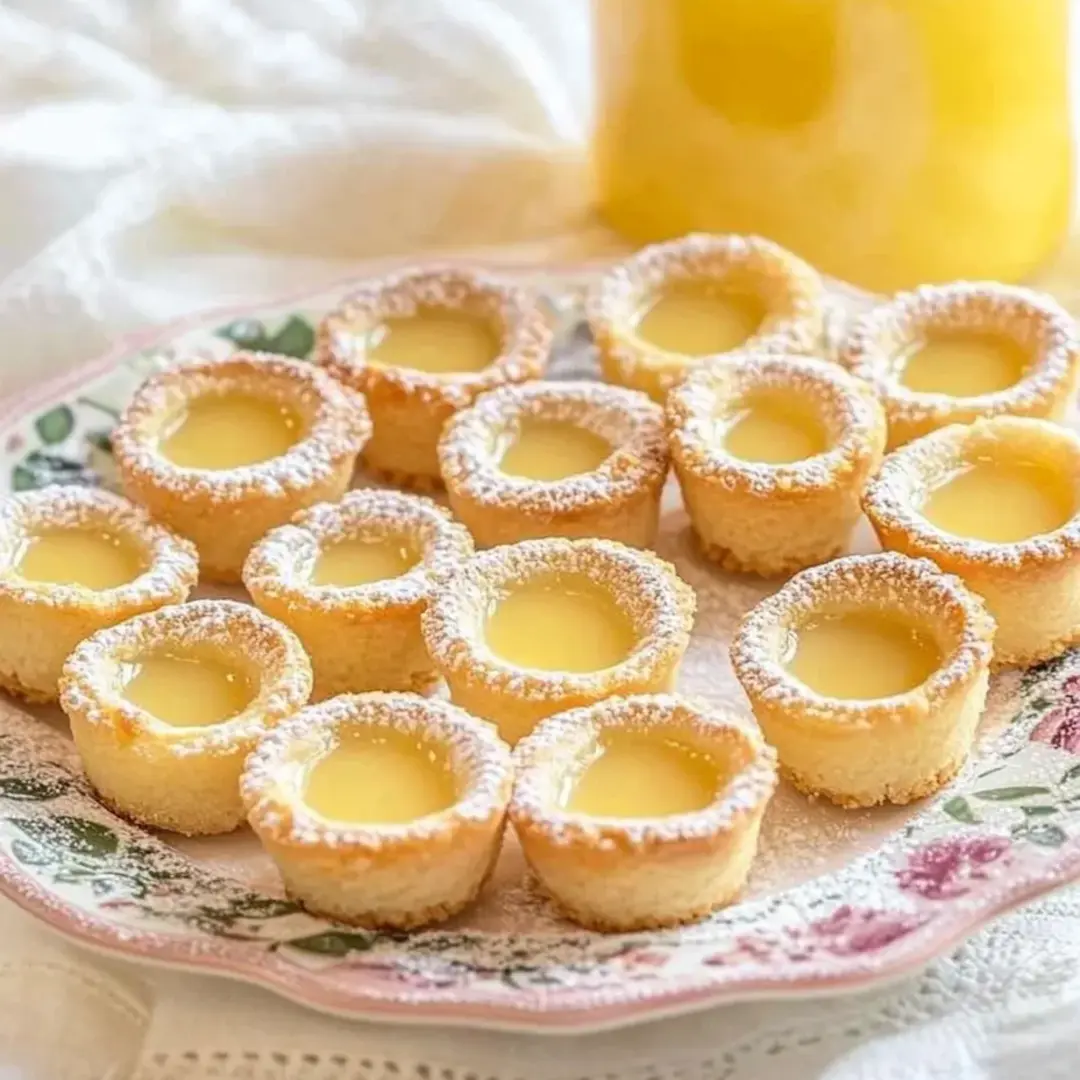
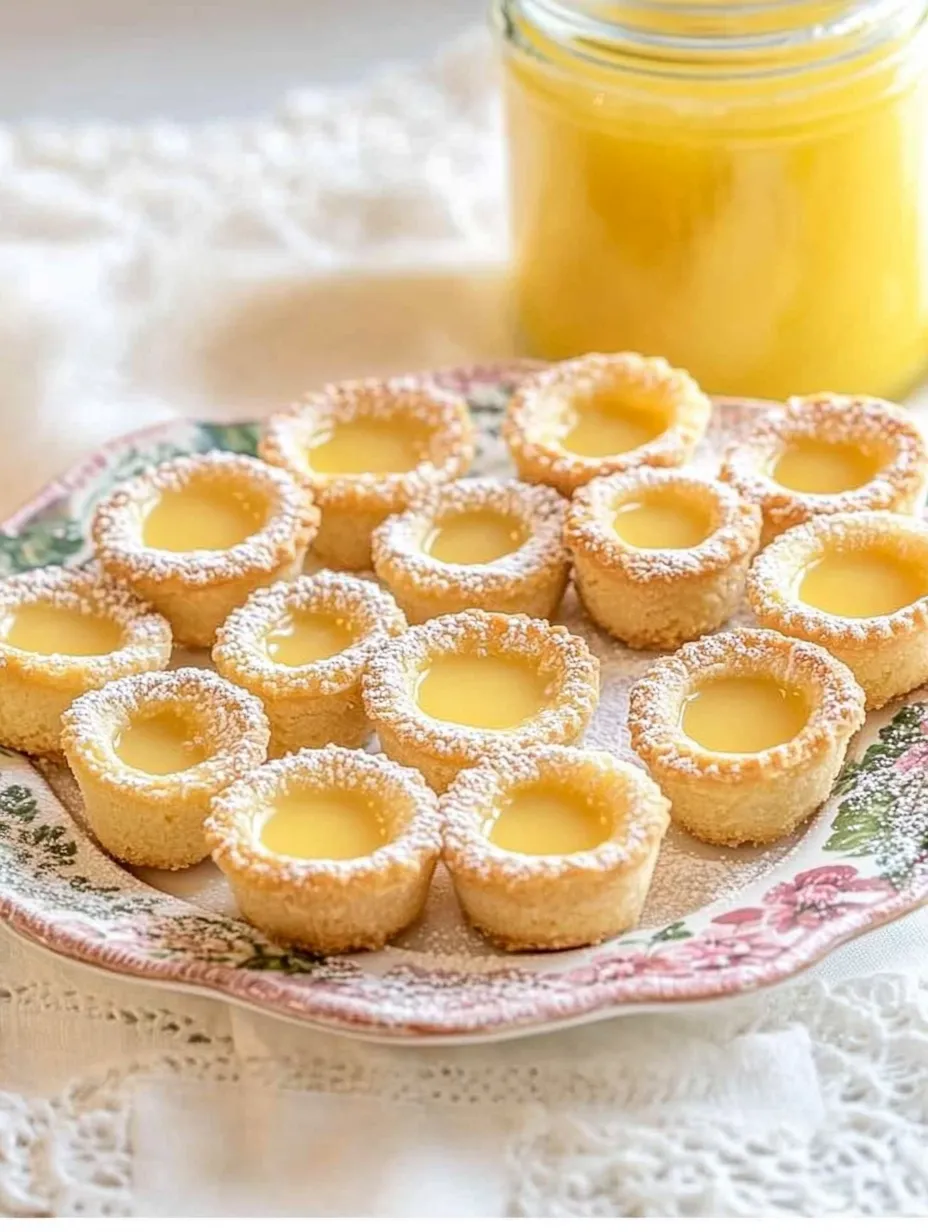
These delightful lemon bar cookie cups transform the classic lemon bar experience into an adorable, portable treat that combines buttery cookie cups with silky smooth lemon curd. The beauty of these little gems lies in their simplicity – they deliver all the bright, tangy-sweet flavor of traditional lemon bars but in a more manageable, less messy form. The tender, slightly crumbly cookie base creates the perfect vessel for holding the luscious homemade lemon curd, while a dusting of powdered sugar adds the finishing touch.
I discovered these little treasures while experimenting with cookie cup variations in my kitchen. After the first batch came out of the oven and I filled them with fresh lemon curd, my husband grabbed one before they had even cooled properly. The look on his face told me everything – these were something special that would become a staple in our dessert rotation.
Ingredients
- All-purpose flour: Creates the tender structure for the cookie cups; measuring accurately ensures they'll have the perfect crumbly-yet-sturdy texture
- Powdered sugar: Gives the cookie base a melt-in-your-mouth quality that complements the lemon filling beautifully
- Butter: Use unsalted butter at room temperature for best results; it creates richness and that distinctive shortbread-like flavor
- Vanilla extract: Adds depth to the cookie cups that balances the bright lemon flavor
- Lemons: Fresh lemons are absolutely essential for the curd; you'll need both the juice and zest for the most vibrant flavor
- Granulated sugar: Balances the tartness of the lemons in the curd without dulling their brightness
- Eggs: Provide structure and richness to the lemon curd; using whole eggs simplifies the process
- Salt: Just a pinch enhances all the flavors without making the cookies taste salty

Step-by-Step Instructions
- Prepare your cookie dough:
- Begin by creaming room temperature butter with powdered sugar until light and fluffy, about 2-3 minutes. This creates the foundation for the tender cookie texture. Add vanilla extract and beat until incorporated. The vanilla will provide subtle depth to balance the bright lemon filling.
- Mix the dry ingredients:
- In a separate bowl, whisk together flour and salt. Gradually add this mixture to the butter mixture, mixing just until combined. Overmixing can make the cookies tough, so stop as soon as the flour disappears into the dough.
- Shape the cookie cups:
- Scoop approximately 1 tablespoon of dough and roll into balls. Place each ball into the cups of a mini muffin tin, pressing gently in the center with your thumb or the back of a rounded measuring spoon to create a depression. The dough should come about halfway up the sides of each cup.
- Bake to perfection:
- Place the filled muffin tin in a preheated 350°F oven and bake for 10-12 minutes until the edges are just beginning to turn golden. The cookies may puff up slightly during baking, so while they're still warm, use the back of a measuring spoon to redefine the cup shape if needed.
- Cool completely:
- Allow the cookie cups to cool in the pan for about 5 minutes before carefully removing them to a wire rack to cool completely. Patience is key here – if you try to remove them too soon, they may crumble.
- Prepare the lemon curd:
- While the cookies cool, make the lemon curd by creaming butter and sugar together until light and fluffy. Slowly beat in whole eggs one at a time, ensuring each is fully incorporated before adding the next. This unique method prevents curdling later.
- Add lemon juice and zest:
- Beat in fresh lemon juice and finely grated lemon zest until well combined. The mixture will look curdled at this point, but don't worry – this is normal.
- Cook the curd:
- Transfer the mixture to a medium saucepan and cook over medium-low heat, stirring constantly with a wooden spoon, until the mixture thickens enough to coat the back of the spoon, about 5-7 minutes. Be patient and keep the heat moderate to prevent scrambling the eggs.
- Cool the curd:
- Remove from heat and transfer to a bowl. Press plastic wrap directly on the surface to prevent a skin from forming, and refrigerate until completely cooled and thickened.
- Assemble the cookie cups:
- Once both components are completely cool, fill each cookie cup with about a teaspoon of lemon curd. The filling should come just to the top of the cup without overflowing.
- Finish with powdered sugar:
- Just before serving, dust the filled cookie cups with powdered sugar for a classic lemon bar appearance and extra sweetness that balances the tartness of the lemon.
The Versatility Factor
These cookie cups are remarkably adaptable to different occasions and preferences. During summer months, I've added fresh blueberries on top for a colorful twist, while around the holidays, a tiny sprig of rosemary creates a festive appearance that's absolutely stunning on cookie platters.
Make-Ahead Magic
One of the greatest advantages of these lemon bar cookie cups is their make-ahead potential. The cookie cups can be baked up to three days in advance and stored in an airtight container. The lemon curd keeps beautifully in the refrigerator for up to a week, allowing you to assemble just before serving for the freshest experience.
The Joy of Homemade Lemon Curd
Making your own lemon curd might seem intimidating, but this foolproof method removes all the stress. The technique of creaming butter and sugar first, then adding eggs before the lemon juice, creates a stable emulsion that results in silky smooth curd every time—no straining required!
My grandmother was a magnificent baker who specialized in anything lemon. The first time I made these cookie cups, their flavor instantly transported me back to her kitchen. That bright, sunny flavor combined with buttery sweetness is the taste of my childhood summers. Now when I make them with my own children, the tradition continues as they eagerly line up to help fill each little cup with sunshine-yellow curd.
My final thought about these lemon bar cookie cups is that they represent the perfect intersection of classic flavor and modern convenience. They maintain everything we love about traditional lemon bars—that perfect sweet-tart balance and buttery base—while eliminating the cutting and serving challenges. Whenever I bring these to gatherings, they're the first dessert to disappear, and I always return home with recipe requests rather than leftovers. For lemon lovers, these little cups of sunshine are an absolute must-try that might just become your new signature dessert.
Frequently Asked Questions
- → Can I use store-bought lemon curd instead of making it from scratch?
- Yes, you can substitute about 3/4 cup of store-bought lemon curd if you're short on time. However, homemade curd typically has a fresher, more vibrant flavor that makes these cookie cups special.
- → How do I store these lemon bar cookie cups?
- Store them in a single layer in an airtight container in the refrigerator for up to 5 days. Let them come to room temperature before serving for the best flavor and texture.
- → Can I freeze these cookie cups?
- Yes, they freeze well for up to 3 months. Place them in an airtight container with parchment paper between layers. Thaw overnight in the refrigerator before serving.
- → Can I use all-purpose flour instead of the mix of all-purpose and whole wheat?
- Yes, you can use 2 1/4 cups of all-purpose flour instead of the flour mixture. The whole wheat adds a slight nuttiness that complements the lemon, but all-purpose works perfectly fine.
- → What can I do if my lemon curd is too runny?
- If your lemon curd hasn't thickened enough, it likely needs to cook longer. Return it to the heat and continue cooking while stirring constantly until it coats the back of a spoon. Remember it will thicken further upon cooling.