
 Pin it
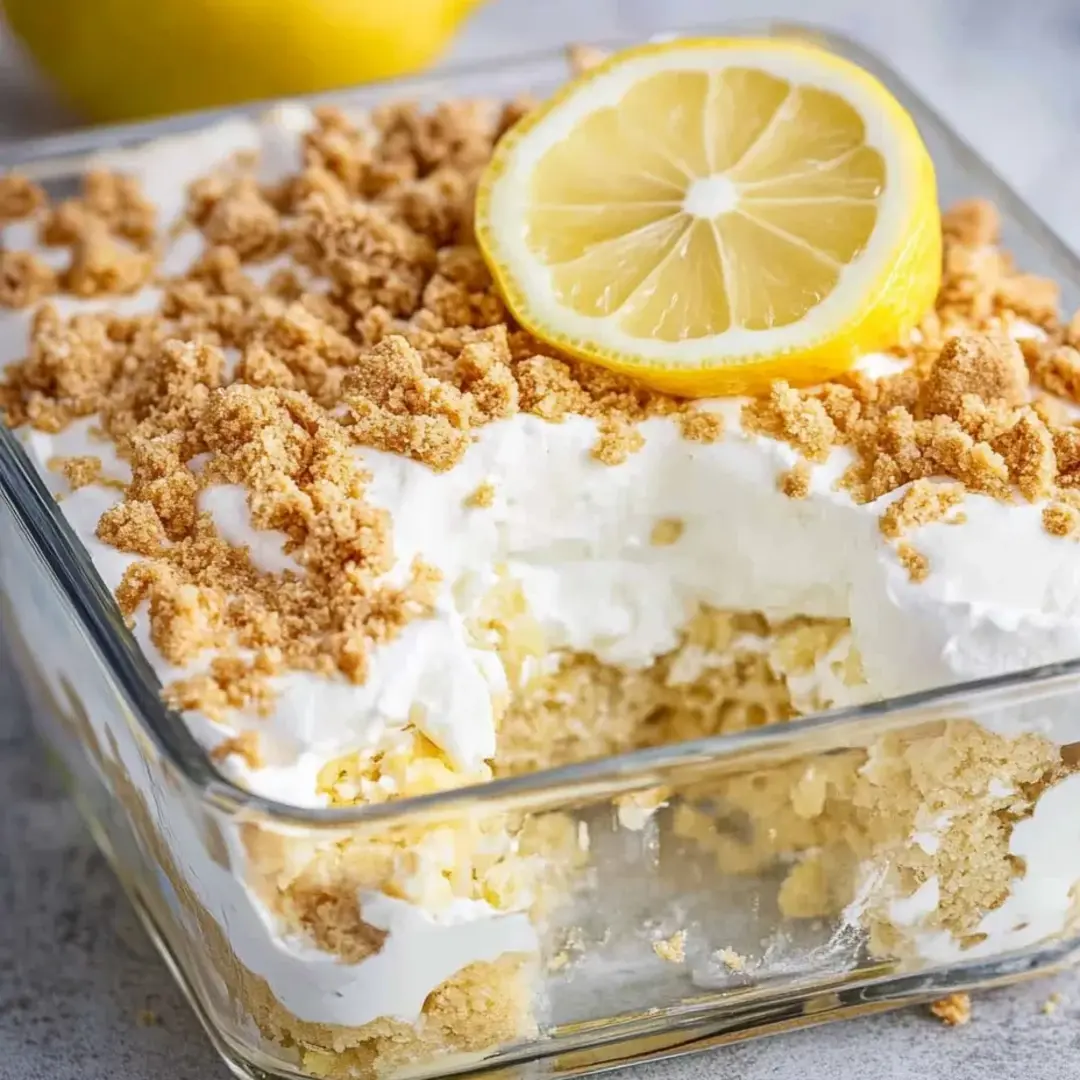
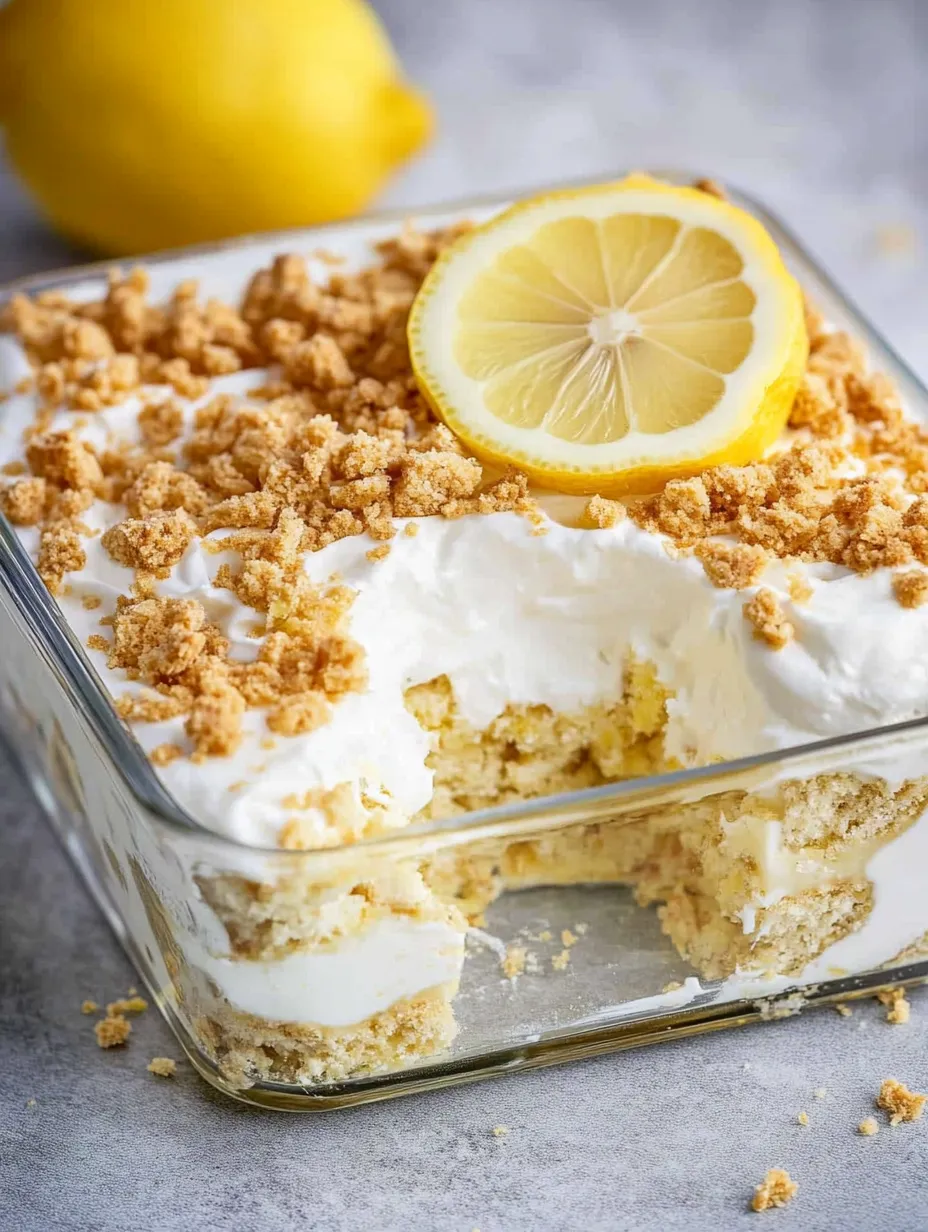
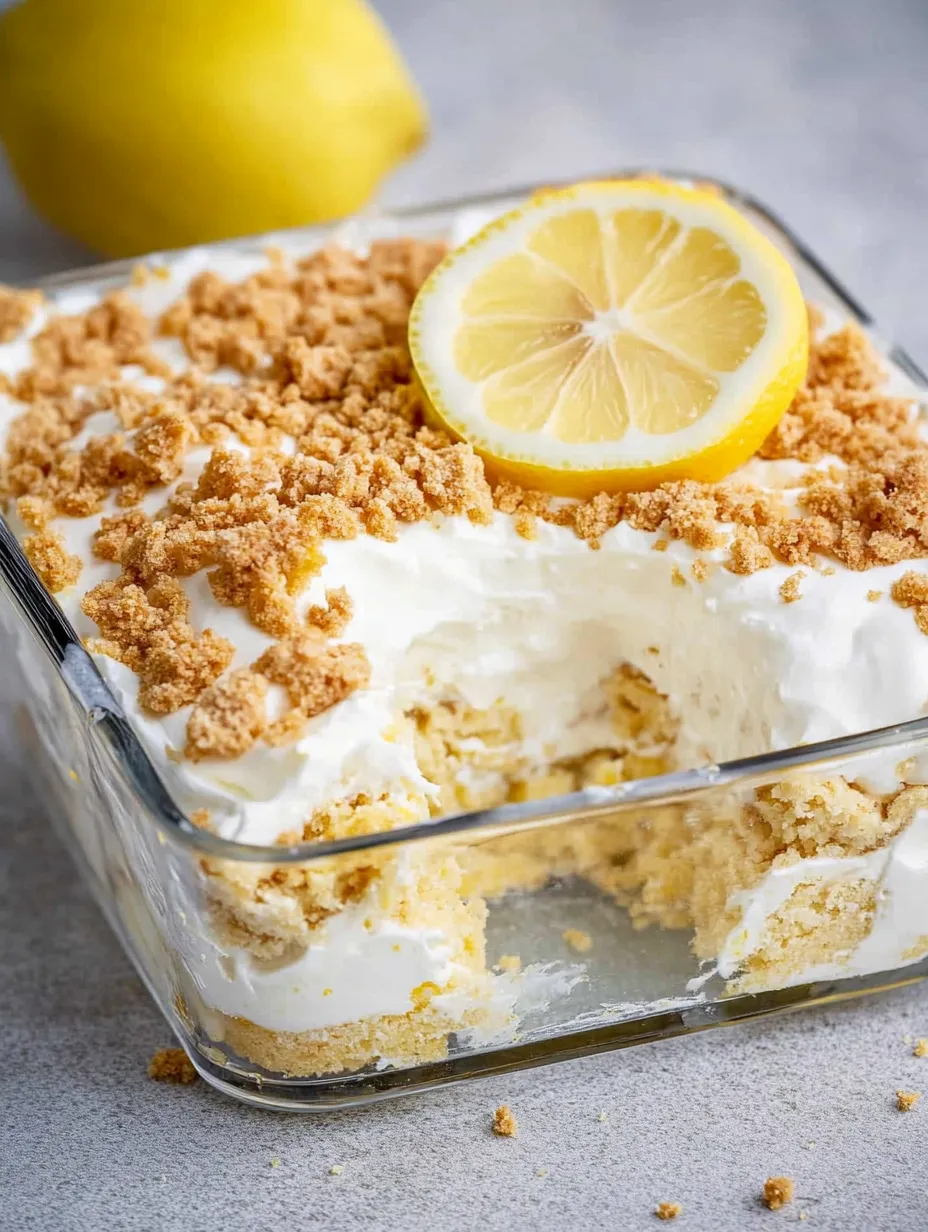
Lemon Lush Dessert combines the bright, tangy flavor of lemon with the subtle sweetness of Golden Oreos to create a refreshing no-bake treat that's perfect for warm weather gatherings. This layered dessert features a buttery cookie base topped with creamy lemon pudding, a rich lemon curd layer, and a cloud-like whipped topping that melts in your mouth. The contrasting textures—from the slightly crunchy cookie base to the silky pudding and fluffy topping—create an experience that's both indulgent and light. Best of all, it comes together without ever turning on your oven, making it ideal for summer potlucks or any time you crave something sweet without the heat.
I brought this dessert to our neighborhood block party last month, and I was shocked at how quickly it disappeared! Even my friend's husband, who claims he doesn't like "fancy desserts," came back for seconds and then asked me for the recipe. The next day, I got three separate text messages from neighbors wanting to know how to make it themselves!
Ingredients
- Golden Oreos: These vanilla sandwich cookies create a sweet, buttery base that complements the lemon without competing with it. Their subtle vanilla flavor provides the perfect foundation for the brighter layers to follow. If you can find the limited-edition lemon Oreos, they work beautifully too.
- Butter: Binds the crushed cookies together and adds rich flavor to the base. Melted butter helps the crumbs stick together just enough while maintaining some texture. Salted butter adds a nice contrast to the sweetness of the cookies.
- Instant pudding mix: Creates the silky, creamy second layer with minimal effort. Lemon flavor intensifies the citrus profile, but vanilla or cheesecake flavors work wonderfully too. Make sure to use instant (not cook-and-serve) for the right consistency.
- Milk: Activates the pudding mix but using less than the box directions creates a firmer set that holds up better in the layers. Whole milk provides the richest results, but 2% works well too. Avoid non-dairy milks as they won't set the pudding properly.
- Lemon curd: The star ingredient that delivers intense, authentic lemon flavor. Store-bought is convenient, but homemade offers unparalleled freshness and tang. This layer provides the true lemon punch that makes this dessert special.
- Whipped topping: Lightens the texture and adds creamy sweetness that balances the tart lemon. Using prepared whipped topping ensures stability for days in the refrigerator. Its neutral flavor lets the lemon shine while adding that essential cloudlike texture.
- Lemon zest: Optional garnish that adds visual appeal and an aromatic lemon boost. The oils in the zest contain concentrated lemon flavor that enhances the entire dessert with just a light sprinkle.
Step-by-Step Instructions
- Step 1:
- Prepare the cookie base properly - Begin by placing about 24 Golden Oreos (one standard package) in a large zip-top bag, seal it removing excess air, and crush them using a rolling pin. Aim for a mixture of fine crumbs with some slightly larger pieces for texture variation. You want them broken down but not completely pulverized into dust. Alternatively, pulse them in a food processor with 4-5 short bursts. Transfer the crushed cookies to a medium bowl and pour in 5 tablespoons of melted butter. Stir with a fork until all crumbs are moistened and the mixture resembles wet sand. The consistency should be such that when you press some between your fingers, it holds together but still crumbles easily.
- Step 2:
- Create the foundation layer - Gently transfer your cookie mixture into an 8×8 or 9×9-inch square baking dish. Unlike traditional crusts, don't press this mixture too firmly—a light touch with your fingertips to create an even layer is sufficient. This looser approach allows the cookies to partially soften as the dessert chills, creating that perfect texture midway between crust and cake. Make sure to bring the crumbs all the way to the edges and corners of the dish for even dessert slices later.
- Step 3:
- Mix the pudding layer with care - In a large mixing bowl, combine one 3.4-ounce box of instant lemon pudding mix with 1½ cups cold milk (less than the package directions). Using a hand mixer or whisk, beat for about 2 minutes until the mixture begins to thicken. The pudding will seem thinner than usual—this is intentional as it will continue to set and we'll be folding in whipped topping. Let it stand for about 5 minutes to begin setting while you prepare the next step.
- Step 4:
- Create the perfect pudding texture - Gently fold 1 cup of whipped topping into the partially set pudding using a rubber spatula. Use a light hand and an under-and-over motion rather than stirring to maintain as much air as possible in the mixture. Continue folding just until the mixture is uniform with no streaks of white remaining. The result should be a light, mousse-like consistency that's still pourable but much fluffier than the original pudding.
- Step 5:
- Develop the lemon curd layer - In a separate bowl, combine ¾ cup lemon curd with ½ cup whipped topping. Fold together gently until just combined, using the same careful technique as the previous step. This lightens the lemon curd, making it easier to spread while stretching it further. The whipped topping also tempers the intensity of the lemon curd slightly, creating a more balanced flavor that works harmoniously with the other layers.
- Step 6:
- Assemble with precision - Pour the pudding mixture over the cookie base, using your spatula to spread it into an even layer that reaches the edges of the dish. Next, dollop the lemon curd mixture over the pudding layer and very gently spread it to cover the pudding. Work slowly to avoid mixing the layers—they should remain distinct. Finally, spread the remaining whipped topping (about 1½ cups) over the top as the final layer, creating decorative swirls if desired.
- Step 7:
- Chill thoroughly for proper setting - Cover the dish with plastic wrap without touching the surface (or use the lid if your container has one) and refrigerate for at least 2 hours, though overnight is even better. This chilling time is crucial as it allows the flavors to meld and the cookies to soften slightly, creating that perfect "lush" texture that gives this dessert its name. The layers also firm up during chilling, making the dessert easier to slice cleanly.
- Step 8:
- Garnish before serving - Just before serving, add a sprinkle of fresh lemon zest and/or small slivers of lemon for an elegant presentation that hints at the flavors within. For special occasions, consider adding small mint leaves or even edible flowers like violets for a truly impressive display. Cut into squares with a sharp knife, wiping the blade clean between cuts for the neatest presentation.
The Magic of No-Bake Desserts
There's something particularly satisfying about creating an impressive dessert without ever turning on your oven. Beyond the obvious benefit of keeping your kitchen cool during warm weather, no-bake desserts like this Lemon Lush have a unique quality that baked desserts often lack. The layers maintain their distinct textures and flavors while still melding together as they chill. The cookies soften just enough to provide structure without becoming soggy, creating an almost cake-like quality. This transformation happens slowly in the refrigerator, which is why these desserts often taste even better the second day.
The Art of Layering
The true beauty of a lush dessert lies in its distinct layers, each contributing something special to the overall experience. The key to perfect layers is patience and a gentle touch. When spreading each component, take your time and use an offset spatula if you have one. Work from the center outward with light, sweeping motions rather than stirring or pressing too firmly. If you find the layers want to mix, try chilling the dessert for 20-30 minutes between adding each layer. This extra step takes more time but ensures picture-perfect layers that will impress when sliced.
The Versatility Factor
One of the greatest aspects of this Lemon Lush recipe is its incredible adaptability. Think of it as a basic formula rather than a rigid recipe: cookie base + creamy filling + flavor accent + whipped topping. While the lemon version is spectacular, you can easily transform this into a completely different dessert by switching the components. Try chocolate sandwich cookies with chocolate pudding and a layer of raspberry jam. Or graham crackers with cheesecake pudding and a layer of blueberry preserves. The possibilities are endless, making this a recipe you'll return to again and again with different variations.
Making It Ahead for Gatherings
This dessert is the perfect make-ahead option for entertaining. In fact, it benefits from being prepared at least 8 hours before serving, allowing the flavors to develop and the textures to meld perfectly. It will keep beautifully in the refrigerator for up to 3 days, though the cookie layer will continue to soften over time. If making for a potluck or gathering, consider preparing it in a disposable aluminum pan with a plastic lid for easy transport. The stable layers travel well, and the dessert can sit at room temperature for up to 2 hours during service without compromising texture or food safety.
I learned the hard way about using the right amount of milk in the pudding layer. The first time I made this, I followed the package directions exactly, and while it tasted delicious, the layers sort of melded together when I sliced it. Now I always use about ¼ cup less milk than called for, and the difference in how beautifully it slices is remarkable!
This Lemon Lush has become my signature potluck contribution, the dessert friends specifically request when we have gatherings. There's something about the combination of that buttery cookie layer with the bright, tangy lemon that just screams "summer" to me. What I love most is watching people take their first bite – there's always that moment of surprise when they taste how the simple ingredients have transformed into something that tastes so sophisticated. It's the perfect balance of impressive and easy, which is exactly what I'm looking for in a dessert that needs to feed a crowd but doesn't take all day to make.
Frequently Asked Questions
- → Can I make this dessert ahead of time?
- Yes, this is a perfect make-ahead dessert. You can prepare it up to 2 days in advance and keep it refrigerated until ready to serve.
- → What can I substitute for Golden Oreos?
- You can use regular Oreos, vanilla wafers, graham crackers, or any crisp sandwich cookie. The flavor will change slightly depending on your choice.
- → Can I use homemade whipped cream instead of whipped topping?
- Yes, you can substitute with 3 cups of freshly whipped cream (about 1½ cups heavy cream whipped to stiff peaks with 3 tablespoons powdered sugar).
- → How long does this dessert last in the refrigerator?
- This dessert will stay fresh for up to 4 days when stored covered in the refrigerator. The cookies will soften more over time.
- → Can this dessert be frozen?
- Yes, you can freeze it for up to 1 month. Let it thaw in the refrigerator overnight before serving. Note that the texture might change slightly after freezing.