
 Pin it
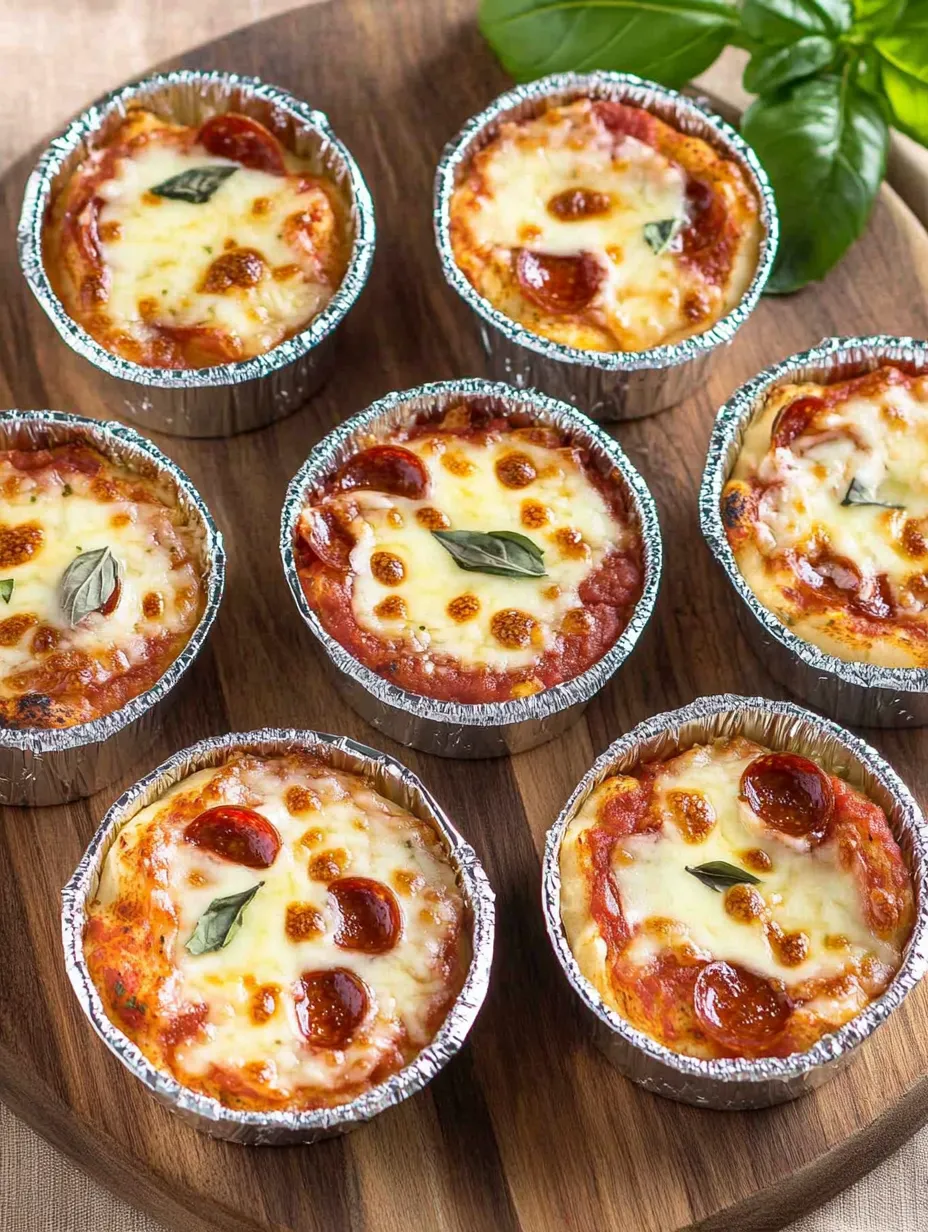
These Mini Pizza Pot Pies brilliantly combine two beloved comfort foods into one irresistible handheld treat. Each bite delivers the perfect harmony of textures – a golden, buttery biscuit crust infused with Italian herbs and garlic gives way to a gooey, cheesy center studded with savory pepperoni. The clever individual portion design creates the ideal ratio of crust to filling, ensuring a perfect balance of flavors in every mouthful. Unlike traditional pizza where toppings can slide off, these pot pies keep all that delicious goodness neatly contained, making them perfect for casual entertaining. Simple to prepare yet impressive to serve, these versatile little cups transform classic pizza flavors into an innovative appetizer that disappears within minutes of hitting the table.
I discovered these delightful treats when hosting an impromptu game night with friends. With limited ingredients and time, I needed something substantial yet simple that would please a crowd. These pizza pot pies were such a hit that my brother-in-law, who typically shows restraint with appetizers to "save room for the main course," devoured four before dinner and requested them for his birthday gathering the following month! My teenage nephew now makes them regularly for his friends, texting me photos of his increasingly creative filling combinations. What began as a quick solution to unexpected guests has become our family's most requested party food.
Ingredients
- 1 can (8 count) refrigerated biscuits: Creates the perfect pot pie crust with minimal effort. The biscuit dough bakes into a buttery, flaky shell that holds the fillings beautifully.
- 2 tablespoons butter, softened: Adds richness to the crust and helps it develop a beautiful golden color. Use unsalted butter to control the salt level precisely.
- 1 tablespoon olive oil: Combines with the butter to create a flavorful coating for the biscuit crust. The olive oil adds a subtle Mediterranean note that complements the pizza flavors.
- 1/2 teaspoon garlic powder: Infuses the crust with aromatic garlic flavor without the risk of burning that comes with fresh garlic. Every great pizza experience needs that garlic undertone.
- 1 teaspoon Italian seasoning: Provides the classic herb profile essential to pizza flavor. This blend typically includes basil, oregano, rosemary, and thyme for authentic Italian taste.
- 1/4 teaspoon salt: Enhances all the flavors and brings balance to the recipe. Diamond Crystal kosher salt distributes more evenly than table salt.
- 1/4 teaspoon black pepper: Adds subtle warmth and depth to the flavor profile. Freshly ground provides the most aromatic punch.
- 1/2 cup pasta sauce or pizza sauce: Forms the traditional tomato base that defines pizza flavor. Choose a high-quality sauce with minimal added sugar for the best taste.
- 1 1/2 cups shredded mozzarella cheese: Creates that essential gooey, stretchy texture that makes pizza irresistible. Freshly shredded melts more smoothly than pre-packaged varieties.
- 1/2 cup pepperoni, chopped: Provides classic pizza flavor with savory, slightly spicy notes. Chopping allows better distribution throughout each pot pie.
- Cooking spray: Ensures the pot pies release cleanly from the muffin cups for perfect presentation. A light touch prevents excessive greasiness.
I'm particularly passionate about the herb-infused butter spread in this recipe. After experimenting with various approaches, I discovered that combining butter with olive oil creates the perfect consistency while adding Mediterranean flavor notes. The garlic powder and Italian herbs bloom in this warm fat mixture, releasing their aromatic compounds and infusing the biscuit dough with depth of flavor that takes these pot pies from good to unforgettable.
Step-by-Step Instructions
- Step 1:
- Begin by preheating your oven to 350°F (175°C). This moderate temperature allows the biscuit crust to bake through completely while giving the cheese time to melt perfectly without burning. Position the rack in the middle of the oven for even heat distribution.
- Step 2:
- In a small bowl, combine the softened butter, olive oil, salt, garlic powder, Italian seasoning, and black pepper. Mix thoroughly until you have a smooth, well-incorporated herb butter. This flavorful mixture will infuse the biscuit crust with savory goodness as it bakes. Set aside at room temperature to maintain spreadability.
- Step 3:
- Prepare your baking vessels by lightly coating 8 standard-sized muffin cups with cooking spray. Use a paper towel to blot away any excess oil pooling at the bottom. This light touch prevents the pot pies from becoming greasy while ensuring they'll release cleanly after baking. Alternatively, you can use 3½-inch round foil muffin cups placed on a baking sheet.
- Step 4:
- Open the can of refrigerated biscuits and separate them into individual pieces. Take each biscuit and gently press it into a muffin cup, working it up the sides to create a cup shape. The dough will initially resist and spring back, so continue pressing patiently until it stays in place, forming a well for the fillings. The bottom should be slightly thinner than the sides.
- Step 5:
- Using a fork, prick the bottom and sides of each biscuit cup several times. This prevents the dough from puffing up during baking, maintaining the well shape needed to hold the fillings. These small holes allow steam to escape while creating a more even baking surface.
- Step 6:
- Brush the inside of each biscuit cup generously with the prepared herb butter mixture. Use a pastry brush to ensure even coverage, reaching all the way up the sides. This layer adds flavor while creating a slight barrier that helps prevent the sauce from making the crust soggy.
- Step 7:
- Spoon approximately ½ heaping teaspoon of pasta sauce into each biscuit cup, spreading it lightly to cover the bottom. This thin layer provides the classic tomato base flavor without making the crust soggy. The restraint here is intentional—too much sauce can prevent the crust from baking properly.
- Step 8:
- Layer each cup with a heaping tablespoon of shredded mozzarella, followed by ½ tablespoon of chopped pepperoni. The layering approach ensures good distribution of fillings throughout the pot pie rather than having all the cheese at the bottom or top. The first cheese layer will melt into the sauce, creating a luscious base.
- Step 9:
- Add another layer of mozzarella (about 1 tablespoon) on top of the pepperoni, followed by another ½ tablespoon of pepperoni. This double-layering creates pockets of cheese and pepperoni throughout the pot pie for the perfect bite every time. Finish with a light sprinkle of additional Italian seasoning on top if desired.
- Step 10:
- If using individual foil muffin cups, place them on a baking sheet before putting them in the oven. This makes them easier to handle and prevents any potential spillover from dripping in your oven. The baking sheet also helps conduct heat evenly to the cups.
- Step 11:
- Bake for 20-23 minutes, until the edges of the biscuit crust are golden brown and the cheese is completely melted and bubbly. The perfectly baked pot pie should have a crisp exterior crust with a soft, fully cooked interior. If the tops begin to brown too quickly, you can loosely cover with foil for the remaining baking time.
- Step 12:
- Remove from the oven and allow the pot pies to cool for 3-5 minutes before serving. This brief resting period allows the cheese to set slightly while letting the crusts firm up enough to hold their shape when removed from the muffin cups. It also prevents burnt mouths from overly enthusiastic guests!
- Step 13:
- Gently remove each pot pie from the muffin tin using a small offset spatula or butter knife to loosen the edges if necessary. The pot pies should release easily if the cups were properly greased. Arrange on a serving platter or board for a beautiful presentation.
- Step 14:
- Serve warm, when the cheese is still gooey and the flavors are at their peak. The contrast between the crisp, buttery crust and the molten filling creates the perfect textural experience. Optional garnishes include a sprinkle of fresh basil chiffonade or a light dusting of grated Parmesan cheese.

Creative Filling Variations
While the classic pepperoni and cheese combination is always a crowd-pleaser, these versatile pot pies welcome countless variations to suit any taste preference:
- Supreme Style: Add finely diced green peppers, black olives, and cooked Italian sausage for a supreme pizza experience in pot pie form. The key is chopping all components small enough to fit nicely in the cups.
- Margherita Inspired: Layer fresh mozzarella pearls with a sprinkle of fresh basil added after baking. A drizzle of good quality olive oil just before serving elevates this simple variation to gourmet status.
- Buffalo Chicken: Toss diced cooked chicken with buffalo sauce before adding to the cups, then top with a mixture of mozzarella and blue cheese. The spicy-cool combination makes these irresistible.
- Mediterranean: Incorporate chopped artichoke hearts, feta cheese, and a few pine nuts for a Mediterranean twist. The feta adds a tangy note that complements the biscuit crust beautifully.
When experimenting with variations, remember the cardinal rule: avoid water-releasing ingredients like fresh tomatoes, mushrooms, or spinach, which can make the crust soggy. If you must use these, pre-cook them to remove excess moisture first.
Make-Ahead and Storage Tips
These pizza pot pies are perfect for entertaining because you can prepare them in advance:
- Same-Day Prep: Assemble the pot pies up to 4 hours before baking. Cover lightly with plastic wrap and refrigerate until ready to bake. Allow them to sit at room temperature for 15 minutes before baking to ensure even cooking.
- Freezer-Friendly: Prepare and bake the pot pies as directed, then cool completely. Wrap individually in plastic wrap followed by foil and freeze for up to 2 months. Reheat from frozen in a 350°F oven for about 15-20 minutes until heated through.
- Leftovers: Store any leftover baked pot pies in an airtight container in the refrigerator for 3-4 days. Reheat in a 325°F oven for 10 minutes to restore the crisp crust texture. Microwaving is possible but will result in a softer crust.
For the best party planning strategy, consider making several batches with different fillings and freezing them. This gives you a ready supply of impressive appetizers that can be baked directly from frozen whenever unexpected guests arrive.
I learned the importance of properly pricking the dough through a memorable kitchen disaster. During my first attempt, I skipped this step, assuming it was unnecessary. Halfway through baking, I peeked in the oven to find the biscuit dough had puffed dramatically, pushing all the fillings out and creating a cheesy mess all over my oven floor! Now I'm meticulous about creating those steam vents with a fork, which ensures the dough maintains its cup shape while baking evenly from crust to center. This simple step transforms potentially uneven, misshapen cups into perfectly formed individual pot pies.
These Mini Pizza Pot Pies represent the perfect fusion of convenience and creativity – they transform simple ingredients into something that feels special without requiring advanced culinary skills. I love watching guests' faces light up when they take their first bite and discover that perfect harmony of crisp crust and gooey filling. There's something particularly satisfying about reinventing familiar flavors in new forms, especially when the result brings such joy to family and friends. Whether served at a casual game night or an elegant cocktail party, these versatile little cups prove that sometimes the most beloved recipes are born from necessity and imagination rather than complicated techniques.
Frequently Asked Questions
- → Can I add other pizza toppings to these pot pies?
- Absolutely! Just make sure any vegetables or meats are pre-cooked and finely chopped. Good options include cooked Italian sausage, finely diced bell peppers, olives, or mushrooms.
- → Can I make these ahead of time?
- You can prepare them up to the point of baking and refrigerate for a few hours. Add 2-3 minutes to the baking time if cooking straight from the refrigerator. They're best served fresh and warm.
- → What kind of refrigerated biscuits work best?
- Regular-sized refrigerated biscuits (not grands or flaky layers) work best. Look for the standard-sized tubes with 8 biscuits that are about 2-2.5 inches in diameter.
- → Can I make these in a mini muffin tin for smaller bites?
- Yes! Use mini biscuits or cut regular ones in half. Reduce the filling amounts and baking time to about 12-15 minutes, watching carefully.
- → How do I store and reheat leftovers?
- Store leftovers in an airtight container in the refrigerator for up to 3 days. Reheat in a 325°F oven for 5-7 minutes until warmed through, or about 20 seconds in the microwave (though they won't be as crispy).