
 Pin it
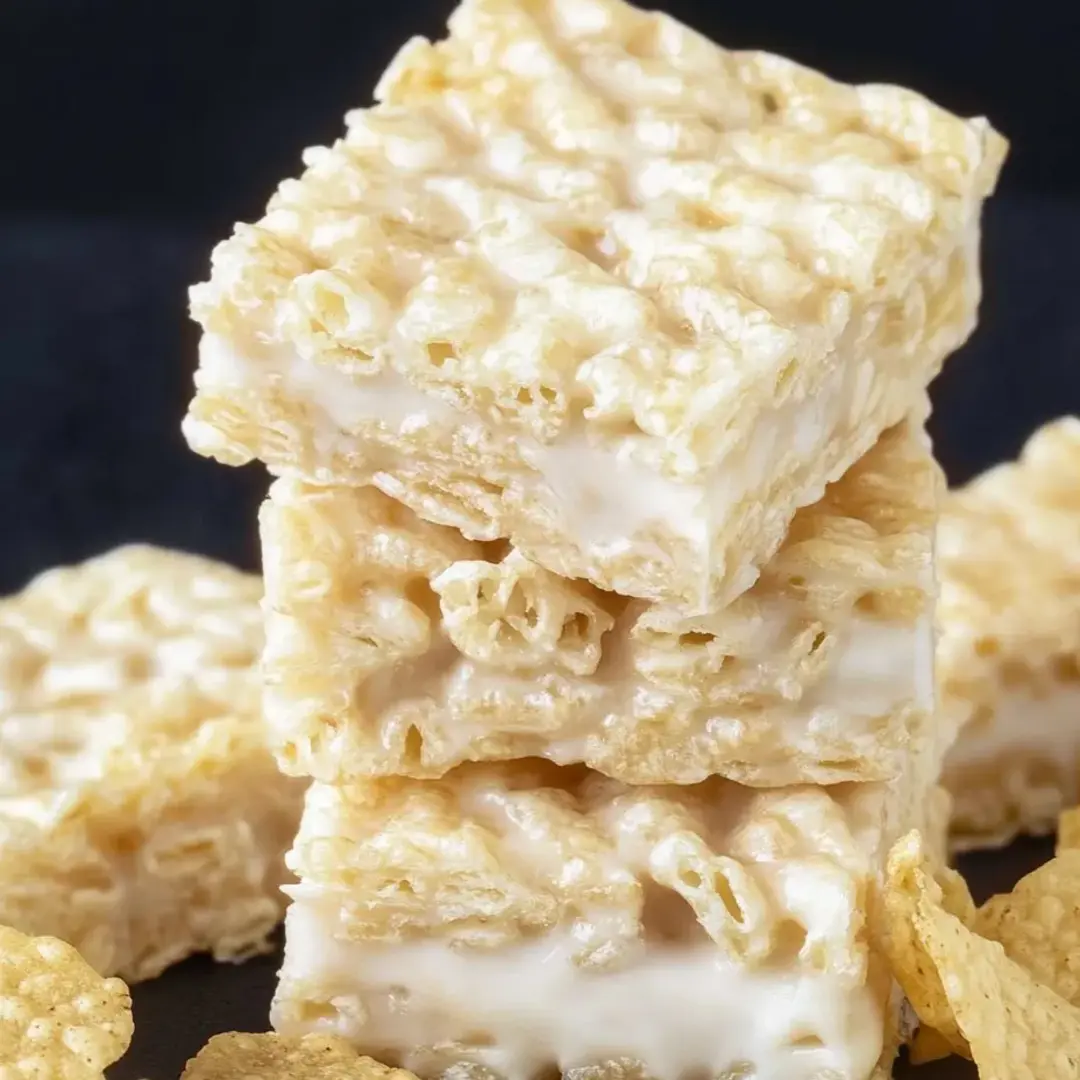
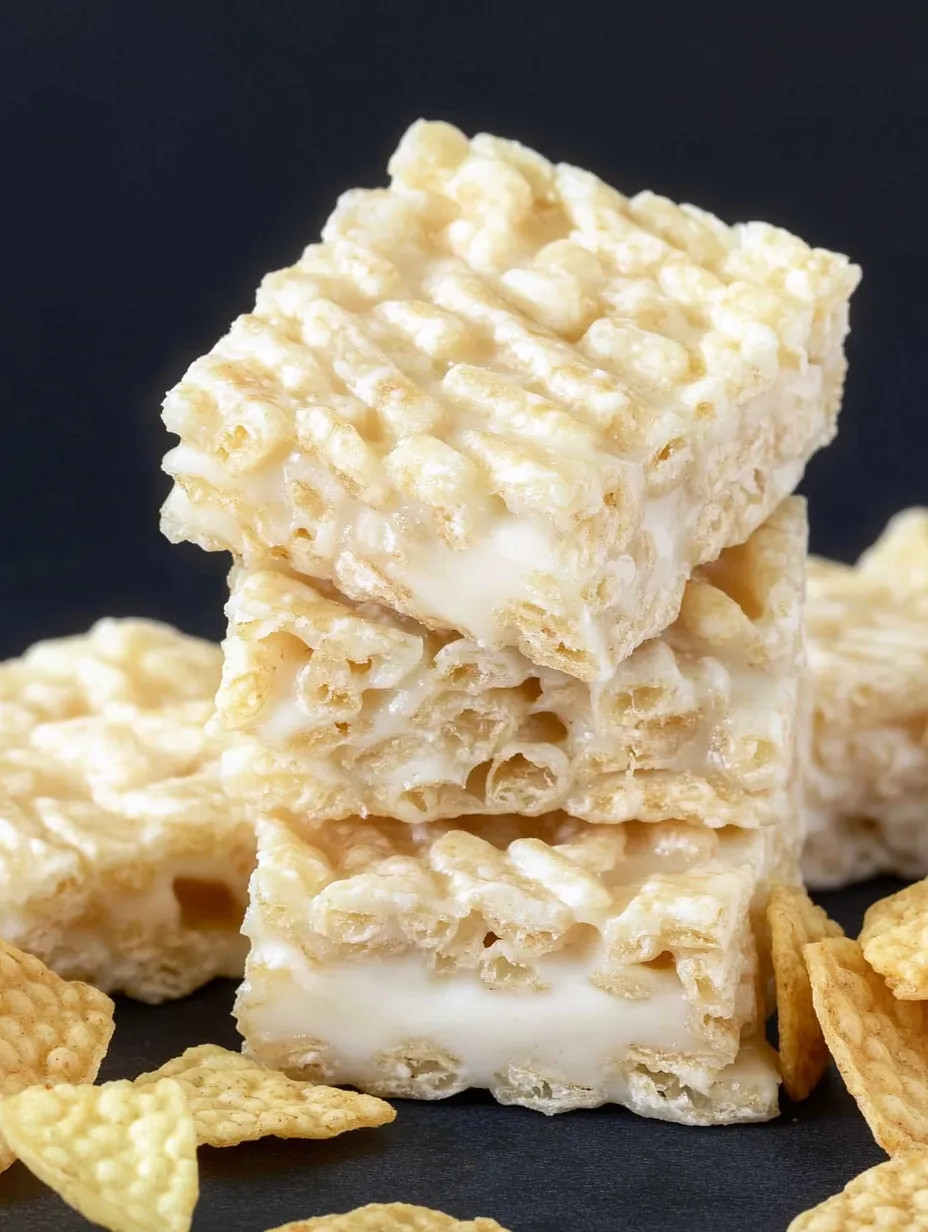
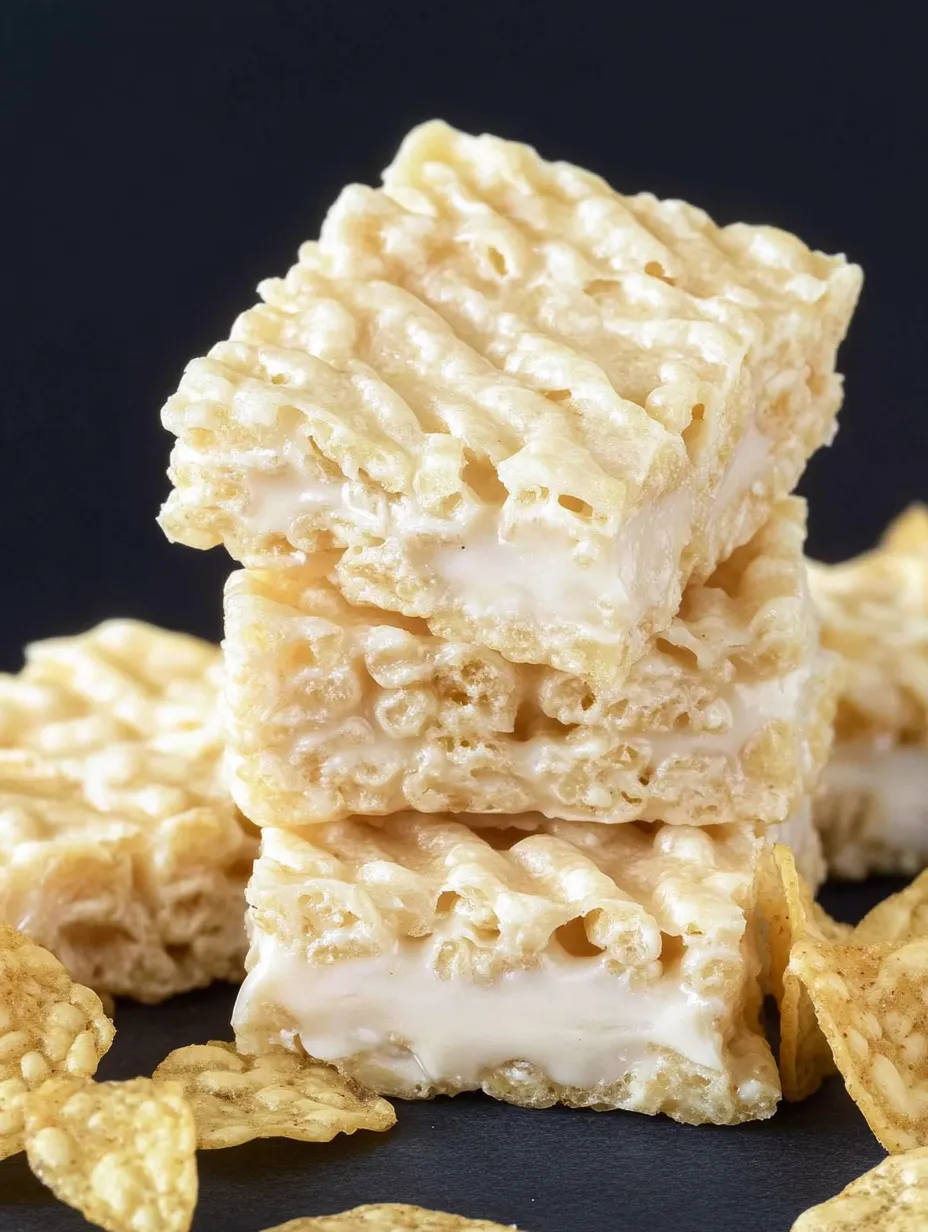
These irresistible Potato Chip Rice Krispie Treats combine the classic chewy marshmallow cereal bars we all know and love with the satisfying crunch of potato chips. The sweet and salty combination creates a mouthwatering treat that's addictively good. With just a handful of ingredients and simple steps, you can whip up these crowd-pleasing treats that disappear within minutes at any gathering.
I first tried these treats at a neighborhood potluck and couldn't believe how quickly they vanished from the dessert table. When I finally got my hands on one, I understood why - that unexpected crunch from the potato chips combined with the chewy marshmallow base was absolutely delightful! My kids now request these regularly, and I'm happy to oblige since they're so quick to make.
Ingredients
- 6 tablespoons salted butter: European-style butter like Kerrygold or President is recommended as it contains more butterfat and less water, resulting in better-tasting treats
- 16 ounces marshmallows: Jet-Puffed brand works best for the perfect texture; mini marshmallows melt more easily but regular size works too
- 3 cups Rice Krispies cereal: Kellogg's brand specifically creates the ideal texture and flavor based on extensive testing
- 7.8-ounce bag wavy/rippled potato chips: The thicker, wavy variety holds up better in the mixture, maintaining their satisfying crunch even when combined with melted ingredients
- Non-stick cooking spray or additional butter: For greasing your utensils and pan to prevent sticking
Step-by-Step Instructions
- Prepare your workspace:
- Begin by greasing a large mixing bowl, a 9×13-inch baking pan, and your silicone spatula or wooden spoon with butter or non-stick cooking spray. Using butter rather than spray provides a better flavor on the exterior of your treats.
- Prepare the potato chips and cereal:
- Break any large potato chips into smaller pieces, but avoid crushing them completely. Reserve about ½ cup of chips for topping. In your greased mixing bowl, combine the Rice Krispies cereal with the remaining potato chips and set aside.
- Melt the butter:
- Place a medium-large saucepan over LOW heat (this is crucial to prevent overheating the marshmallows). Add the butter, cut into small pieces or slices, and allow it to begin melting slowly.
- Add the marshmallows:
- Once the butter has mostly melted, add the marshmallows to the pan. Gently toss them with the butter and let them begin to melt, stirring occasionally with your greased spatula.
- Watch the melting process carefully:
- When approximately 75% of the marshmallows have melted (this typically takes 6-9 minutes), remove the pan from the heat. This prevents the marshmallows from overheating, which can cause the treats to become hard and difficult to eat.
- Finish melting off the heat:
- Continue stirring the marshmallow mixture off the heat until all the marshmallows have completely melted and the mixture is smooth and creamy.
- Combine with cereal and chips:
- Pour the melted marshmallow mixture over the cereal and potato chips in your greased bowl. Gently fold everything together until the cereal and chips are evenly coated with the marshmallow mixture. Try not to crush the chips too much during mixing.
- Press into the pan:
- Transfer the mixture to your greased 9×13-inch pan, spreading it evenly. Work quickly as the mixture begins to set fast.
- Add the topping:
- Immediately, while the marshmallow is still sticky, sprinkle and gently press the reserved potato chips onto the top of the treats.
- Let set and serve:
- Allow the treats to cool completely at room temperature until set, then cut into squares and serve. For neat cuts, use a knife coated with non-stick spray.
Microwave Method Alternative
If you prefer using the microwave instead of the stovetop:
- Combine the butter and marshmallows in a large microwave-safe bowl.
- Heat on high power for 1 minute, then let the bowl rest in the microwave for 2-3 minutes to allow the marshmallows to slowly melt.
- Remove and stir until completely smooth. If needed, heat for an additional 10-15 seconds.
- Regular (large) marshmallows work better than minis when using the microwave method.
- Continue with the remaining steps as above.
The Perfect Texture Balance
What makes these treats special is the contrasting textures - the chewy marshmallow base, the crispy rice cereal, and the satisfying crunch of potato chips. The key is maintaining the integrity of each component, especially ensuring the potato chips don't get soggy. That's why using thicker, rippled chips is essential - they hold their crunch even when mixed with the warm, melted marshmallow mixture.
The Sweet and Salty Magic
The science behind why we love sweet and salty combinations is fascinating. Our taste buds respond differently to these contrasting flavors, creating a more complex and satisfying taste experience. The sweetness of the marshmallows enhances the salty potato chip flavor, while the saltiness makes the sweetness more pronounced - it's a perfect culinary balance that keeps you coming back for more.
My family has always been divided between sweet and salty snack lovers. These treats have become our perfect compromise - satisfying everyone's cravings in one delicious bite. When my daughter had her soccer team over, I worried about making enough, but these were so simple I quickly whipped up a double batch. Seeing the kids' surprised expressions when they bit into what looked like a regular Rice Krispie treat only to discover potato chips inside was absolutely priceless!
My final thought on these Potato Chip Rice Krispie Treats is that they perfectly represent the joy of playful cooking - taking familiar ingredients and combining them in unexpected ways. They're proof that sometimes the most delightful culinary experiences come from breaking the rules a little bit. Whether you're making these for a special occasion or just a weekday treat, they're bound to bring smiles and that wonderful phrase every cook loves to hear: "Can I have the recipe?"
Frequently Asked Questions
- → What type of potato chips work best in this recipe?
- Wavy or rippled potato chips work best because they're sturdier and maintain more structure when mixed with the marshmallow. Regular thin chips may crush too easily and lose their texture. Kettle-cooked chips are also a good option for their extra crunch.
- → Can I add other mix-ins to these treats?
- Absolutely! Try adding a handful of mini chocolate chips (add after the marshmallow mixture has cooled slightly), a drizzle of caramel, or even a sprinkle of flaky sea salt on top. Pretzels, nuts, or a swirl of peanut butter would also work well with the sweet-salty profile.
- → Why are my Rice Krispie treats too hard?
- Hard treats usually result from overheating the marshmallows or pressing the mixture too firmly into the pan. Remember to melt marshmallows slowly over low heat, remove from heat while they're still partially unmelted, and press the mixture into the pan gently to avoid dense treats.
- → Can I use flavored potato chips?
- Yes! Flavored chips like sour cream & onion, barbecue, or even salt & vinegar can add an interesting flavor twist. Just be mindful that strongly flavored chips will more dramatically affect the final taste, so you might want to use a mix of plain and flavored chips.
- → How do I get clean cuts when slicing the treats?
- For clean, neat cuts, lightly butter your knife before slicing, or run it under hot water and wipe it dry between cuts. You can also use a plastic knife, which surprisingly cuts through sticky treats very cleanly without the mixture sticking to it.