
 Pin it
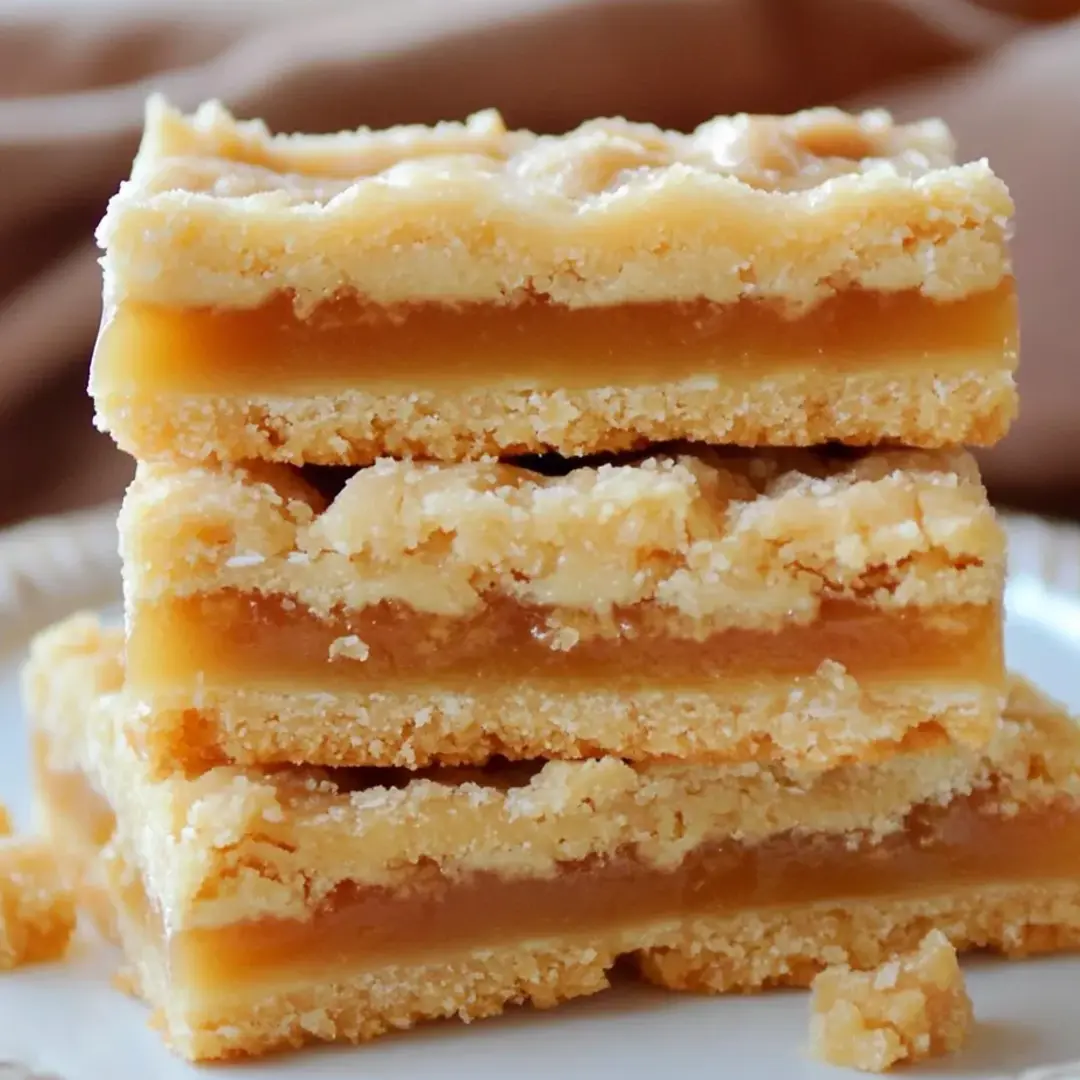
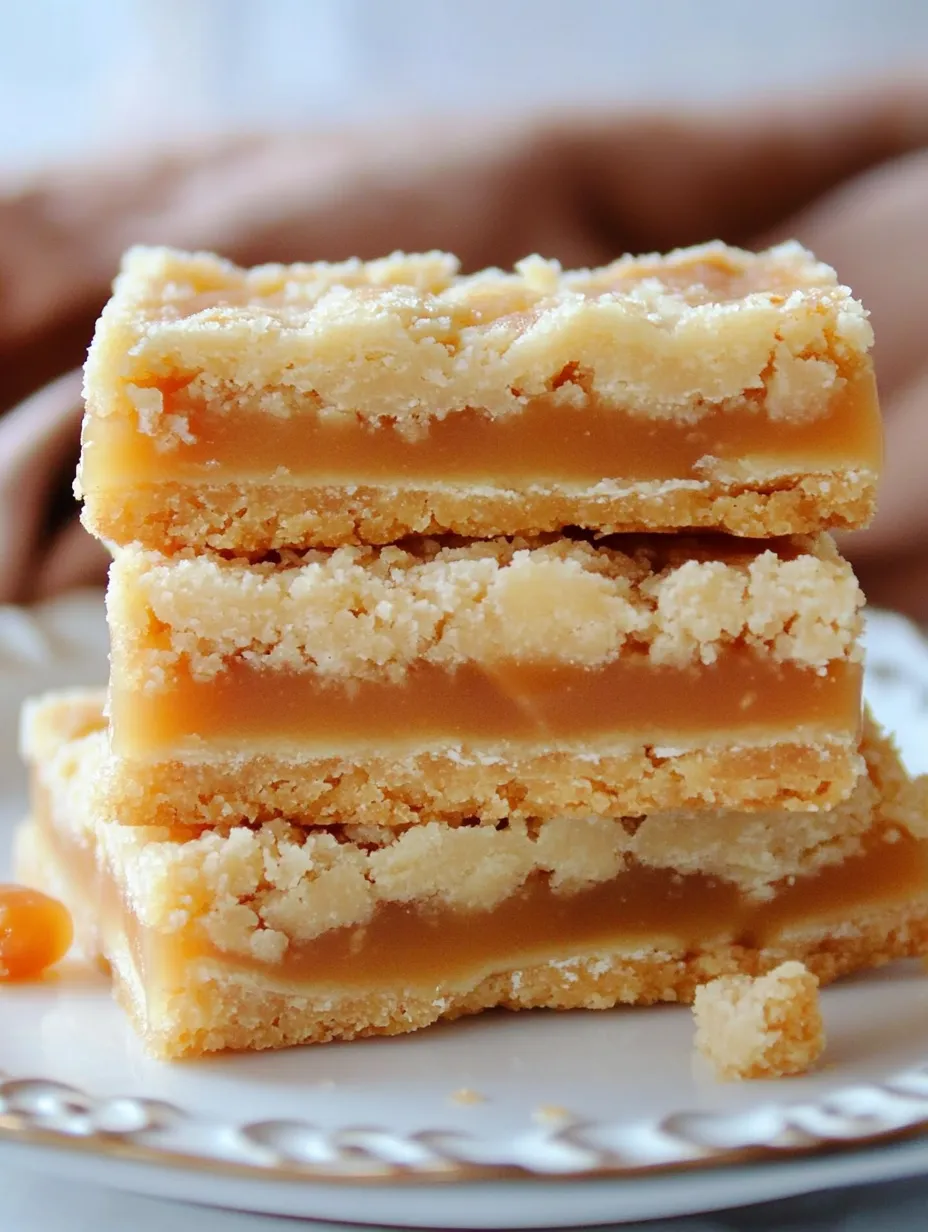
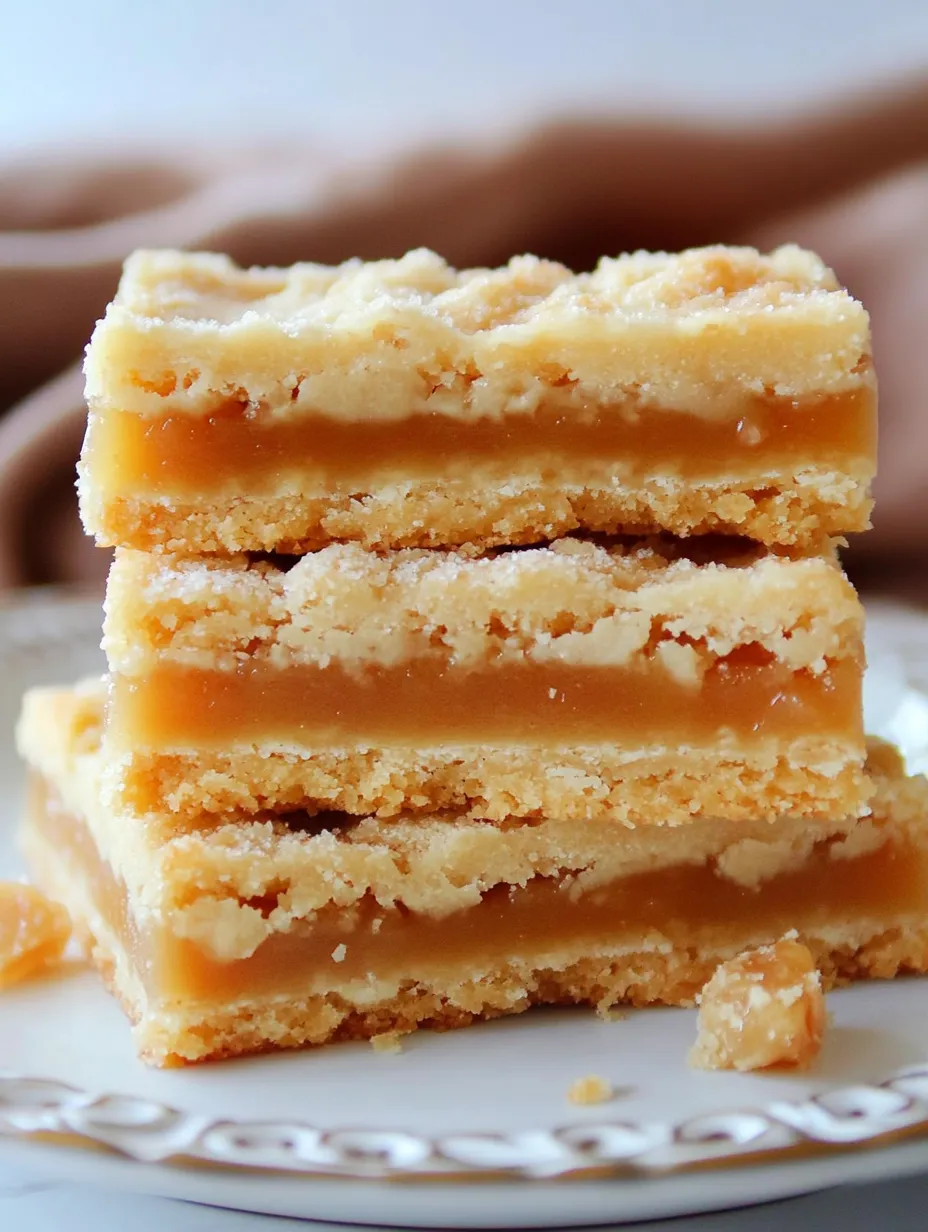
Salted caramel butter bars deliver the perfect balance of sweet, salty, and buttery in every irresistible bite. These indulgent treats feature a shortbread-like cookie base and topping with a luscious ribbon of salted caramel running through the center. The contrast between the soft, melt-in-your-mouth cookie layers and the gooey caramel creates a textural experience that makes it nearly impossible to stop at just one bar. Perfect for holiday gatherings, gift boxes, or anytime you need a special dessert that's guaranteed to impress, these bars have earned their place as a year-round favorite for good reason.
I first added these bars to our holiday baking rotation after discovering the recipe years ago, and they've since become our family's most anticipated holiday treat. My father, who typically exercises impressive restraint around sweets, loses all self-control when these appear on the Christmas dessert table. The first year I made them, I had to hide a separate batch just to ensure there would be enough for our neighbor gift boxes! Now I automatically double the recipe, knowing how quickly they disappear and how many requests I'll get for "just one more."
Essential Ingredients
- Butter: Creates the rich, tender texture that gives these bars their melt-in-your-mouth quality. Use unsalted butter at room temperature for best results, allowing for proper creaming with the sugars.
- Granulated sugar: Provides sweetness and helps create the perfect cookie texture. Look for pure cane sugar for the cleanest flavor.
- Powdered sugar: Contributes to the soft, tender crumb of the cookie layers. Sift before measuring to ensure no lumps affect the texture.
- Vanilla extract: Enhances the buttery flavor with warm aromatic notes. Pure vanilla extract rather than imitation gives the best flavor depth.
- All-purpose flour: Forms the structure of the cookie dough. For the most accurate results, measure by weight or use the spoon-and-level method.
- Salted caramel sauce: Creates the gooey center layer that makes these bars special. Store-bought works beautifully (Smucker's Simply Delights is excellent), or make your own for an extra homemade touch.
- Sea salt: Optional finishing touch that enhances the sweet-salty contrast. Flaky sea salt like Maldon provides the perfect delicate crunch and visual appeal.
Detailed Cooking Instructions
- Step 1:
- Prepare your baking environment – Begin by preheating your oven to 325°F. Line a 9x13 inch baking pan with parchment paper, allowing excess to hang over the sides to create handles for easy removal later. This careful preparation ensures your bars will release cleanly from the pan and maintain their perfect shape.
- Step 2:
- Create the perfect buttery dough base – In a large mixing bowl or stand mixer fitted with the paddle attachment, cream together 1 cup (2 sticks) room temperature unsalted butter with ½ cup granulated sugar and ½ cup powdered sugar until light and fluffy, about 2-3 minutes. This extended creaming process incorporates air into the butter, which is crucial for the right texture. Add 1 tablespoon of vanilla extract and mix until incorporated, scraping down the sides of the bowl as needed.
- Step 3:
- Add the dry ingredients with care – Gradually add 2 cups of all-purpose flour to the butter mixture, mixing on low speed just until combined. Over-mixing at this stage can develop gluten in the flour, resulting in tough rather than tender bars. The dough will be thick and somewhat crumbly but should hold together when pressed. It should have a consistency similar to shortbread dough – not sticky, but able to be pressed together.
- Step 4:
- Prepare the bottom layer – Press approximately half of the dough (about 2 cups) evenly into the bottom of your prepared baking pan. Use the bottom of a measuring cup or glass to flatten the surface, creating a smooth, even base about ¼-inch thick. This technique ensures uniform thickness and even baking. Place the remaining dough in the refrigerator while you prebake the bottom layer.
- Step 5:
- Prebake the bottom layer – Bake the bottom crust for 15-17 minutes until it's just barely beginning to turn golden around the edges but is still quite pale. This partial baking ensures the bottom layer will be fully cooked and sturdy enough to support the caramel filling. Remove from the oven but keep the oven on.
- Step 6:
- Add the caramel layer with precision – Pour one 10-ounce jar of salted caramel sauce over the warm crust, spreading it evenly with an offset spatula but leaving about ¼-inch border around the edges. This border helps prevent the caramel from seeping down the sides and sticking to the pan. The warmth from the prebaked crust will help the caramel spread more easily.
- Step 7:
- Create the crumble topping – Remove the reserved dough from the refrigerator and crumble it evenly over the caramel layer. Don't worry about covering the caramel completely – the gaps between the crumbles allow glimpses of the golden caramel to show through, creating an appealing finish. The dough pieces should be roughly ½-inch in size for the perfect texture contrast.
- Step 8:
- Bake to golden perfection – Return the pan to the oven and bake for an additional 25-30 minutes until the crumble topping is golden brown and the caramel is bubbling slightly at the edges. The extended baking time allows the flavors to meld and the caramel to thicken properly.
- Step 9:
- Finish with a touch of salt – If desired, sprinkle the hot bars lightly with flaky sea salt immediately after removing from the oven. The heat will help the salt adhere to the surface. Be judicious with this final salting, especially if your caramel sauce is already well-salted.
- Step 10:
- Cool and cut with patience – Allow the bars to cool completely in the pan, which takes at least 2 hours at room temperature. This cooling period is crucial – cutting too soon will result in a messy, gooey center that hasn't set properly. Once completely cool, use the parchment paper handles to lift the entire slab out of the pan, then cut into squares using a sharp knife. For the cleanest cuts, wipe the knife clean between slices.
Make-Ahead and Storage Tips
These bars are perfect for holiday preparation as they can be made several days in advance. Store them in an airtight container at room temperature for up to 5 days, separating layers with parchment paper to prevent sticking. For longer storage, refrigerate for up to 2 weeks – just bring to room temperature before serving for the best texture.
These bars also freeze beautifully for up to 3 months. Layer them with parchment paper in a freezer-safe container, then thaw overnight in the refrigerator or for several hours at room temperature when ready to serve. This make-ahead capability makes them perfect for holiday cookie boxes and gift-giving.
Variation Ideas for Different Occasions
While the classic version is perfect as written, these bars welcome thoughtful variations. Try adding a cup of mini chocolate chips to the crumble topping for a chocolate-caramel twist. For fall gatherings, mix ½ teaspoon of cinnamon into the dough for a warm, spiced version. During summer, a teaspoon of orange or lemon zest in the dough creates a bright, citrusy note that balances the rich caramel beautifully.
For an extra decadent treat, drizzle the cooled bars with melted dark or white chocolate before cutting. The additional layer not only looks stunning but adds another flavor dimension to these already incredible bars.
The Best Caramel Options for Perfect Results
The caramel sauce is the star ingredient here, so choosing the right one matters. Smucker's Simply Delights Salted Caramel Sauce offers consistent results with the perfect balance of sweetness and salt. Other excellent options include Trader Joe's Fleur de Sel Caramel Sauce or King's Cupboard Butter Rum Caramel Sauce.
If you prefer to make your own, a simple homemade caramel sauce made with 1 cup sugar, ¼ cup water, ½ cup heavy cream, 4 tablespoons butter, and ½ teaspoon sea salt creates an especially luxurious filling. Just be sure to cool it slightly before pouring over the prebaked crust.
I've discovered that chilling the dough for the crumble topping while the bottom crust prebakes makes it easier to achieve those perfect crumbles on top. The first time I tried this technique, the contrast between the smooth caramel and the distinct crumbles was so visually appealing that everyone thought I'd bought them from a bakery!
My final thought on these salted caramel butter bars is that they perfectly exemplify why certain recipes become cherished traditions. There's something magical about a dessert that combines simple ingredients into something so irresistibly delicious that it creates memories and anticipation year after year. Whether they're part of your holiday celebrations, a thoughtful homemade gift, or simply a special treat to brighten an ordinary day, these bars have a way of bringing joy with every sweet and salty bite.
Frequently Asked Questions
- → Can I use homemade caramel sauce?
- Yes! Homemade caramel works great. Just make sure it's thick enough to hold up during baking.
- → How do I store these bars?
- Store in an airtight container in the fridge for up to 5 days. They're delicious cold or at room temperature.
- → Can I freeze these bars?
- Absolutely! Wrap tightly and freeze for up to 3 months. Thaw in the fridge overnight before serving.
- → Why did my caramel leak through the crust?
- Make sure your crust is pre-baked properly and has no cracks before adding the caramel layer.
- → Can I reduce the sugar in this recipe?
- You can reduce the white sugar by about 1/4 cup, but the powdered sugar is needed for the right texture.