
 Pin it
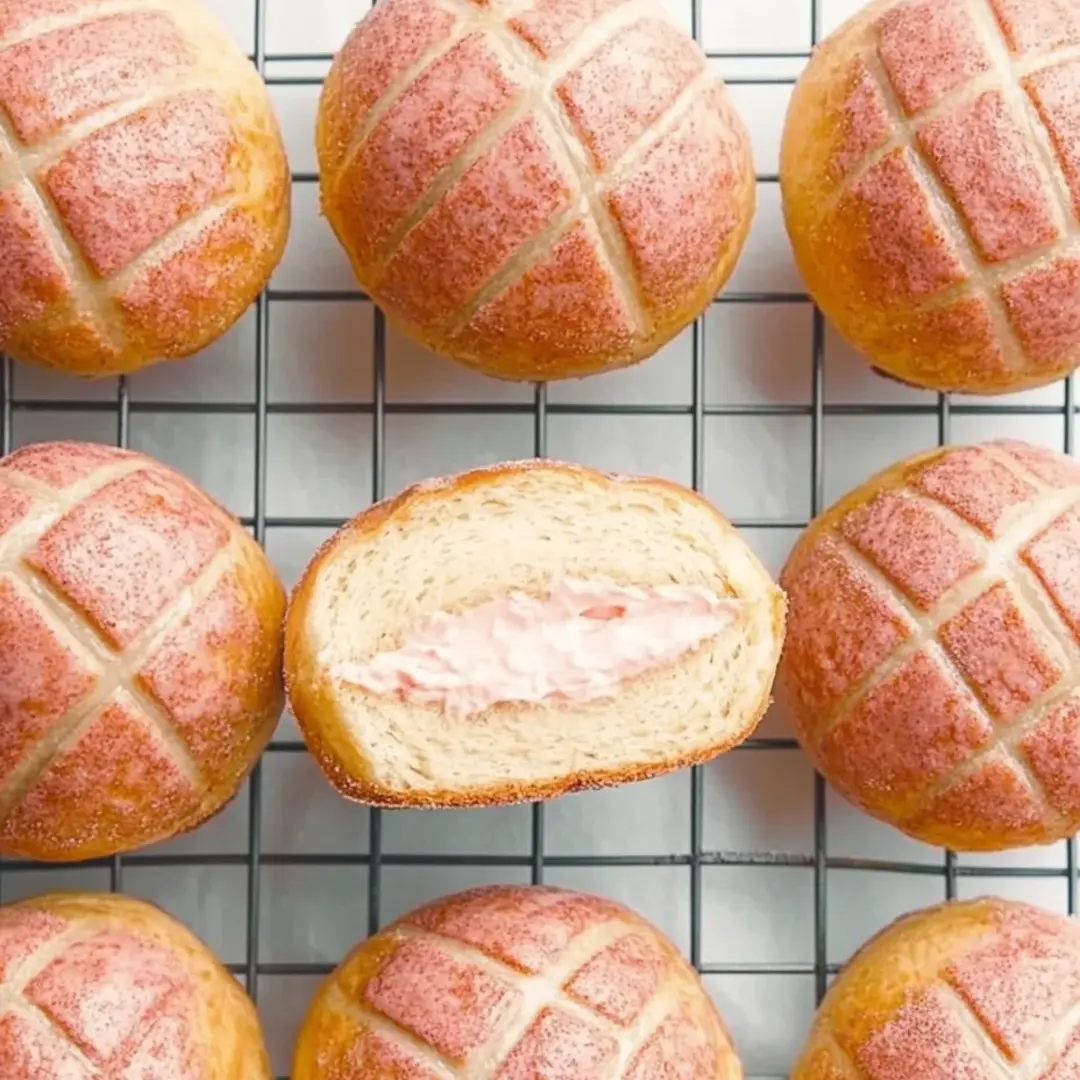
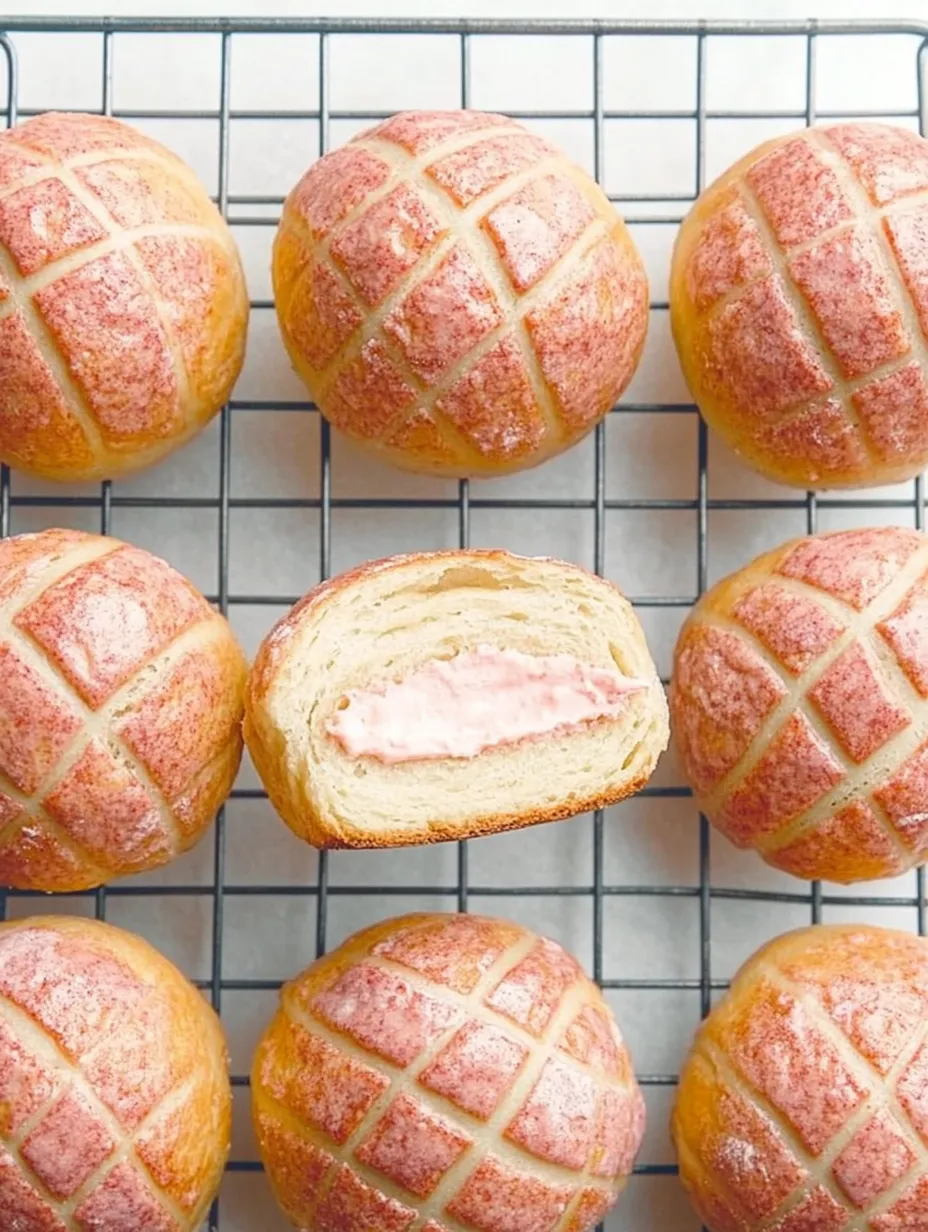
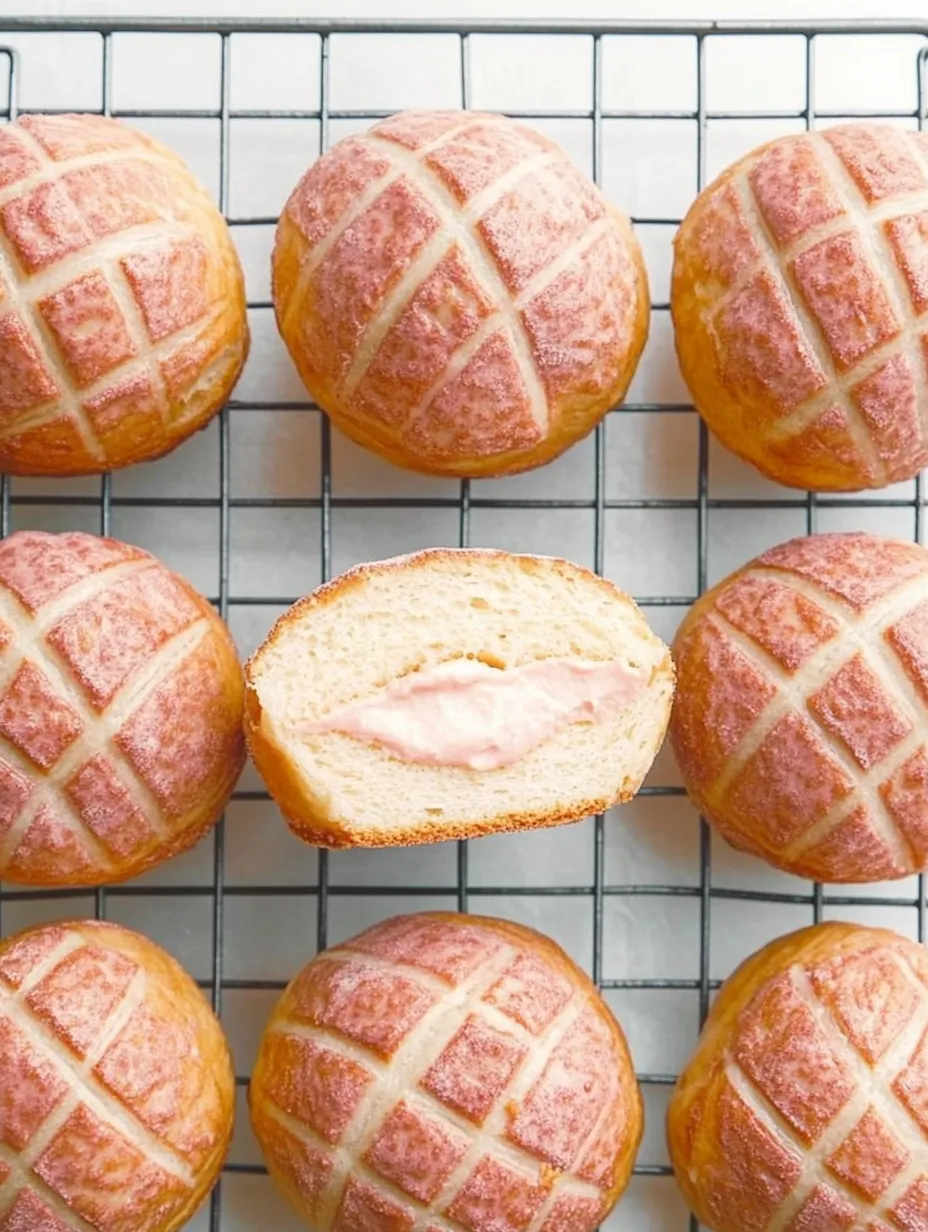
These strawberry pineapple buns represent the pinnacle of Asian bakery craftsmanship - pillowy soft bread topped with a crisp cookie crust and filled with luscious strawberry cream cheese. Each bite delivers three distinct textural experiences: the crackly cookie top that shatters delightfully, the impossibly fluffy bread beneath, and the creamy, fruity center that ties everything together. While they require some effort to create, the result is a bakery-quality treat that surpasses many professional versions.
After perfecting this recipe, I brought a batch to my friend's dinner party. Her father, who grew up in Taiwan and had been disappointed by American versions of pineapple buns for years, took one bite and fell silent. When he finally spoke, he simply said, "These taste like memories." That moment confirmed that mastering these techniques was absolutely worth the effort.
Ingredients
- Tangzhong starter: This pre-cooked flour paste is the secret to bread that stays soft for days
- Bread flour: Higher protein content creates the perfect chewy yet tender crumb
- Instant yeast: Allows for direct mixing without pre-activation; Saf brand produces superior results
- Freeze-dried strawberry powder: Provides natural color and intense flavor without added moisture
- Strawberry jam: Enhances the color and adds fruity depth to the filling
- Cream cheese: Creates a rich, tangy filling that balances the sweetness of the bread
- Cold milk: Starting with cold liquid prevents overheating during extended kneading
Step-by-Step Instructions
- Step 1:
- Prepare the Tangzhong (Day 1) - In a heat-proof bowl, add a portion of bread flour. Pour boiling water over it and quickly stir until it forms a thick paste without any dry spots. The mixture will be sticky and somewhat translucent. Cover with plastic wrap, pressing it directly onto the surface to prevent a skin from forming, and refrigerate overnight. This pre-gelatinized starch mixture is the foundation for exceptionally soft bread that maintains its texture for days.
- Step 2:
- Make the strawberry cream cheese filling (Day 1) - Beat softened cream cheese until completely smooth, then fold in strawberry jam and freeze-dried strawberry powder. The filling should be uniform in color with no white streaks. Cover and refrigerate overnight to allow the flavors to meld and for easier handling during assembly.
- Step 3:
- Prepare the bread dough (Day 2) - In a stand mixer bowl, combine bread flour, sugar, instant yeast, and cold milk. Mix on low speed until roughly combined, then add the chilled Tangzhong. Increase to medium-low speed and mix until a shaggy dough forms. Cover and let rest for 30 minutes – this autolyse period allows gluten to develop naturally with minimal kneading.
- Step 4:
- Develop the dough structure - After the rest period, add salt and softened butter to the dough. Knead on medium speed for 12-15 minutes until the dough becomes smooth, elastic, and passes the windowpane test – when a small piece can be stretched thin enough to see light through without tearing. The dough should feel silky and supple, not sticky or tough.
- Step 5:
- First proof - Shape the dough into a ball and place in a lightly oiled bowl. Cover and let rise in a warm spot until doubled in size, approximately 60-90 minutes. The dough should look puffy and spring back slowly when gently poked.
- Step 6:
- Make the cookie topping - While the dough proofs, cream together butter and sugar until light and fluffy. Add egg and mix until incorporated. Fold in cake flour and freeze-dried strawberry powder to create a pink cookie dough. Cover and refrigerate until firm enough to handle.
- Step 7:
- Shape the buns - Divide the proofed dough into equal portions (about 60g each). Flatten each piece into a disc, place a tablespoon of chilled strawberry cream cheese filling in the center, then bring the edges together and pinch tightly to seal. Place seam-side down on a parchment-lined baking sheet, leaving space between each bun for expansion.
- Step 8:
- Apply the cookie topping - Roll the chilled cookie dough between sheets of parchment paper to about 3mm thickness. Use a round cutter to cut discs slightly smaller than the buns. Gently place each disc on top of a filled bun, pressing lightly to adhere. Use a knife to score a crisscross pattern on top, mimicking a pineapple's exterior.
- Step 9:
- Final proof - Cover the buns loosely with plastic wrap and let rise until puffy, about 45-60 minutes. The buns should increase in size by about 50% and feel light and airy when gently touched.
- Step 10:
- Bake to perfection - Preheat your oven to 350°F (180°C). Place the baking tray on the middle rack with an empty baking sheet on the rack above to shield the buns from direct heat. This prevents browning that would affect the pink color. Bake for 15-18 minutes until the cookie top is set and crisp but still maintains its pink hue. The bread underneath should reach an internal temperature of 190°F (88°C).
The Science Behind Perfect Buns
What makes these buns special isn't just the ingredients but the techniques employed. The Tangzhong method pre-gelatinizes some of the starch in the flour, allowing it to hold more water. This results in bread that's incredibly soft and stays fresh longer. Starting with cold liquid and employing the autolyse method allows for optimal gluten development without overheating the dough, which would compromise flavor and texture.
Storing and Enjoying
These buns have multiple components with different optimal storage conditions. Since they contain cream cheese filling, it's best to freeze any buns not consumed on the first day. When you're ready to enjoy them again, bake from frozen at 350°F (180°C) for about 10 minutes until the top regains its crispness and the center is warm.
Perfect Timing Tips
Creating these buns involves multiple components, but you can spread the work across two days for a more manageable process:
- Day 1 (evening): Prepare the Tangzhong and strawberry cream cheese filling
- Day 2 (morning): Make and proof the bread dough
- Day 2 (while dough proofs): Prepare the cookie topping
- Day 2 (afternoon): Shape, fill, top, proof, and bake
My journey with these buns began after tasting an exceptional version in a small Taiwanese bakery. After multiple attempts and refinements, I discovered that the key was not cutting corners on technique. The first time I achieved that perfect contrast between crisp top and pillowy center was a moment of pure joy - and worth every minute of preparation.
The magic of these strawberry pineapple buns lies in their ability to offer something for everyone - the crisp cookie layer for those who love texture, the soft bread for comfort-seekers, and the creamy center for indulgence-lovers. They represent the perfect harmony of East Asian baking techniques with Western flavors, creating a truly special treat that connects cultures through the universal language of exceptional baking.
Frequently Asked Questions
- → What is a pineapple bun?
- Despite the name, traditional pineapple buns don't contain pineapple. They're a popular Asian pastry with a crispy cookie-like top that resembles pineapple skin when baked. This version adds a strawberry cream cheese filling for extra flavor.
- → What is tangzhong and why is it important?
- Tangzhong is a Japanese technique where a small portion of flour is cooked with water to form a paste. This pre-gelatinized starch helps the bread retain moisture, resulting in an exceptionally soft, fluffy texture that stays fresh longer.
- → Can I make these buns without a stand mixer?
- Yes, though it will require more effort. You can knead by hand for about 15-20 minutes to achieve the same window pane test. The dough is sticky, so use oil on your hands instead of flour when handling.
- → Can I use fresh strawberries instead of freeze-dried?
- Fresh strawberries contain too much moisture for this recipe. Freeze-dried strawberries provide concentrated flavor without affecting the texture. If unavailable, you could use strawberry extract or additional jam instead.
- → How do I store these buns?
- Store in an airtight container at room temperature for 1-2 days. For longer storage, refrigerate for up to 5 days. Warm slightly before eating. They can also be frozen for up to a month - thaw at room temperature and reheat in a 300°F oven for 5 minutes.