
 Pin it
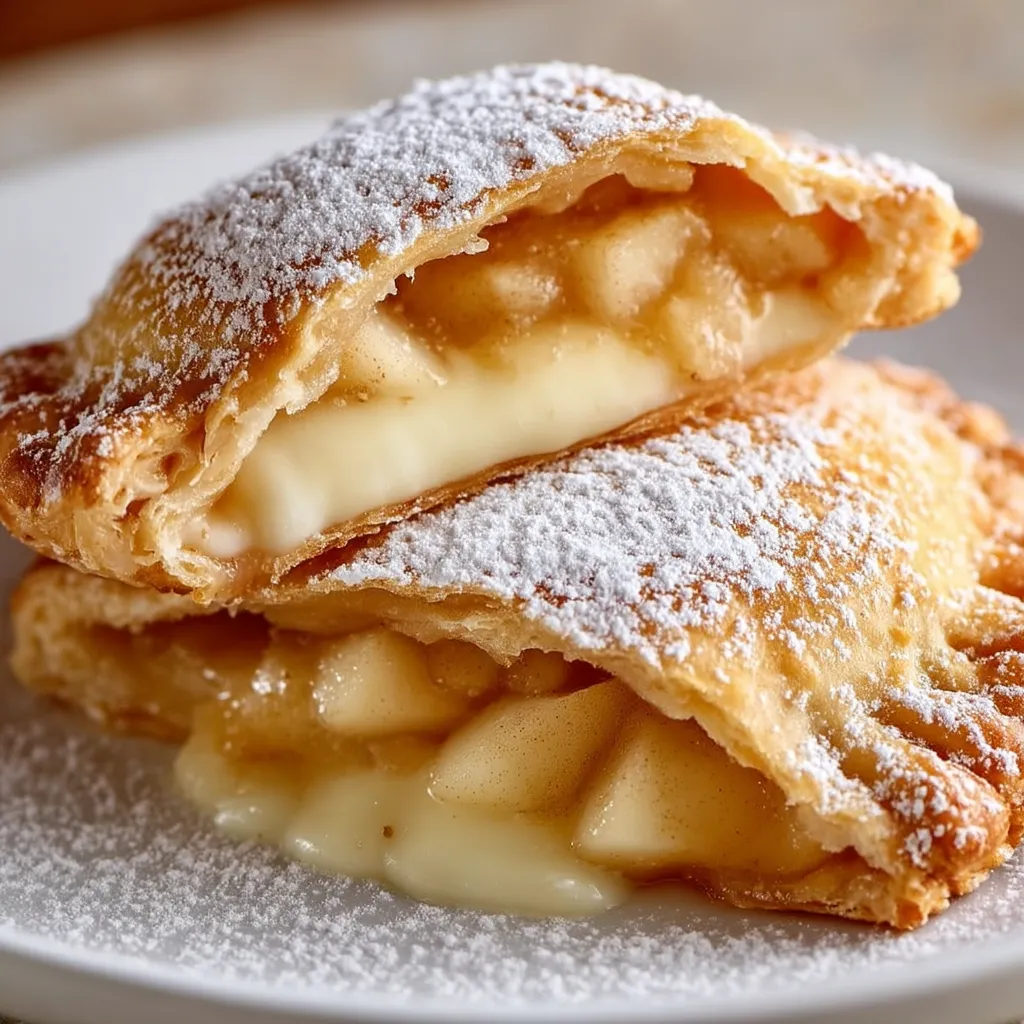
This stuffed cheesecake fried apple pie recipe combines two of my favorite desserts into one irresistible handheld treat. The crispy exterior gives way to a perfect balance of tangy cream cheese and warm spiced apples in every bite.
I created these on a rainy Sunday afternoon when my family was craving something special but I didn't want to make an entire cheesecake or apple pie. Now they request these little hand pies regularly especially during fall apple season.
Ingredients
- Granny Smith or Honeycrisp apples: Bring the perfect balance of tartness and structure for the filling
- Cream cheese: Creates that rich cheesecake layer everyone loves
- Refrigerated pie crusts: Save time while still delivering flaky texture
- Cinnamon and nutmeg: Provide classic warm apple pie flavors
- Brown sugar: Adds depth and caramel notes to the apple filling
- Cornstarch: Helps thicken the apple mixture to prevent leaky pies
- Vanilla extract: Enhances the cheesecake filling with aromatic sweetness
Step-by-Step Instructions
- Prepare Apple Filling:
- Melt butter in a pan over medium heat until bubbly. Add diced apples ensuring they're uniform size for even cooking. Sprinkle brown sugar, cinnamon, and nutmeg over apples and stir to coat evenly. Cook until apples are just tender, about 5 to 7 minutes—you want them soft but not mushy. Mix cornstarch with water to create a slurry, then add to the pan, stirring constantly for 1 to 2 minutes until the mixture thickens and becomes glossy. Remove from heat and transfer to a bowl to cool completely.
- Create Cheesecake Filling:
- Place softened cream cheese in a mixing bowl, making sure it's at room temperature for smoothest results. Add sugar and vanilla extract, then beat until completely smooth and slightly fluffy with no lumps remaining. Refrigerate for about 15 minutes to firm up slightly, which makes it easier to work with during assembly.
- Assemble The Pies:
- Lay out pie crust pieces on a lightly floured surface and cut into circles about 4 to 5 inches in diameter. Place a tablespoon of chilled cream cheese mixture in the center of each circle followed by a tablespoon of cooled apple filling, being careful not to overfill. Brush the edges with water or egg wash for better sealing. Fold the dough over to create a half-moon shape and press edges firmly with fingers first, then seal with fork tines for a decorative edge.
- Fry To Golden Perfection:
- Heat oil in a heavy-bottomed pan to 350°F, checking temperature with a thermometer for accuracy. Carefully lower pies into hot oil, working in batches to avoid crowding the pan. Fry for 2 to 3 minutes per side, watching closely until they reach a deep golden brown color. Remove with a slotted spoon and place on paper towels to drain excess oil.
- Final Touches:
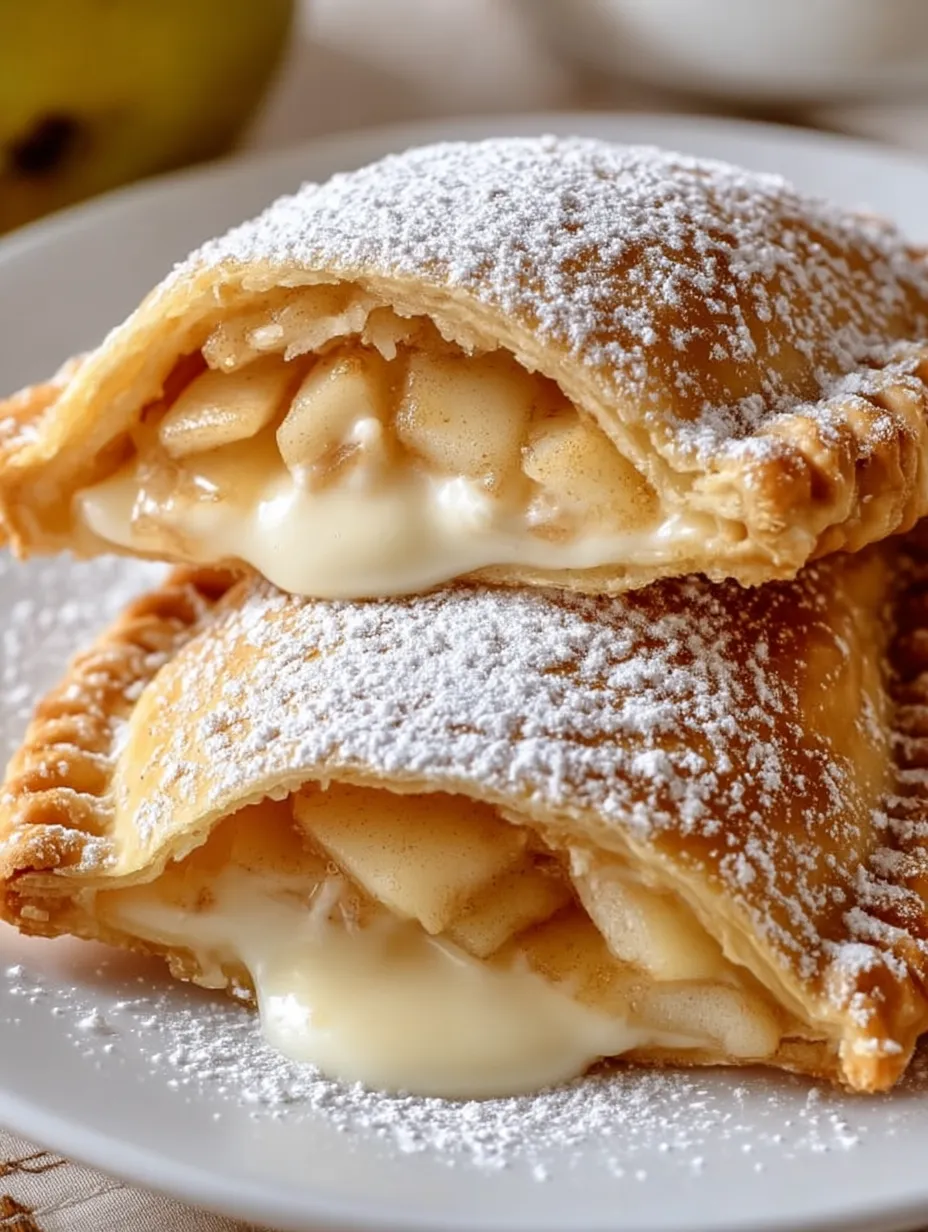
- While pies are still warm but not hot enough to burn hands, toss in cinnamon sugar mixture, turning gently to coat all sides. Arrange on a serving plate and optionally drizzle with warm caramel sauce or dust with powdered sugar just before serving.
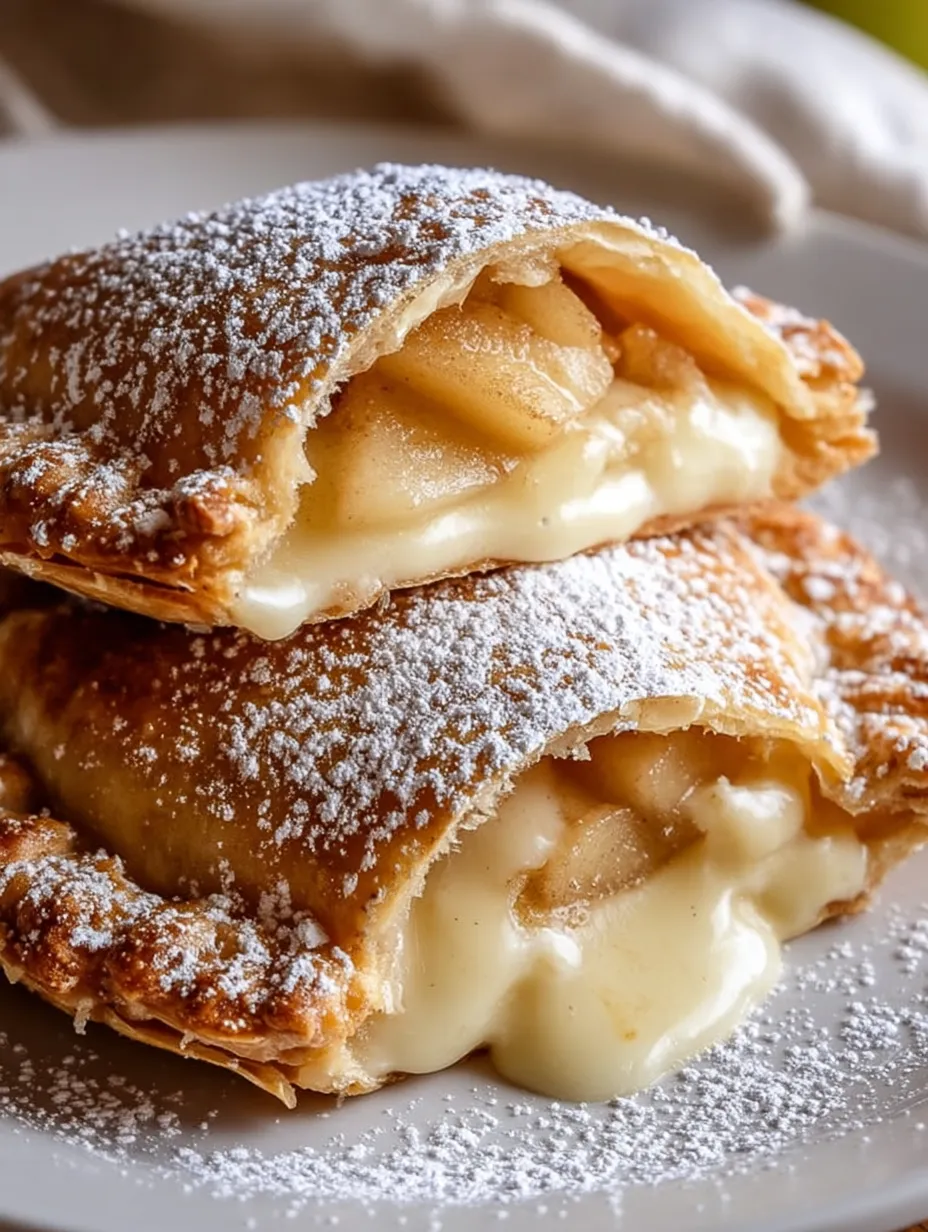
The moment these golden pies come out of the oil is pure magic in my kitchen. The aroma of cinnamon, apple, and vanilla fills the air, and somehow everyone mysteriously appears in the kitchen. I particularly love how the cream cheese layer creates a velvety contrast to the tender fruit.
Make Ahead Options
These hand pies are perfect for planning ahead. You can assemble them completely, then freeze in a single layer before transferring to a freezer bag. They'll keep for up to three months frozen. When ready to enjoy, simply fry them directly from frozen, adding an extra minute per side. The filling stays perfectly contained and tastes just as fresh as when first made.
Perfect Substitutions
If apples aren't in season, or you prefer other fruits, try using pears, peaches, or mixed berries instead. For the cheese filling, mascarpone creates an extra luxurious version, while Neufchâtel offers a lighter option with fewer calories. Don't have pie crust? Puff pastry squares, crescent roll dough, or even spring roll wrappers can work in a pinch, each offering a different but delicious texture experience.
Serving Suggestions
These pies shine on their own but become extra special with additions. Serve warm with a scoop of vanilla ice cream and a drizzle of salted caramel sauce for an elevated dessert. For brunch, pair with bacon and a dollop of maple whipped cream. During holidays, arrange on a platter with other mini desserts and provide dipping sauces like chocolate ganache, cream cheese frosting, and fruit coulis.
Frequently Asked Questions
- → Can I use canned apple filling?
Yes, canned apple pie filling can be a quick and convenient substitute for homemade apple filling.
- → How can I seal the edges properly?
Use a fork to press and seal the dough edges firmly. Brushing with water or egg wash can help ensure a tight seal.
- → What oil is best for frying?
Neutral oils like vegetable, canola, or peanut oil are great choices for frying these pies.
- → Can these be baked instead of fried?
Yes, you can bake them at 375°F (190°C) for 15–20 minutes or until golden brown, for a healthier alternative.
- → How do I store leftovers?
Store leftover pies in an airtight container at room temperature for up to 2 days or refrigerate for up to 5 days. Reheat for best taste.