
 Pin it
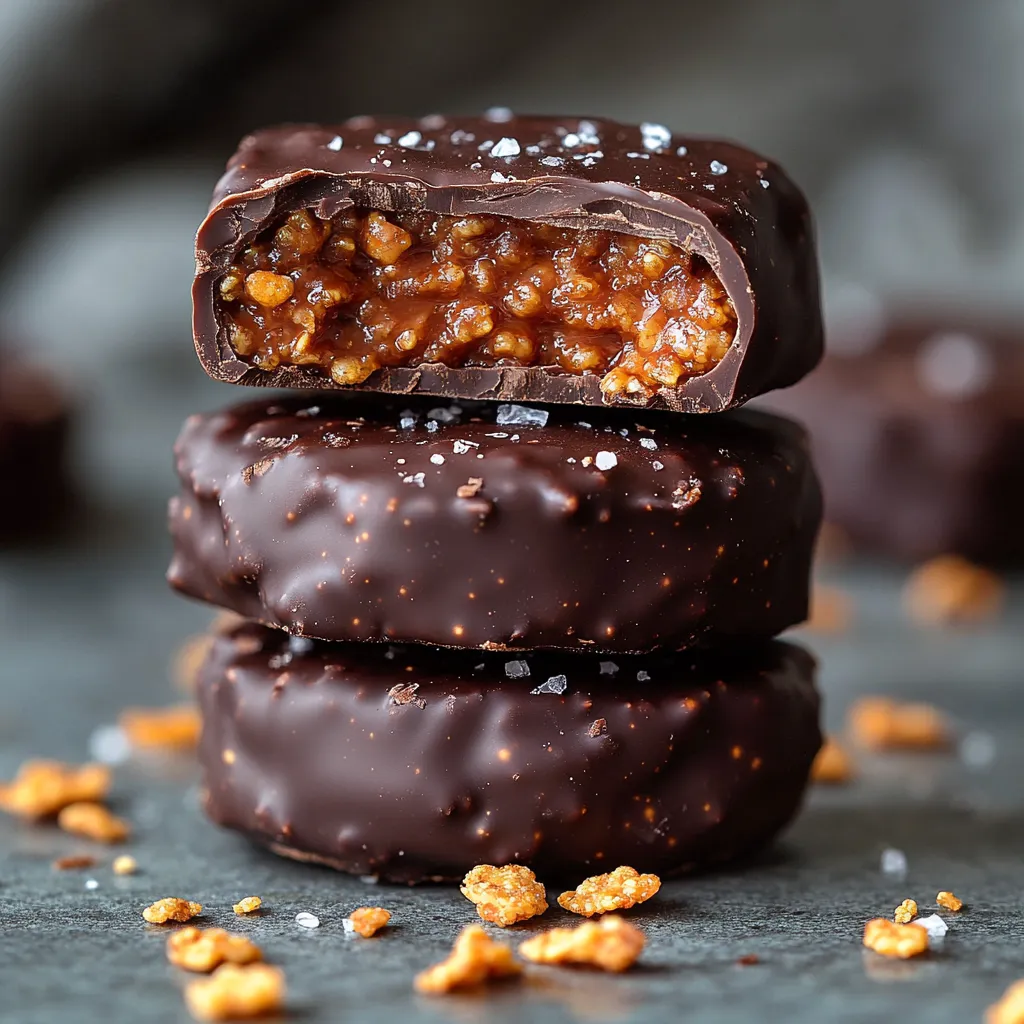
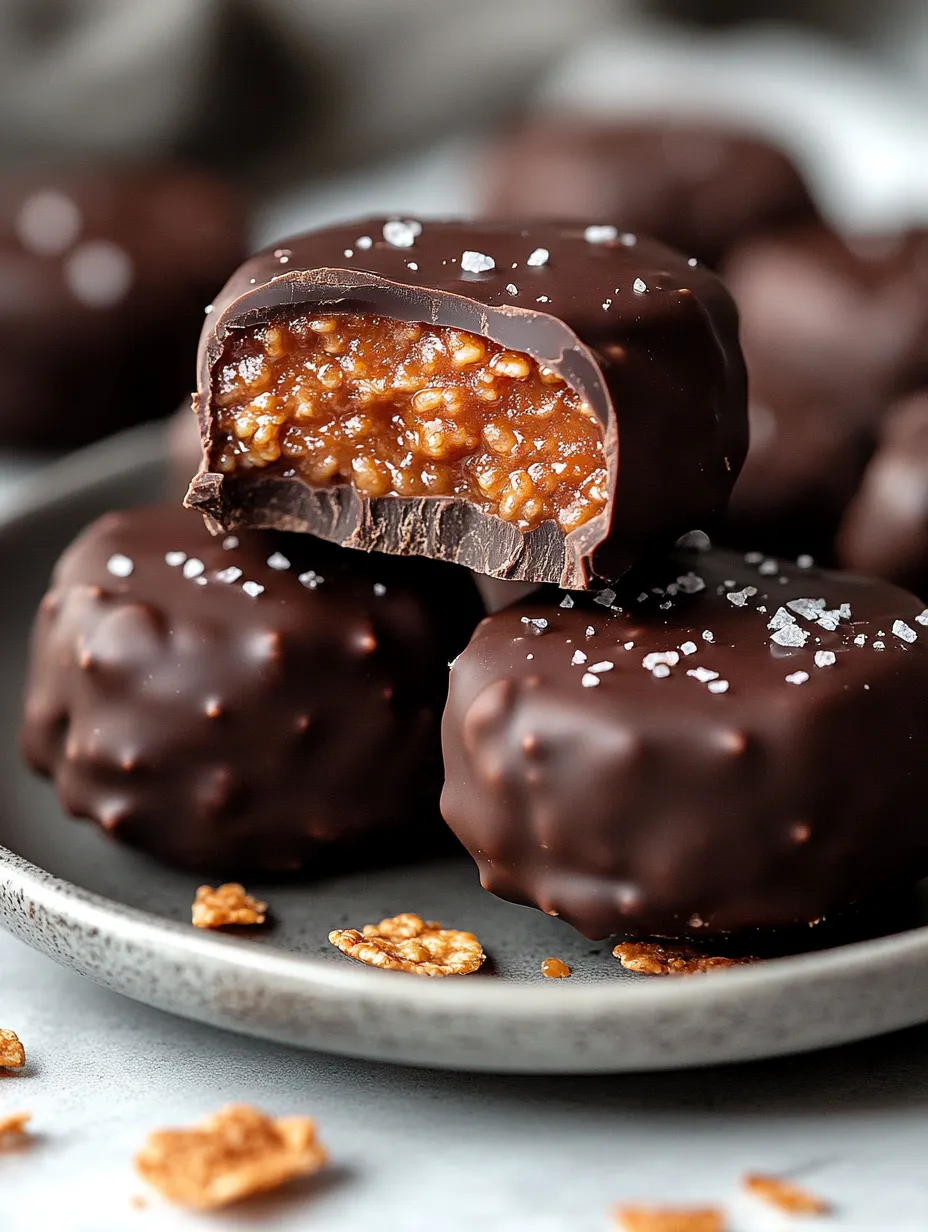
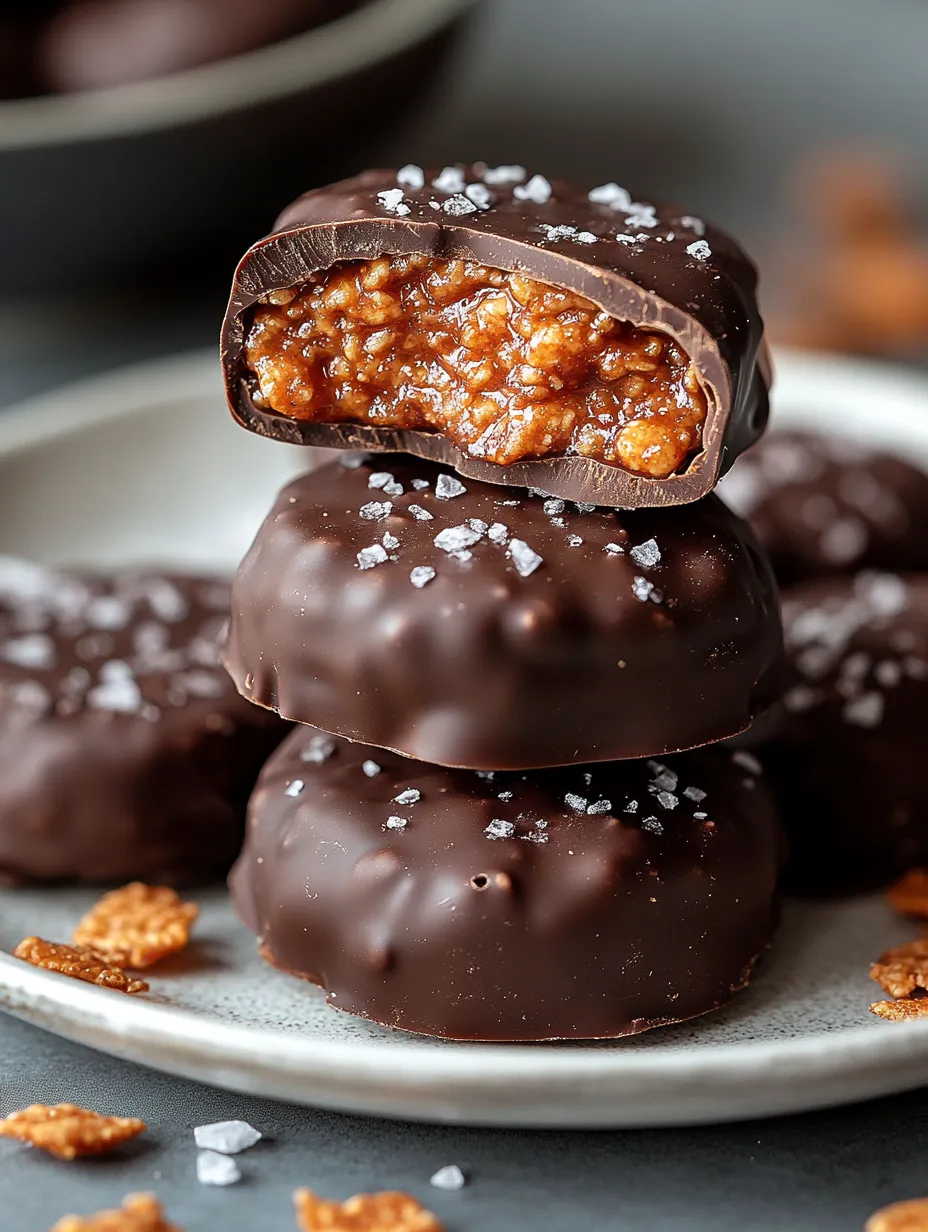
These sweet and sticky peanut butter chocolate cornflake bites combine velvety nut butter, indulgent chocolate, and light, airy cereal into one irresistible snack. Whipped up in just 20 minutes with five simple ingredients, they're the ultimate no-fuss treat for anyone craving something sweet without kitchen drama. The magic happens when soft peanut butter meets crisp cornflakes and smooth chocolate, creating that can't-stop-at-one texture combo we all dream about.
I created these clusters one hectic afternoon when my sweet tooth was acting up but I couldn't face actual baking. They vanished within hours once my family discovered them, and now they're on regular rotation in our kitchen. There's something magical about how the peanut butter binds those cornflakes into munchable morsels that taste even more amazing after their chocolate bath.
Simple Pantry Ingredients
- Peanut butter: Serves as the creamy, protein-rich base; choose minimally processed varieties for richer flavor
- Maple syrup: Adds natural sweetness and binding power while bringing subtle caramel notes
- Cornflakes: Supply that essential crispy element; any brand works fine, including gluten-free options
- Dark chocolate: Provides a decadent coating that balances the sweetness; aim for 70% cocoa content
- Coconut oil: An optional addition that helps thicken nut butters reach the right consistency
I've found the results vary depending on which peanut butter you grab. When your peanut butter drips easily, skip the coconut oil altogether. You're looking for a consistency like warm maple syrup—thick enough to coat but fluid enough to mix. This ensures every cornflake gets evenly wrapped while maintaining that wonderful crunch factor.
Building Perfect Clusters
Lay out parchment paper or a silicone baking mat on a cookie sheet for easy release and minimal cleanup. Gather your measuring cups, a large mixing bowl, and a smaller one for chocolate melting before you begin.
Create Your Gooey Foundation
Combine your peanut butter and maple syrup in a large microwave-safe bowl. Heat in short 20-second intervals, stirring between each, until the mixture flows smoothly. If it seems stubborn or too stiff, add a small spoonful of coconut oil to help it along.
Add Your Crunch Factor
Pour the cornflakes into your peanut butter mixture and gently fold everything together using a rubber spatula. Work carefully to coat each flake without crushing them. Preserving those intact pieces means better texture in your finished treats.
Shape Your Treats
Drop spoonfuls of your mixture onto the prepared cookie sheet using either a cookie scoop or regular tablespoon. You can make dome shapes, irregular mounds, or even press the entire batch into a lined pan for bar-style treats later. Aim for tablespoon-sized portions for perfect snacking bites.
Add Chocolate Magic
Melt your dark chocolate with a touch of coconut oil using either microwave bursts or the double-boiler method. Drizzle this glossy goodness over your clusters or dunk half of each one for a two-tone effect. While the chocolate's still wet, sprinkle with sea salt flakes or extra cornflake bits for extra visual appeal.
Let Them Set Up
Pop the tray into your refrigerator for about 15 minutes until the chocolate hardens completely. This quick chilling creates that satisfying snap when you bite through the chocolate into the crunchy center.
I can't help smiling when I think about making these with my niece during her last visit. She got it in her head that we should count every single cornflake for better flavor. We abandoned that mission pretty quickly, but seeing her joy as we created something so delicious with minimal effort made these treats hold an extra special place in my heart.
Tasty Serving Ideas
These bites make the perfect afternoon pick-me-up alongside tea or coffee. They travel well in lunchboxes for both kids and adults, offering just enough sweetness without sugar overload. When hosting friends, arrange them on a platter with fresh strawberries for beautiful color contrast. They're also standouts at cookie exchanges as the unique no-bake option among traditional holiday treats.
Tasty Variations
Try swapping in almond or cashew butter for new flavor profiles. For nut-free needs, sunflower seed butter works wonders. A few drops of vanilla extract or a sprinkle of cinnamon can transform the base flavor. Toss in dried cherries or cranberries for tart bursts. Make them ultra-indulgent by folding mini chocolate chips into the mix before shaping. For fancy presentations, zigzag both white and dark chocolate across the tops.
Storage Solutions
Store your clusters in an airtight container in the fridge for about a week, though they rarely last that long in my house. For longer storage, place them in freezer containers with parchment between layers. They'll stay fresh up to three months frozen. The cool part? They taste fantastic straight from the freezer—the cold transforms the peanut butter center to a creamy ice-cream-like texture while the outside stays perfectly crisp.
I've come to cherish no-fuss recipes like this one—they remind me that making something delicious doesn't require complicated methods or fancy ingredients. Sometimes the most memorable treats come from combining a few everyday flavors in creative ways. These chocolate peanut butter cornflake clusters have become my go-to when I want to whip up something impressive with minimal effort, and the happy faces around my table confirm that sometimes simple really is best.
Frequently Asked Questions
- → Can I use a different peanut butter type?
- Of course! Chunky peanut butter brings more crunch. For stickiness, try adding a bit more coconut oil if needed.
- → What can replace cornflakes in this?
- Other cereals like Cheerios or Rice Krispies work well, or even crushed pretzels and chips for a salty twist.
- → How can I make these nut-free?
- Swap peanut butter for sunflower butter, tahini, or cookie butter. The flavor will shift, but they’ll still be delicious.
- → Why do my bites break when dipping them?
- Make sure they’re fully frozen before dipping. If they still split, increase peanut butter or coconut oil next time.
- → How long should they sit after freezing?
- Let them rest 15–20 minutes after freezing to soften up. Too long and they might get sticky, too soon and they’ll be hard.