
 Pin it
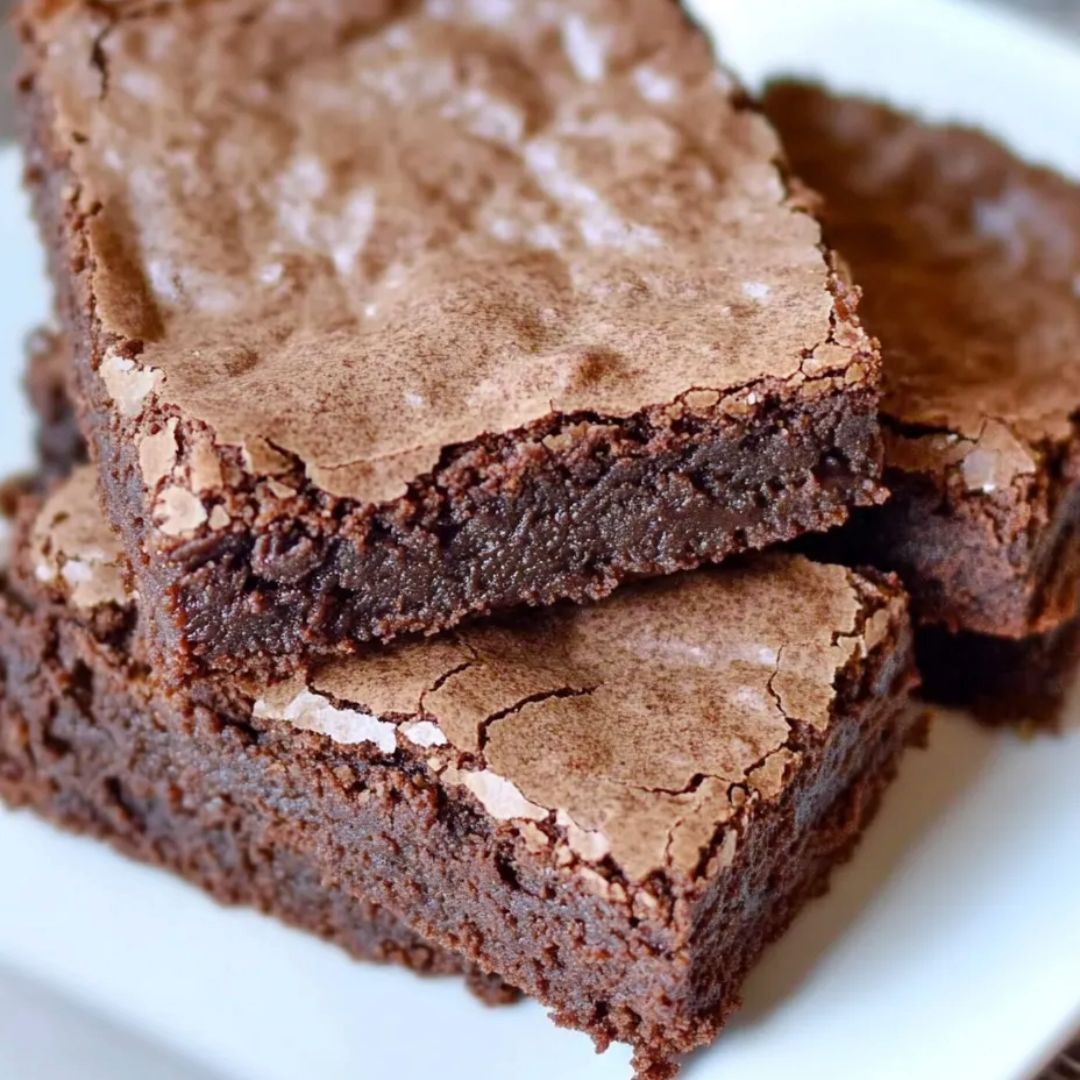
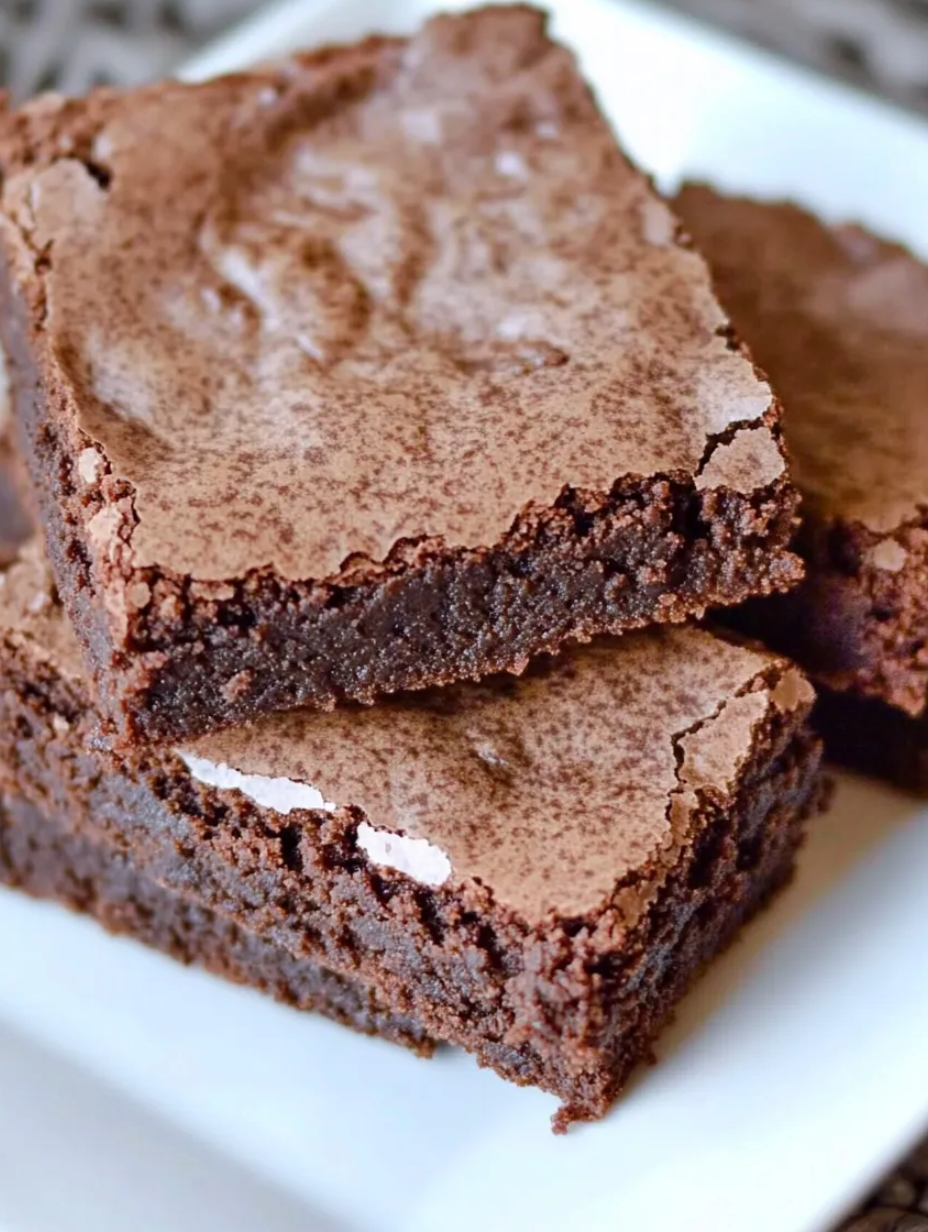
Some recipes carry more than just ingredients and instructions—they hold memories, love, and family history within their worn pages. These brownies are my grandmother's legacy, a recipe that has traveled through generations, bringing smiles and comfort to our family for decades. The first time I baked these on my own was during my college finals week. Stressed and homesick, I called my mother for the recipe, hoping to recreate a piece of home in my tiny apartment kitchen. The moment the scent of cocoa filled the air, I felt my grandmother's presence, as if her hands were guiding mine. These aren't just brownies—they're the thickest, most indulgent cake-like yet fudgy squares you'll ever taste, crowned with a unique warm fudge frosting that sets like chocolate heaven. One bite transports me back to her immaculate kitchen, watching her measure ingredients with practiced precision, telling stories that made me laugh until my sides hurt.
I recently took my daughters to visit my grandmother, who at 100 years old still lights up at the mention of these brownies. While the trip had its challenges—a stomach bug for my three-year-old and a hotel pool mysteriously 'out of order'—seeing my girls with their great-grandmother made everything worthwhile. We took photos that I'll treasure forever, capturing four generations of women bonded by love, laughter, and these extraordinary brownies. My mother makes these for every gathering with friends, and they're always the first dessert to disappear. She laughs because, although we've eaten these brownies our entire lives and knew they were good, we never fully appreciated just how exceptional they truly are until we saw others experience them for the first time.
Ingredients (with Selection Tips)
- Unsalted Butter (1 cup): Room temperature for the batter, melted for the frosting. My grandmother insisted on real butter—no substitutes. She'd say good butter is the foundation of any proper dessert. The richness it brings is unmistakable and essential for that melt-in-your-mouth quality.
- Granulated Sugar (2 cups): Look for pure cane sugar rather than beet sugar for the best results. The way sugar incorporates with butter creates the perfect structure. This might seem like a lot of sugar, but trust me—it's what gives these brownies their perfect texture and balances the cocoa's bitterness.
- Eggs (4 large): Always use room temperature eggs—they incorporate much better into the batter. My grandmother would set hers out the night before baking day. The eggs provide structure and that distinctive rise that makes these brownies so impressively thick.
- Unsweetened Cocoa Powder (1 cup): This recipe shines with Dutch-processed cocoa for its smooth, rich flavor, but regular unsweetened works beautifully too. The cocoa is the soul of these brownies—don't skimp on quality here. The deep chocolate flavor comes from this generous amount of cocoa rather than melted chocolate.
- All-Purpose Flour (1½ cups): Unbleached flour gives the best flavor. Measure by spooning into cups and leveling off—my grandmother would be horrified at the thought of scooping directly from the bag and compacting the flour. The moderate protein content of all-purpose flour gives these brownies their perfect balance between cake and fudge textures.
- Pure Vanilla Extract (2 teaspoons): Always use pure, never imitation. My grandmother splurged on good vanilla even during lean times, saying, 'Some corners aren't worth cutting.' The vanilla enhances the chocolate flavor in a way that's subtle but essential.
- Salt (½ teaspoon): Table salt works perfectly here. Salt isn't just for savory dishes—it heightens the chocolate flavor and balances the sweetness. My grandmother taught me that a little salt is what transforms a good dessert into an unforgettable one.
- Powdered Sugar (3 cups, for frosting): Sift it if it's lumpy for the smoothest frosting. The fine texture creates that melt-on-the-tongue quality while still allowing the frosting to set up firmly. This is what makes the frosting so unique—it's soft when warm but sets up like fudge.
- Milk (6 tablespoons, for frosting): Whole milk creates the richest frosting. The milk thins the frosting just enough to spread while still allowing it to set properly. My grandmother would never consider using anything but whole milk—'Baking is no place for skimping,' she'd say.
Step-by-Step Cooking Instructions
- Step 1:
- Prepare the Baking Dish — Preheat your oven to 350°F. Butter a 9×13-inch baking dish, then line it with parchment paper, leaving overhang on two sides to create handles for easy removal later. Butter the parchment too. My grandmother always took this extra step, and it makes serving these thick brownies so much easier. The buttered parchment ensures nothing sticks and creates perfectly clean edges.
- Step 2:
- Create the Base — In a large bowl, cream together 1 cup room-temperature butter and 2 cups granulated sugar until light and fluffy. This will take about 3-4 minutes with an electric mixer, 5-6 by hand with a wooden spoon (my grandmother's preferred method). Don't rush this step—the aeration creates the perfect foundation. You'll know it's ready when the mixture lightens in color and appears almost fluffy.
- Step 3:
- Add the Eggs — Beat in 4 eggs, one at a time, incorporating each fully before adding the next. This gradual addition prevents the batter from curdling and ensures each egg is fully integrated into the creamed butter-sugar mixture. The batter will become even lighter and take on a silky appearance with each addition.
- Step 4:
- Incorporate Dry Ingredients — Sift together 1½ cups flour, 1 cup cocoa powder, and ½ teaspoon salt. Gradually add this dry mixture to the wet ingredients, mixing on low speed just until combined. Then stir in 2 teaspoons vanilla extract. The batter will be remarkably thick—almost like a soft dough rather than a typical brownie batter. This thickness is characteristic of these special brownies and creates their unique texture.
- Step 5:
- Spread in Pan — Transfer the batter to your prepared baking pan. The thickness makes it challenging to spread, but use a spatula or the back of a spoon to work it into the corners and create an even layer. Don't worry about getting it perfectly smooth—these brownies are rustic and homey. My grandmother always left those characteristic 'spreading lines' on top, saying they were part of the charm.
- Step 6:
- Bake to Perfection — Place the pan in the preheated oven and bake for 25-30 minutes, or until a toothpick inserted in the center comes out with a few moist crumbs (not wet batter). Be careful not to overbake—these should remain fudgy inside. The top will form a slight crust while the interior stays moist. Position the rack in the center of the oven for the most even baking.
- Step 7:
- Start the Frosting — About 5 minutes before the brownies are done, begin preparing the frosting. In a medium saucepan, melt ½ cup butter over medium heat. Stir in ½ cup cocoa powder and cook for about 1 minute until smooth and fragrant. Remove from heat and stir in 6 tablespoons milk and 1 teaspoon vanilla extract. Gradually add 3 cups powdered sugar, beating with a wooden spoon until smooth. The frosting will be pourable but will set up as it cools.
- Step 8:
- Frost While Warm — Remove the brownies from the oven and let them cool for just 5 minutes—no longer! Pour the warm frosting over the still-warm brownies, spreading it evenly to the edges. This is crucial—the warm frosting on warm brownies creates that special fudge-like layer as they cool together. My grandmother was adamant about this timing, saying it was the secret to the magic.
- Step 9:
- Set and Cool — Allow the brownies to cool completely at room temperature, which takes about 2-3 hours. The frosting will transform from glossy and soft to a matte, fudge-like finish that you can sink your teeth into. Patience is difficult at this stage, but it's essential for the full experience. The wait is part of the anticipation that makes that first bite so memorable.
- Step 10:
- Slice and Serve — Once completely cool, lift the brownies out using the parchment paper handles. Place on a cutting board and use a sharp knife to cut into generous squares. For the cleanest cuts, wipe the knife with a damp cloth between slices. My grandmother always cut hers into exactly 16 pieces—not too small, because she believed dessert should be substantial.
I've always been particularly drawn to the edges of these brownies. While most people fight over corner pieces with other brownies, with these, every piece is equally magnificent. The frosting creates a uniform top layer that adds another dimension to every bite. My mother swears the middle pieces are best, while my father always reached for the edge pieces, claiming they had the perfect chew. This family 'debate' has continued for generations now, with new opinions added as our family has grown. There's something about these brownies that invites you to stake a claim on your 'perfect piece' and defend it passionately.
There's something profoundly comforting about making my grandmother's brownies. As I measure, mix, and spread that impossibly thick batter, I feel connected to her and to every woman in my family who has made these before me. I imagine my daughters someday making these brownies for their children, perhaps sharing stories about their great-great-grandmother who lived to be 100 and had the cleanest house anyone had ever seen. Food has this magical way of transcending time, of keeping people present in our lives long after they're gone. When I bite into one of these brownies, I taste more than chocolate and sugar—I taste love, history, and the special kind of alchemy that happens when simple ingredients are transformed by hands that know exactly what they're doing. This isn't just a recipe; it's my grandmother's legacy, and now I've shared it with you. I hope these brownies become special to you too, perhaps even creating a new tradition in your own family story.
Frequently Asked Questions
- → Why are my brownies too cake-like instead of fudgy?
- You may be over-mixing the batter. For fudgy brownies, stir just until ingredients are combined at each step. Over-stirring incorporates too much air, creating a cake-like texture.
- → How do I know when brownies are done baking?
- The edges should be set and slightly pulling away from the pan, while the center should be set but still slightly soft. A toothpick inserted should come out with a few moist crumbs, not completely clean or too wet.
- → Can I add other mix-ins besides nuts and chocolate chips?
- Absolutely! Try caramel bits, peanut butter chips, mint chips, toffee pieces, or swirl in cream cheese or peanut butter before baking for delicious variations on this classic recipe.
- → How should I store these brownies?
- Store in an airtight container at room temperature for up to 4 days. For longer storage, wrap individual brownies in plastic wrap and freeze for up to 3 months. Thaw at room temperature or microwave for 15-20 seconds.
- → Can I make these brownies with cocoa alternatives?
- Yes, you can use Dutch-processed cocoa for a deeper flavor, or even try dark cocoa powder. Just make sure to use unsweetened varieties to maintain the right sweetness balance in the recipe.