
 Pin it
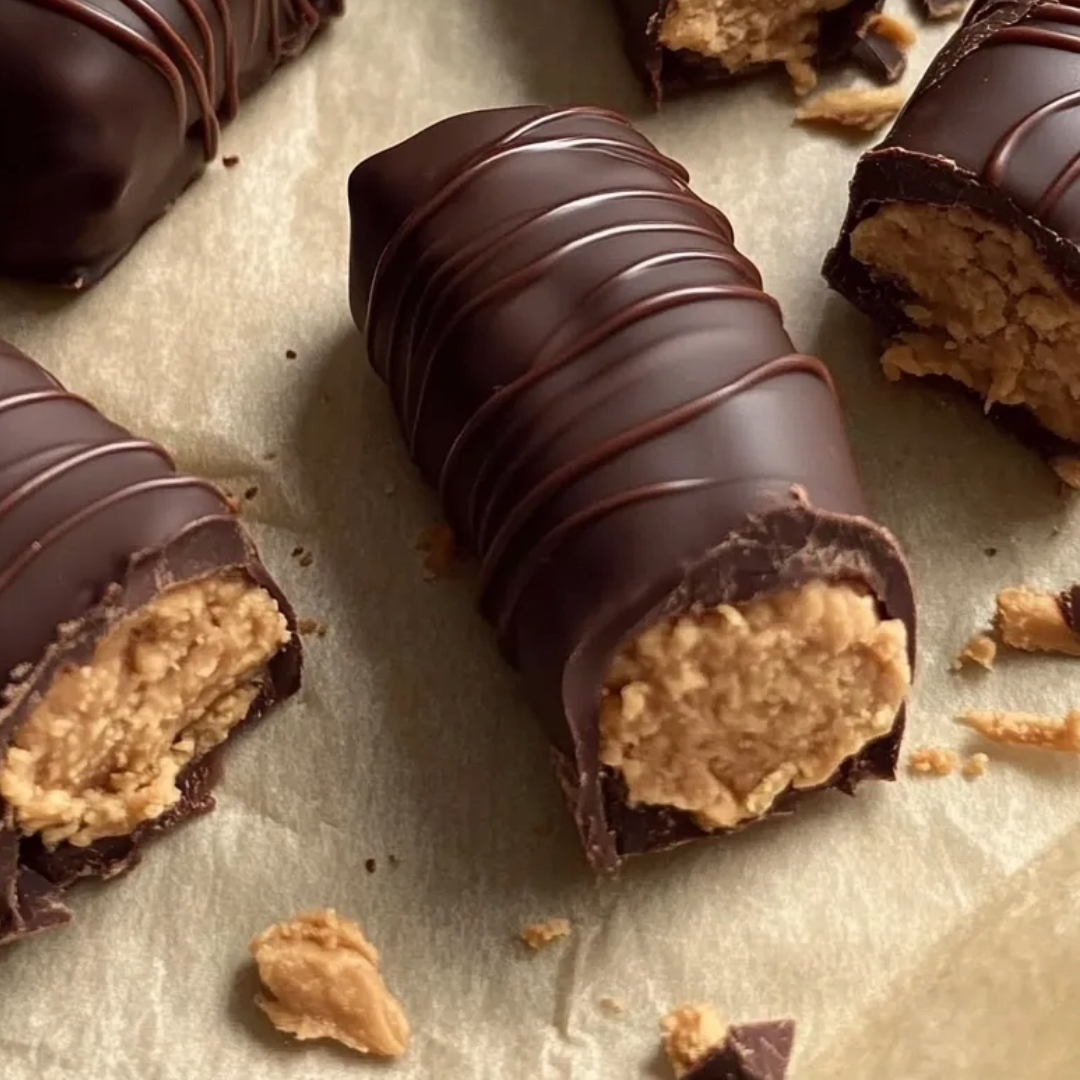
These homemade Butterfingers deliver all the nostalgic crunch and flavor of the classic candy bar but with clean, simple ingredients you can feel good about. The perfect balance of sweet and salty with that iconic flaky, crispy peanut butter center covered in rich chocolate—all made without corn syrup, artificial flavors, or preservatives. I've made these countless times, and they never fail to satisfy my candy bar cravings without the guilt!
The first time I made these for my family gathering, my nephew couldn't believe they weren't the "real thing." Everyone kept coming back for more, and they disappeared faster than any store-bought candy! These have become my go-to for satisfying sweet cravings while still honoring my commitment to cleaner eating.
Ingredients
- 1 cup natural peanut butter: Look for one with just peanuts and salt as ingredients. The natural oils help create the perfect texture and authentic peanut flavor.
- 1/3 cup honey: Nature's sweetener that binds everything together and provides the right amount of sweetness without refined sugar.
- 1 teaspoon vanilla extract: Adds depth and warmth to the flavor profile, enhancing both the peanut butter and chocolate.
- 1/4 teaspoon sea salt: Balances the sweetness and enhances the flavor. If your peanut butter is already quite salty, you can reduce this slightly.
- 2 cups corn flake cereal (gluten-free if needed): The secret to that distinctive Butterfinger crunch! They get caramelized with the honey and peanut butter for the perfect texture.
- 1 cup dairy-free chocolate chips: Creates that classic chocolate coating. Choose high-quality chips for the best flavor.
- 1 tablespoon coconut oil: Helps the chocolate coating set properly and gives it a beautiful shine.
Step-by-Step Instructions
- Step 1:
- Prepare your workspace - Line an 8×8-inch baking dish with parchment paper, leaving some overhang on the sides for easy removal later. Make sure all your ingredients are measured and ready to go, as the process moves quickly once you start.
- Step 2:
- Create the peanut butter mixture - In a medium saucepan, combine the natural peanut butter and honey. Heat over medium-low heat, stirring constantly to prevent burning. You want the mixture warm and completely integrated, but not boiling—about 2-3 minutes.
- Step 3:
- Add flavor enhancers - Remove the pan from heat and stir in the vanilla extract and sea salt until fully incorporated. The warm mixture will help the flavors bloom and distribute evenly.
- Step 4:
- Incorporate the cereal - Add the cornflake cereal to the peanut butter mixture and fold gently but thoroughly with a spatula. Make sure every piece of cereal gets coated. The cereal will begin to break down slightly as you mix—this is perfect for creating that layered, flaky texture that makes Butterfingers unique.
- Step 5:
- Press into the pan - Transfer the mixture to your prepared baking dish. Using slightly damp hands or the back of a spatula (to prevent sticking), press the mixture firmly and evenly into the pan. You want it compact to hold together well when cut.
- Step 6:
- Chill the base - Place the pan in the freezer for about 20-30 minutes until the mixture is firm. This makes cutting and dipping much easier and helps maintain the shape of your candy bars.
- Step 7:
- Prepare the chocolate coating - When the peanut butter base is almost done chilling, melt the dairy-free chocolate chips and coconut oil in a microwave-safe bowl. Heat in 30-second intervals, stirring between each, until completely smooth. Be careful not to overheat the chocolate.
- Step 8:
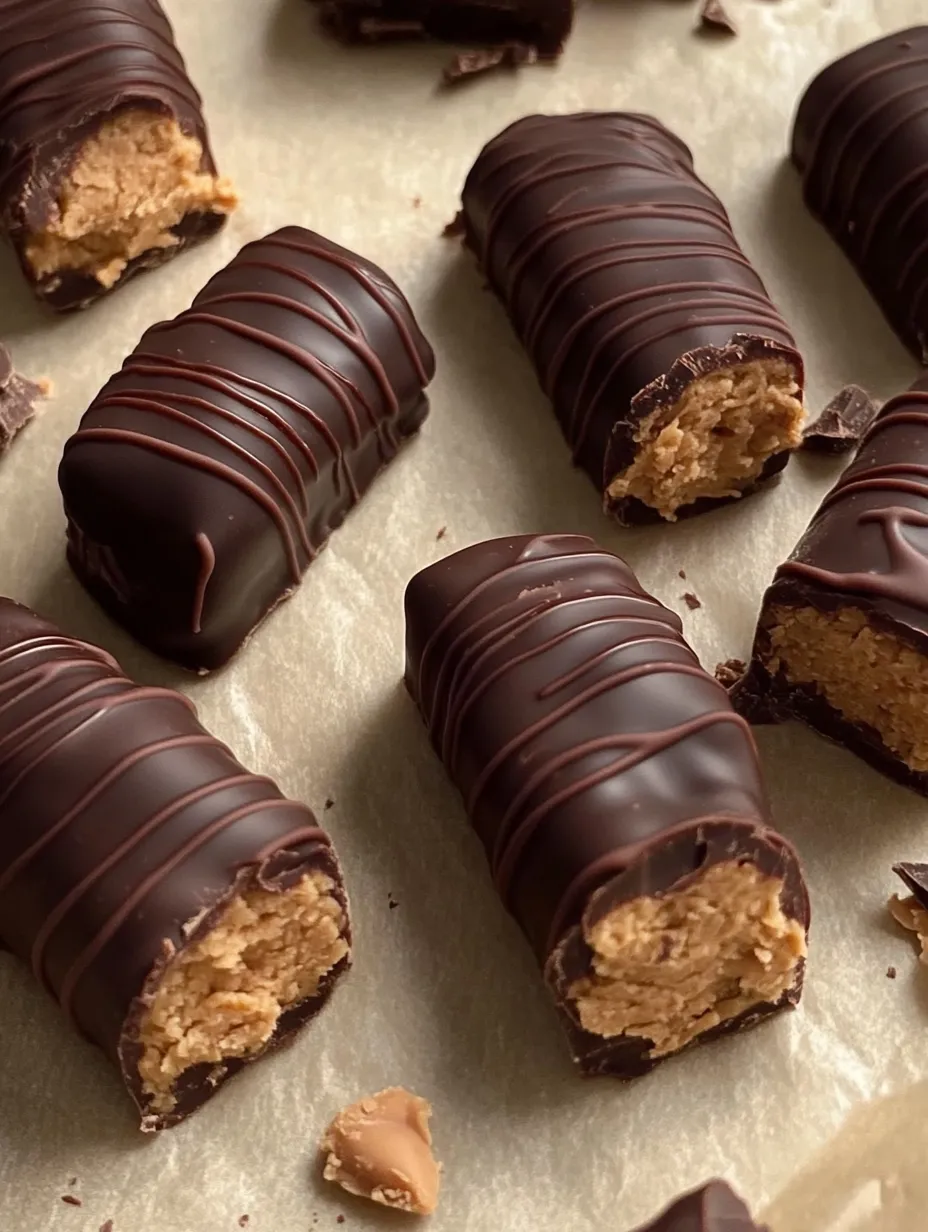
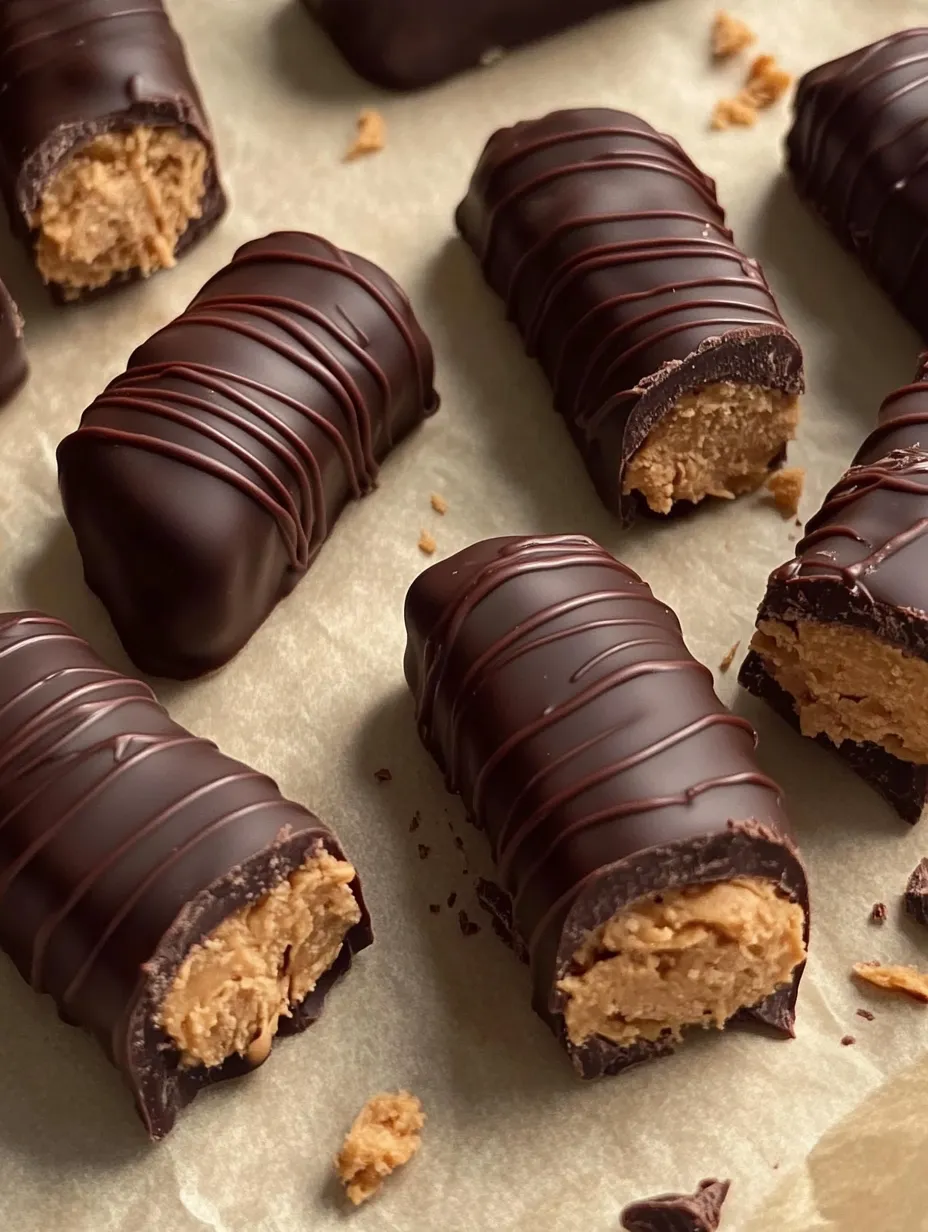
- Cut into bars - Remove the chilled base from the freezer and lift it out of the pan using the parchment paper overhang. Place on a cutting board and use a sharp knife to cut into 12-16 bars, depending on your preferred size.
- Step 9:
- Dip in chocolate - Using a fork or dipping tool, submerge each bar into the melted chocolate, ensuring it's completely coated. Gently tap off excess chocolate and place on a parchment-lined baking sheet. I find it easiest to work with just a few pieces at a time, keeping the rest chilled.
- Step 10:
- Set the chocolate - Return the chocolate-covered bars to the refrigerator for at least 15-20 minutes until the chocolate is completely set. For a firmer texture (especially helpful in warmer months), you can keep them in the freezer.
- Step 11:
- Enjoy your creation - Once set, your homemade Butterfingers are ready to enjoy! The combination of crunchy, sweet peanut butter filling and rich chocolate coating creates that classic candy bar experience you remember from childhood.
The Secret to Perfect Texture
The magic of these Butterfingers happens when the cornflakes mix with the warm peanut butter and honey. As you fold them together, the flakes break down into smaller pieces, creating layers that give you that distinctive shatter when you bite into them. Don't worry if they look somewhat crushed—this actually helps create the authentic texture!
Storing Your Healthy Butterfingers
These homemade Butterfingers store beautifully, making them perfect for meal prep or having treats on hand whenever a craving strikes. Keep them in an airtight container in the refrigerator for up to 2 weeks or in the freezer for up to 3 months. I actually prefer them straight from the freezer—they maintain that perfect snap and slowly melt in your mouth as you eat them.
Perfect for Special Diets
One of the best things about these homemade Butterfingers is how adaptable they are for various dietary needs. They're naturally gluten-free (just be sure your cornflakes are certified gluten-free if needed), dairy-free when made with dairy-free chocolate, and contain no refined sugars when made with high-quality ingredients. You can also easily make them vegan by substituting the honey with maple syrup or agave.
I learned through testing that the temperature of your ingredients matters a lot. If your peanut butter is cold from the refrigerator, allow it to come to room temperature first, or it won't blend as smoothly with the honey. Also, don't skip the chilling time before cutting and dipping—it makes the process so much easier and results in neater bars!
After making these countless times, I've found that allowing the bars to "cure" in the refrigerator overnight intensifies the flavors and improves the texture. While they're delicious right away, they develop an even more authentic Butterfinger taste and crunch after 24 hours!
These Healthy Homemade Butterfingers prove that you don't need artificial ingredients or corn syrup to recreate childhood favorites. With just a few simple, wholesome ingredients, you can enjoy all the nostalgia and satisfaction of a classic candy bar while feeling good about what you're eating. Whether you're making them for yourself, your family, or to share at a gathering, they're sure to impress everyone who tries them!
Frequently Asked Questions
- → Can I use a different type of nut butter?
- Yes! Almond butter works great, though it will change the flavor profile. For the most authentic Butterfinger taste, stick with peanut butter.
- → What can I substitute for honey to make these vegan?
- Maple syrup is the best substitute for honey in this recipe and will keep these treats vegan-friendly while maintaining the right consistency.
- → Do I need to crush the cornflakes first?
- No need to pre-crush them! Just mix them with the warm peanut butter mixture and they'll naturally break down to the perfect texture while you're stirring.
- → Why do mine fall apart when I try to shape them?
- If they're too crumbly, your mixture may be too cool. Try warming it slightly or adding a touch more honey to help it bind together better.
- → How long do these homemade Butterfingers last?
- Stored in an airtight container in the refrigerator, they'll last up to 2 weeks. In the freezer, they'll stay good for up to 3 months.