
 Pin it
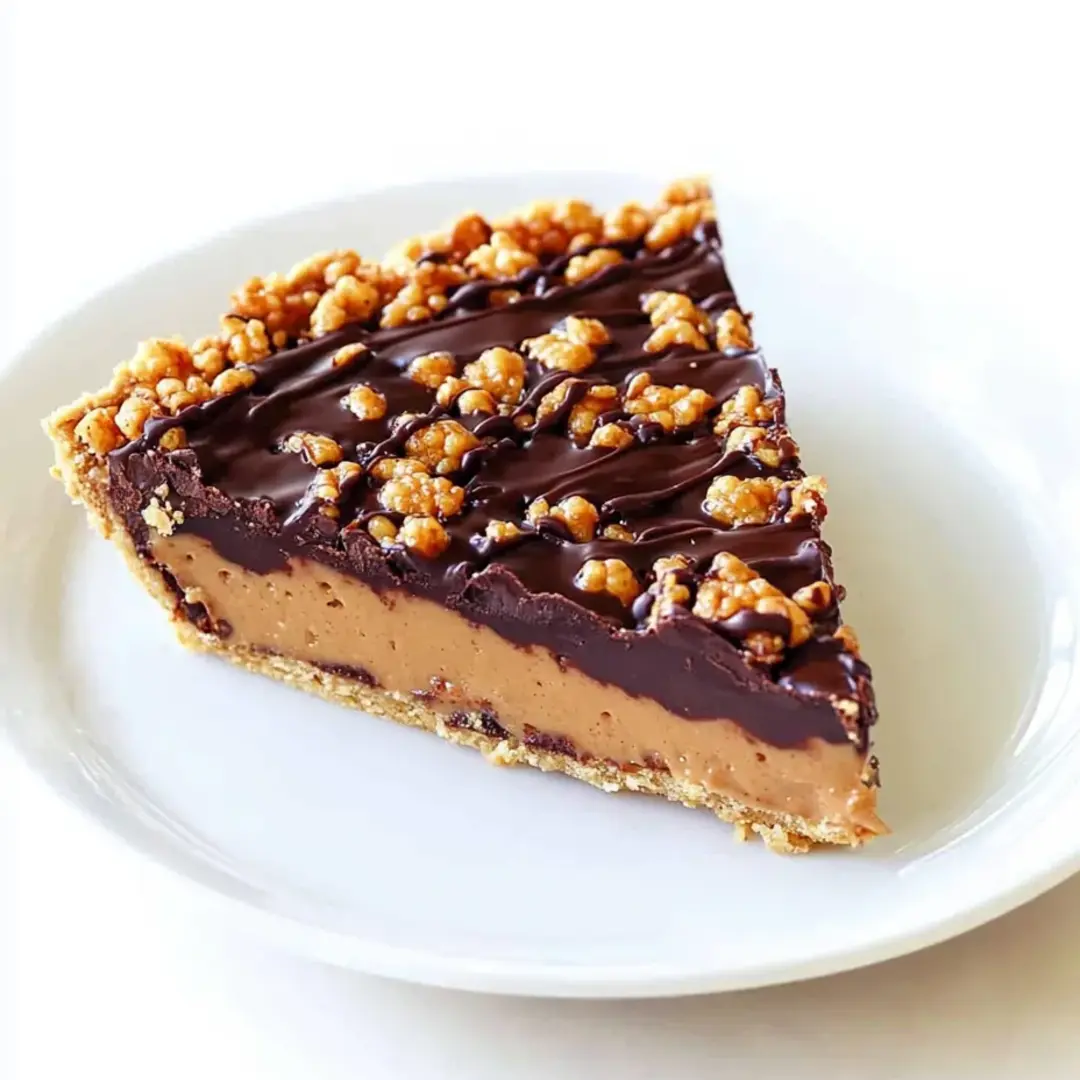
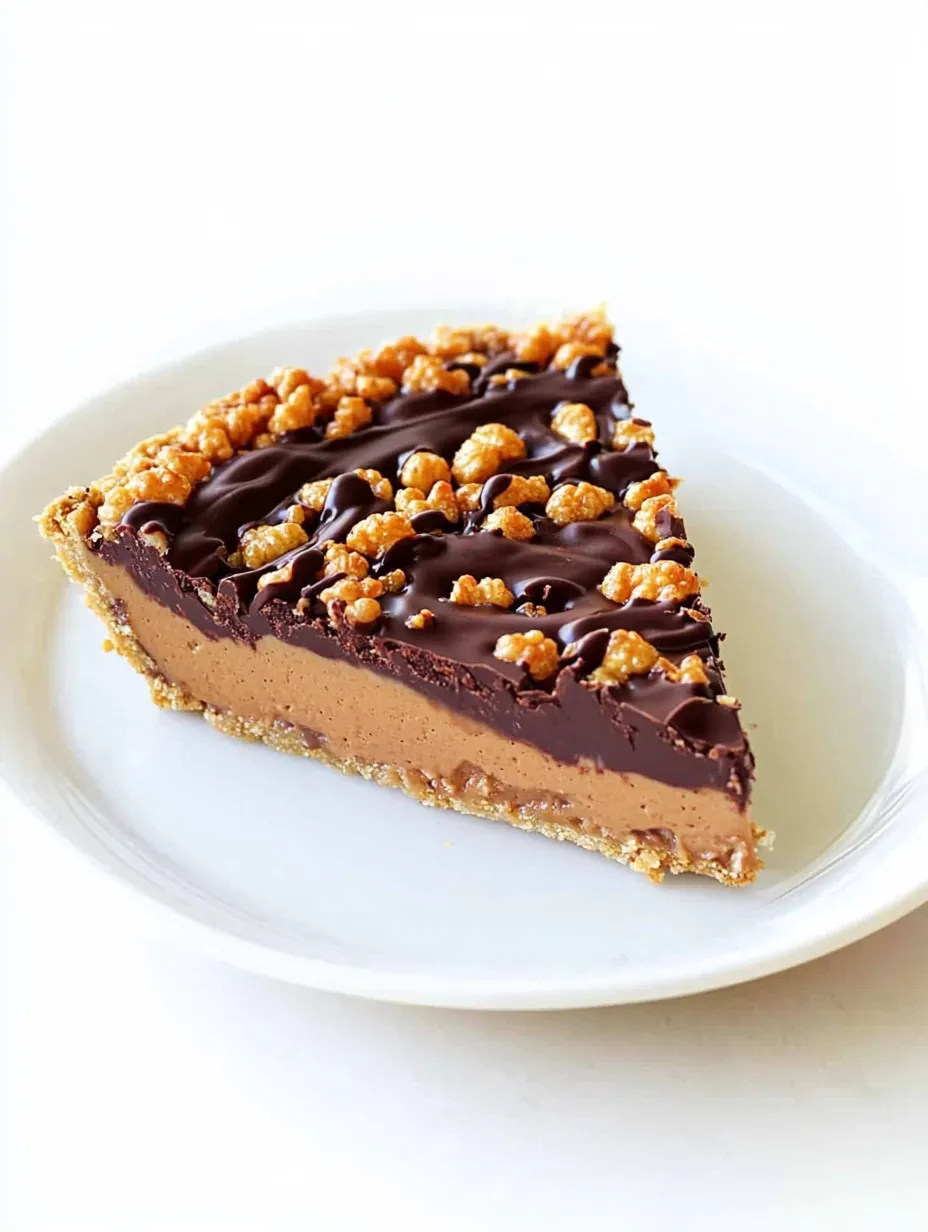
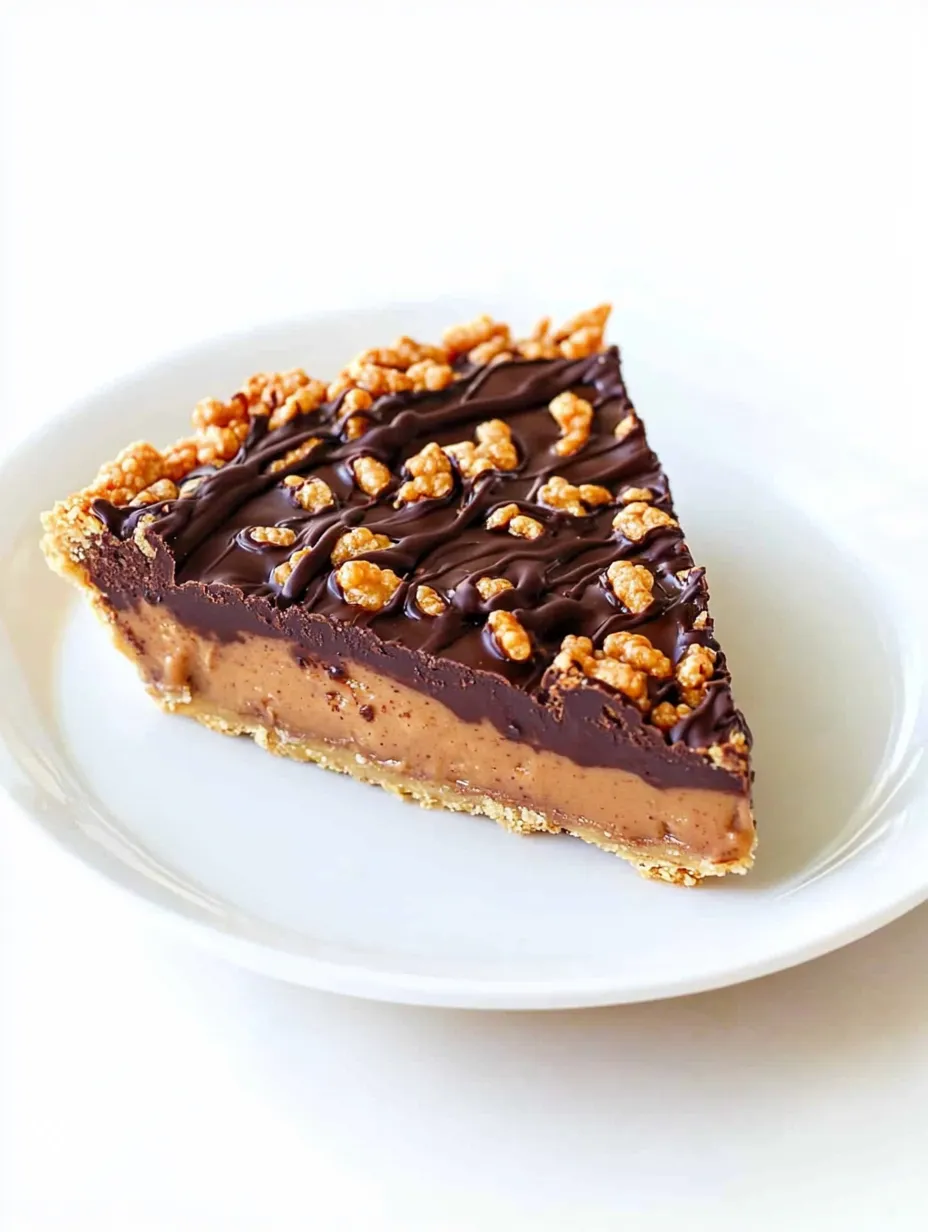
This dreamy No-Bake Peanut Butter Chocolate Crunch Pie delivers the perfect harmony of flavors and textures in every single bite. The combination starts with a buttery cookie crust that provides the ideal foundation for the silky-smooth peanut butter filling. But what truly sets this dessert apart is the innovative topping—a crispy chocolate ganache studded with Rice Krispies that adds an unexpected yet delightful crunch to contrast with the creamy filling below. Each slice offers a perfect balance of sweet and salty, smooth and crispy, rich and light that satisfies every dessert craving simultaneously, all without ever turning on your oven.
I first created this pie when unexpected dinner guests were coming over and I needed something impressive without spending hours in the kitchen. The moment I brought it to the table, everyone's eyes widened at the glossy chocolate top layer. But the true magic happened when they took their first bites and discovered the crunchy surprise in the chocolate. My brother-in-law, who typically politely declines dessert, asked for seconds and then discreetly requested the recipe from me before leaving. Now it's my signature dessert for casual gatherings – the one that makes people think I spent far more time in the kitchen than I actually did!
Key Ingredients
- Chocolate sandwich cookies: They create a rich, chocolatey base that complements the peanut butter filling perfectly; no need to remove the cream filling
- Butter: Binds the cookie crust together while adding richness; salted butter adds a nice flavor contrast
- Cream cheese: Provides tanginess that balances the sweetness of the filling and creates a silky texture
- Peanut butter: The star ingredient that gives this pie its signature flavor; use smooth for the creamiest result
- Powdered sugar: Sweetens the filling without the grittiness of granulated sugar
- Whipped topping: Lightens the peanut butter filling for a mousse-like consistency
- Semi-sweet chocolate: Offers the perfect balance of sweetness and chocolate intensity for the topping
- Heavy cream: Creates a smooth, glossy ganache that sets to the perfect consistency
- Rice Krispies: The secret ingredient that transforms an ordinary chocolate ganache into something special with its delightful crunch
Detailed Cooking Instructions
- Step 1:
- Begin by preparing the cookie crust. Place 24 chocolate sandwich cookies in a food processor and pulse until they form fine crumbs. If you don't have a food processor, place the cookies in a ziplock bag and crush them with a rolling pin, though this method will create slightly less uniform crumbs.
- Step 2:
- Transfer the cookie crumbs to a medium bowl and add 5 tablespoons of melted butter. Stir until the mixture resembles wet sand and holds together when pressed between your fingers. The consistency is important—too dry and the crust will crumble when sliced, too wet and it won't set properly.
- Step 3:
- Pour the crumb mixture into a 9-inch pie plate. Using the bottom of a measuring cup or glass, press the crumbs firmly and evenly across the bottom and up the sides of the pie plate. Pay special attention to the junction where the bottom meets the sides, as this area tends to be thicker and can make slicing difficult if not compressed well.
- Step 4:
- Place the prepared crust in the refrigerator to chill while you make the filling. The cold temperature helps the butter solidify, creating a firm base for the rest of the pie.
- Step 5:
- For the peanut butter filling, in a large mixing bowl, beat 8 ounces of softened cream cheese with an electric mixer until smooth and fluffy, about 2 minutes. Scrape down the sides of the bowl to ensure no lumps remain. The cream cheese must be properly softened to achieve the right consistency—cold cream cheese will result in a lumpy filling.
- Step 6:
- Add 1 cup of smooth peanut butter to the cream cheese and beat until completely incorporated and the mixture is light in color, about 2-3 minutes. Don't rush this step—proper aeration here creates the perfect texture in the finished pie.
- Step 7:
- Gradually add 1 cup of powdered sugar, beating on low speed initially to prevent a sugar cloud, then increasing to medium speed until the mixture is smooth and well combined. The filling should be thick but spreadable at this point.
- Step 8:
- Gently fold in 2 cups of whipped topping (like Cool Whip) using a rubber spatula. Use a folding motion rather than stirring to maintain the air in the whipped topping, which is crucial for the light texture of the filling. Continue folding until no white streaks remain but be careful not to deflate the mixture.
- Step 9:
- Retrieve the chilled crust from the refrigerator and spoon the peanut butter filling into it. Use an offset spatula to spread the filling evenly, creating a smooth, level surface. Return the pie to the refrigerator to chill while preparing the chocolate topping.
- Step 10:
- For the chocolate crunch topping, place 8 ounces of chopped semi-sweet chocolate in a medium heat-proof bowl. In a small saucepan, heat 1 cup of heavy cream just until it begins to simmer around the edges (do not boil). Immediately pour the hot cream over the chocolate and let it stand for 2 minutes without stirring.
- Step 11:
- After 2 minutes, whisk the chocolate and cream mixture slowly at first, then more vigorously as the chocolate melts, until the ganache is completely smooth and glossy. The ganache should be thick but pourable—if it's too thin, allow it to cool slightly before proceeding.
- Step 12:
- Allow the ganache to cool for about 5 minutes, then stir in 1½ cups of Rice Krispies cereal. Fold gently to ensure all the cereal is coated without crushing the pieces. Work relatively quickly as the ganache will begin to set as it cools.
- Step 13:
- Remove the pie from the refrigerator and immediately pour the chocolate crunch mixture over the peanut butter filling. Use an offset spatula to gently spread it to the edges, being careful not to disturb the filling beneath. The warmth of the ganache will slightly soften the top of the peanut butter layer, creating a nice bond between the two.
- Step 14:
- Return the completed pie to the refrigerator and chill for at least 4 hours, preferably overnight. This extended chilling time allows all layers to set properly and the flavors to meld together beautifully.
- Step 15:
- When ready to serve, let the pie stand at room temperature for about 10-15 minutes to take the chill off. This makes it easier to slice and enhances the flavors. Use a sharp knife dipped in hot water and wiped dry between cuts for the cleanest slices.
Make-Ahead Magic
This Peanut Butter Chocolate Crunch Pie is the ideal make-ahead dessert because it actually improves with time. I've discovered that making it a full day before serving allows the flavors to meld beautifully while the textures maintain their distinct characteristics. The cookie crust softens just slightly from the moisture in the filling, creating a more cohesive slice, while the Rice Krispies in the chocolate topping maintain their crunch thanks to being enrobed in the protective ganache. If you're planning to make it more than 24 hours in advance, I recommend waiting to add the chocolate crunch topping until the day before serving for optimal texture contrast. The assembled pie keeps beautifully in the refrigerator for up to 5 days, though the Rice Krispies will gradually soften over time – not that leftovers ever last that long in my house!
Perfect Flavor Variations
While the classic combination of peanut butter and chocolate is hard to improve upon, I've experimented with several delicious variations over the years. For a more intensely peanutty experience, try folding ½ cup of finely chopped roasted peanuts into the peanut butter filling before spreading it into the crust. The additional texture and roasted flavor adds wonderful complexity. If you're a caramel lover, drizzling 3-4 tablespoons of caramel sauce over the peanut butter layer before adding the chocolate topping creates a turtle-inspired variation that's absolutely divine. For those who enjoy a hint of salt with their sweet, sprinkling the finished pie with flaky sea salt just before serving brings out the flavors beautifully. And for a holiday twist, substitute crushed peppermint candies for the Rice Krispies in the chocolate topping during the Christmas season – the mint-chocolate-peanut butter combination is unexpectedly delightful.
Serving Suggestions
While this pie is certainly spectacular enough to stand on its own, a few thoughtful accompaniments can elevate the serving experience even further. A dollop of lightly sweetened whipped cream on each slice provides a neutral counterpoint to the rich flavors. For a restaurant-worthy presentation, try placing each slice on a plate drizzled with chocolate sauce, then adding a scoop of premium vanilla ice cream alongside. The temperature contrast between the cold ice cream and the room-temperature pie creates a delightful sensory experience. For a casual gathering, I often serve small slices with cups of good-quality coffee or espresso – the slight bitterness of the coffee balances the sweetness of the pie perfectly and enhances the chocolate notes.
I discovered by happy accident that adding a tablespoon of malted milk powder to the peanut butter filling creates an incredible depth of flavor that enhances both the peanut butter and chocolate elements. One day when making this recipe, I was reminiscing about peanut butter malts from my childhood and decided to experiment – that spontaneous addition has become my signature twist that always has people asking what the "secret ingredient" is!
This Peanut Butter Chocolate Crunch Pie has become my kitchen reputation-maker – the dessert friends request for birthdays and the first thing to disappear at potlucks. There's something deeply satisfying about creating a dish that looks impressive while secretly being so simple to prepare. The combination of nostalgic flavors in a sophisticated presentation appeals to everyone from children to dessert connoisseurs, making it the perfect crowd-pleasing finale to any meal. Whether you're an experienced baker or just starting your culinary journey, this no-bake wonder delivers professional results with minimal effort – proving that sometimes the most memorable desserts are the ones that don't require turning on the oven at all.
Frequently Asked Questions
- → Can I make this pie ahead of time?
- Yes! This pie is perfect for making ahead. It can be prepared up to 3 days in advance and stored covered in the refrigerator. The texture actually improves after the first day as the layers set completely.
- → Can I freeze this pie?
- Absolutely. This pie freezes beautifully for up to 2 months. Wrap it tightly in plastic wrap and then aluminum foil. Thaw overnight in the refrigerator before serving.
- → What can I substitute for Rice Krispies?
- If you don't have Rice Krispies, you can use cornflakes, crushed pretzels, or even chopped nuts for crunch. For a softer texture, you could omit the crunchy element altogether and just use the chocolate ganache.
- → Can I use crunchy peanut butter instead of smooth?
- Yes, crunchy peanut butter works fine if you prefer more texture in your filling. Just be aware that the filling will have small bits of peanuts throughout.
- → How do I cut clean slices of this pie?
- For clean slices, dip a sharp knife in hot water, wipe it dry, and then slice. Repeat this process between each cut. This helps the knife glide through the chocolate layer without cracking it.