
 Pin it
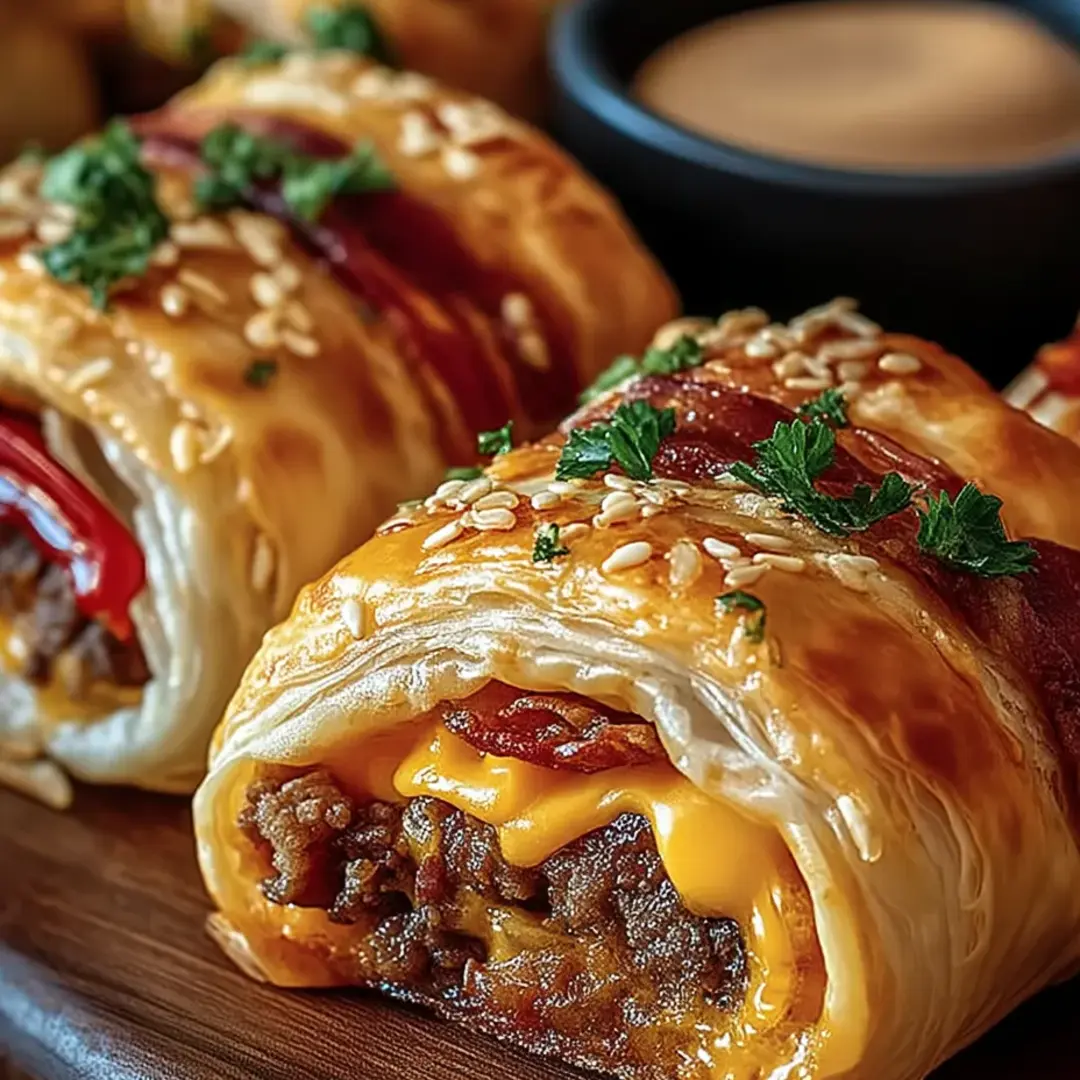
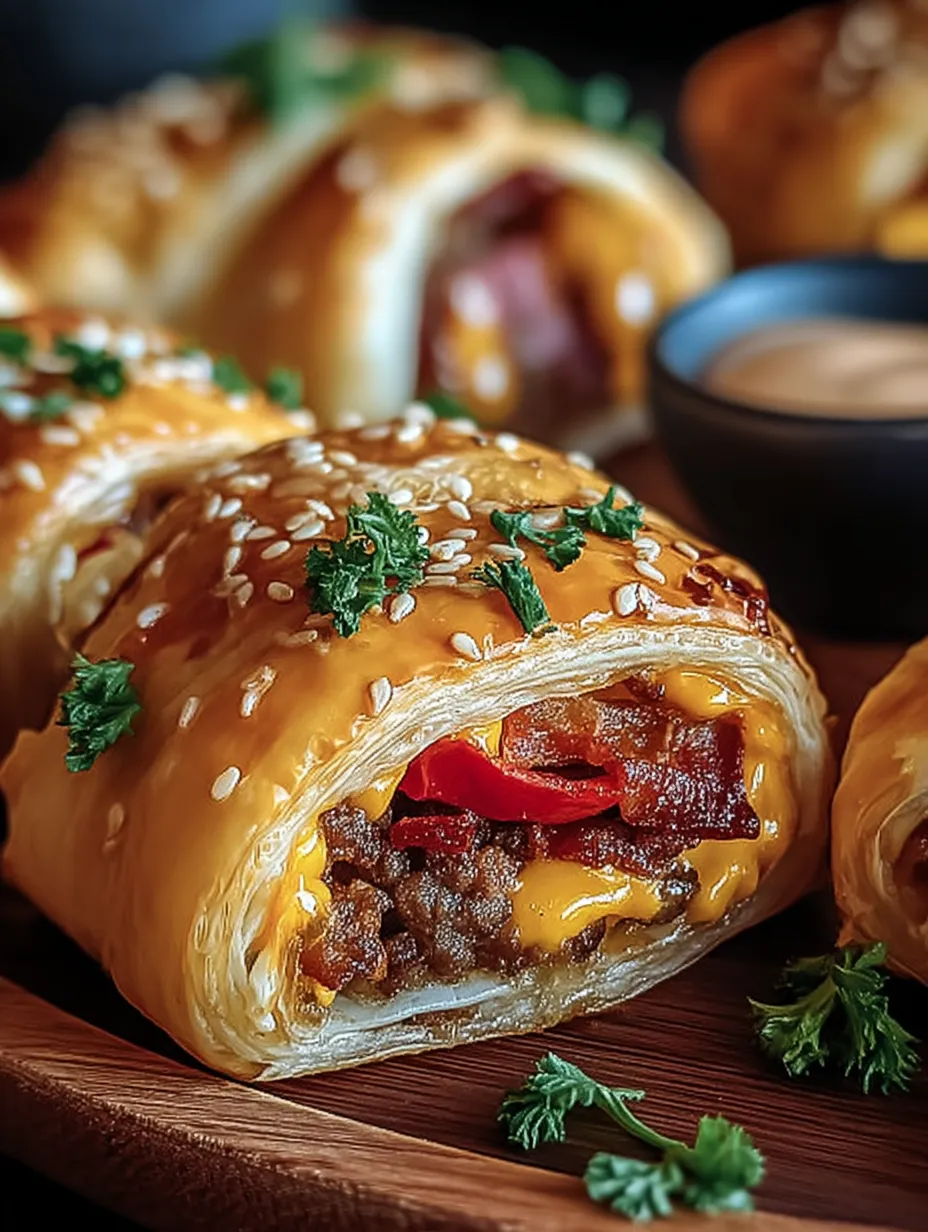
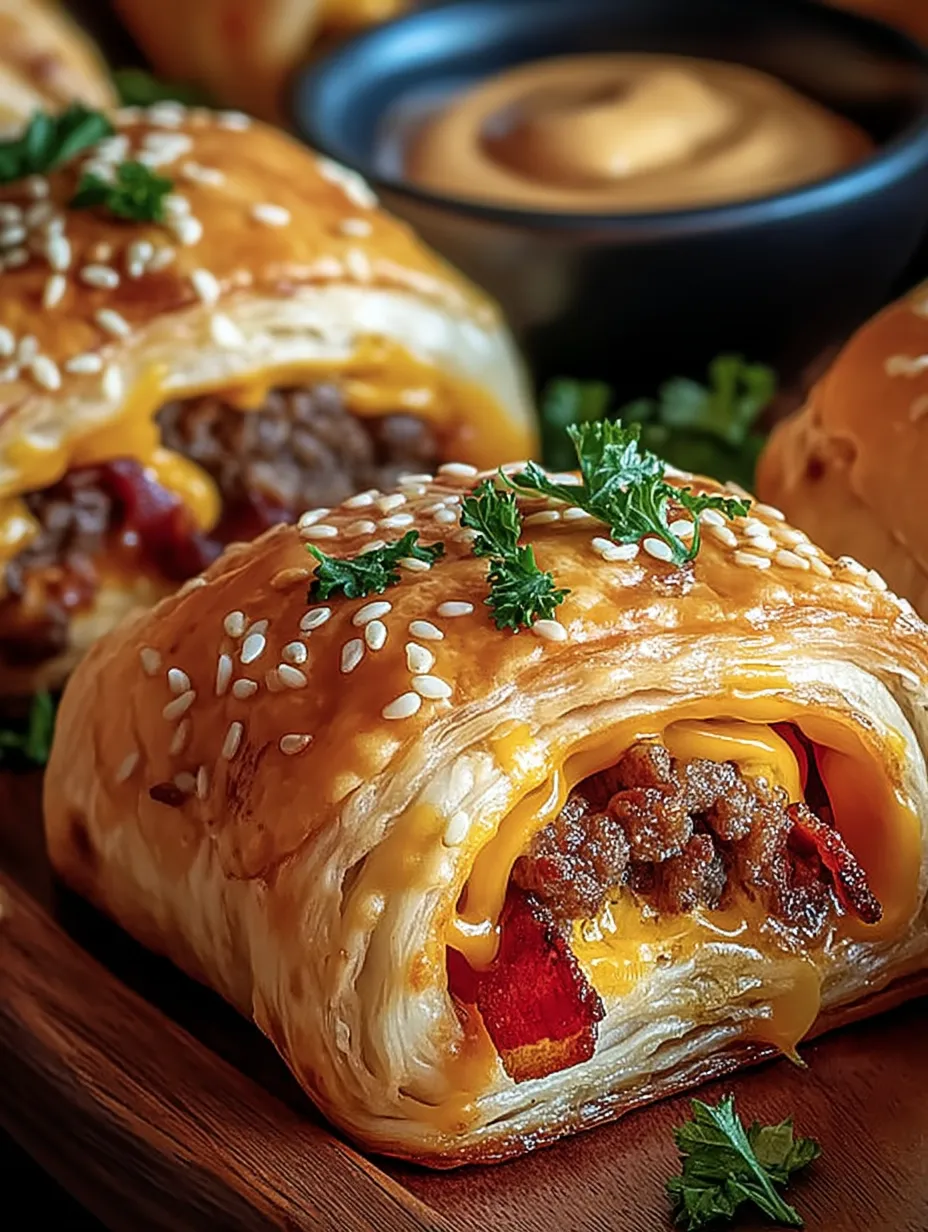
This hearty burger rollup snack transforms classic burger flavors into a portable, crowd-pleasing treat that's perfect for game days, parties, or anytime you need a substantial appetizer. The combination of seasoned beef, crispy bacon, and gooey cheese wrapped in soft pizza dough creates irresistible bites that disappear quickly whenever I serve them.
These rollups became my secret weapon for neighborhood potlucks after I first made them for my son's football team. The parents were fighting over the last few pieces, and now I'm required to bring a double batch to every gathering.
Ingredients
- Ground beef: The foundation of our burger flavor. Look for 80/20 lean-to-fat ratio for the juiciest results without excess grease.
- Taco seasoning mix: Provides perfect burger seasoning without measuring individual spices. Choose low-sodium if watching salt intake.
- Water: Helps the seasoning coat the meat evenly and creates the right consistency.
- Bacon strips: Adds that smoky, savory element that makes burgers special. Precook until crisp for best texture.
- Refrigerated pizza dough: The convenient wrapper that holds everything together. Let it come to room temperature for 10 minutes for easier rolling.
- Shredded cheese: Creates that essential gooey meltiness. Freshly shredded melts better than pre-packaged options.
- Unsalted butter: Forms the base of our garlic butter topping. Unsalted lets you control the final saltiness.
- Garlic cloves: Infuses the butter with aromatic flavor. Fresh minced garlic provides much better flavor than garlic powder.
- Fresh parsley: Adds a pop of color and fresh flavor. Optional but recommended for presentation.
Step-by-Step Instructions
- Brown the Beef:
- Cook the ground beef in a skillet over medium-high heat, breaking it into small crumbles as it cooks. This should take about 5-7 minutes until no pink remains. Drain the excess fat through a colander to prevent greasy rollups. Return the meat to the pan and add taco seasoning and water, stirring continuously until the mixture thickens and coats the beef evenly, about 5 minutes. Set aside to cool slightly so it doesn't melt the cheese prematurely when assembling.
- Prepare the Dough:
- Preheat your oven to 375°F and line a baking sheet with parchment paper for easy cleanup. Lightly flour your work surface to prevent sticking. Roll out the pizza dough into a large rectangle approximately 10×15 inches. Aim for an even thickness throughout to ensure uniform cooking. If the dough springs back while rolling, let it rest for 5 minutes then continue.
- Layer the Fillings:
- Spread the cooled seasoned beef evenly across the dough surface, leaving about half an inch border around all edges. This border helps seal the roll properly. Sprinkle the crumbled bacon pieces evenly over the beef, followed by an even layer of shredded cheese. Press the toppings gently into the dough to help keep everything in place during rolling.
- Form the Roll:
- Starting from one long edge, carefully roll the dough into a tight log, similar to making cinnamon rolls. Tuck and roll with steady pressure to avoid air pockets. When you reach the opposite edge, pinch the seam firmly against the roll to seal it. Place the log seam-side down and use a sharp knife to cut it into 1-inch thick slices. A serrated knife works best for clean cuts without squishing the roll.
- Bake to Perfection:
- Arrange the cut rolls on your prepared baking sheet, leaving about an inch between each piece to allow for expansion. Mix the melted butter with minced garlic in a small bowl, then generously brush this mixture over the tops and sides of each rollup. This creates a golden, aromatic crust. Bake for 15-20 minutes, rotating the pan halfway through, until the rollups are deep golden brown and the cheese is bubbling around the edges.
You Must Know
- These rollups are perfect for meal prep and can be assembled a day ahead and baked when needed
- The recipe easily doubles for larger gatherings
- Each rollup contains approximately 15g of protein making them satisfying snacks
- These freeze beautifully for up to 3 months before or after baking
The bacon really makes these rollups special in my family. My grandmother used to add bacon to everything, claiming it was her secret ingredient for making people smile. Every time I make these rollups, I think of her kitchen and how she taught me that good food brings people together.
Storage Solutions
These burger rollups maintain their quality remarkably well in storage. After cooling completely, place them in an airtight container with paper towels between layers to absorb any excess moisture. They'll keep in the refrigerator for up to 3 days. To reheat, place them in a 350°F oven for 5-7 minutes rather than using a microwave, which can make the dough tough. For longer storage, freeze the baked rollups individually on a baking sheet until solid, then transfer to a freezer bag. They'll maintain quality for up to 3 months.
Creative Variations
The base recipe is delicious, but you can easily customize these rollups to match your favorite burger styles. For a mushroom Swiss version, sauté 8 ounces of sliced mushrooms until golden and substitute Swiss cheese for the cheddar. Craving a BBQ bacon burger? Add 2 tablespoons of barbecue sauce to the meat mixture and top with crispy onion straws before rolling. Vegetarians can enjoy these too by substituting plant-based ground meat and using meat-free bacon alternatives without sacrificing flavor.
Dipping Sauce Pairings
While these rollups are delicious on their own, the right dipping sauce elevates them to restaurant-quality status. A simple mixture of equal parts ketchup and mayo with a splash of pickle juice creates the perfect burger sauce. Ranch dressing mixed with a bit of buffalo sauce offers a tangy kick that complements the savory filling. For a more gourmet option, try a horseradish aioli made by mixing 1/2 cup mayonnaise with 1 tablespoon prepared horseradish and a dash of Worcestershire sauce.
Frequently Asked Questions
- → How do I prevent the rollups from unrolling during baking?
Ensure you roll the dough tightly and pinch the edges to seal them properly. Placing the rollups seam-side down on the baking sheet can also help prevent unrolling.
- → Can I prepare these rollups in advance?
Yes, you can prepare them up to the rolling step, cover tightly, and refrigerate for a few hours before baking. Brush with garlic butter just before placing them in the oven.
- → What dipping sauces pair well with these rollups?
Serve them with classic options like ranch, marinara, or barbecue sauce. Spicy mayo or chipotle aioli are also great choices for added flavor!
- → How can I customize the filling?
Feel free to add pickles, diced onions, or jalapeños for extra flavor. You can also experiment with different cheeses such as mozzarella or pepper jack.
- → How should I store leftovers?
Place any leftovers in an airtight container and refrigerate for up to 3 days. Reheat them in the oven or air fryer for best results.